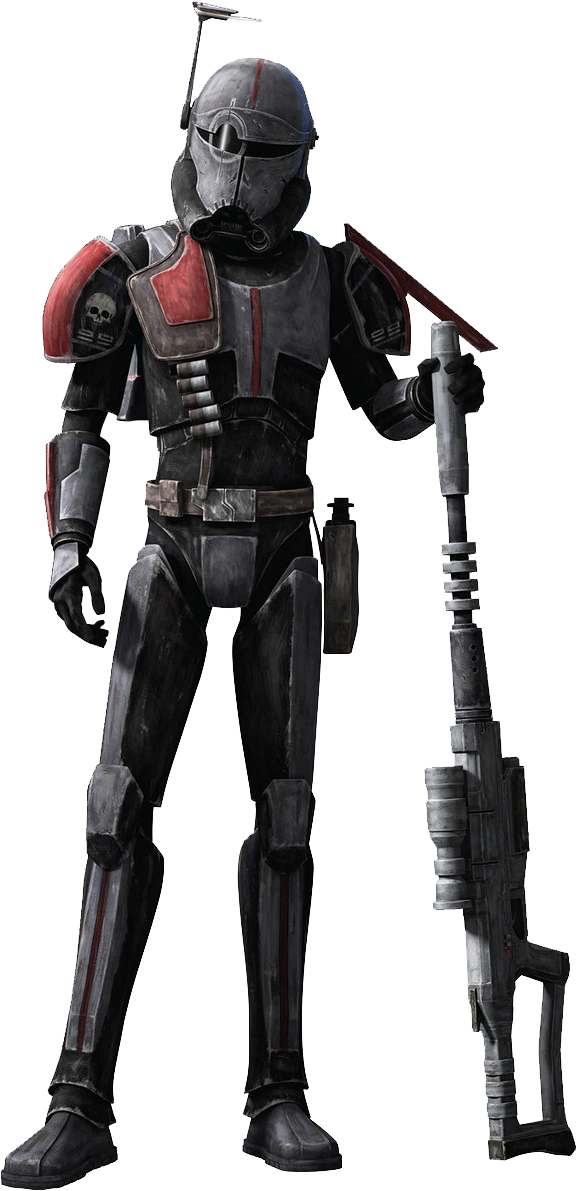
Crosshair is a genetically enhanced clone trooper who we first see in Star Wars: Clone Wars in the beginning of season 7. He is a part of Clone Force 99, a small squad of clones who have all been enhanced. His squadmates are as follows: Hunter, who is designed for tracking. Tech, who is designed for intelligence. Wrecker, who is designed for brute strength. And finally, Crosshair, who was designed for sniping and marksmanship.
I had been a Star Wars fan for a little less than a year when I found a YouTube channel, Ian Eschenberg, who makes complete clone trooper helmets on a 3d printer. I saw one of his videos, and immediately decided then and there, that a 3d printer would be the next big step for my cosplay and art. I spent another complete year hesitating on when to purchase my first 3d printer, overwhelmed by the spectrum of choice and skills that were required…until tariffs were hanging over my head, and instantly bought the first printer that seemed to fit my needs. A Qidi q1 pro.
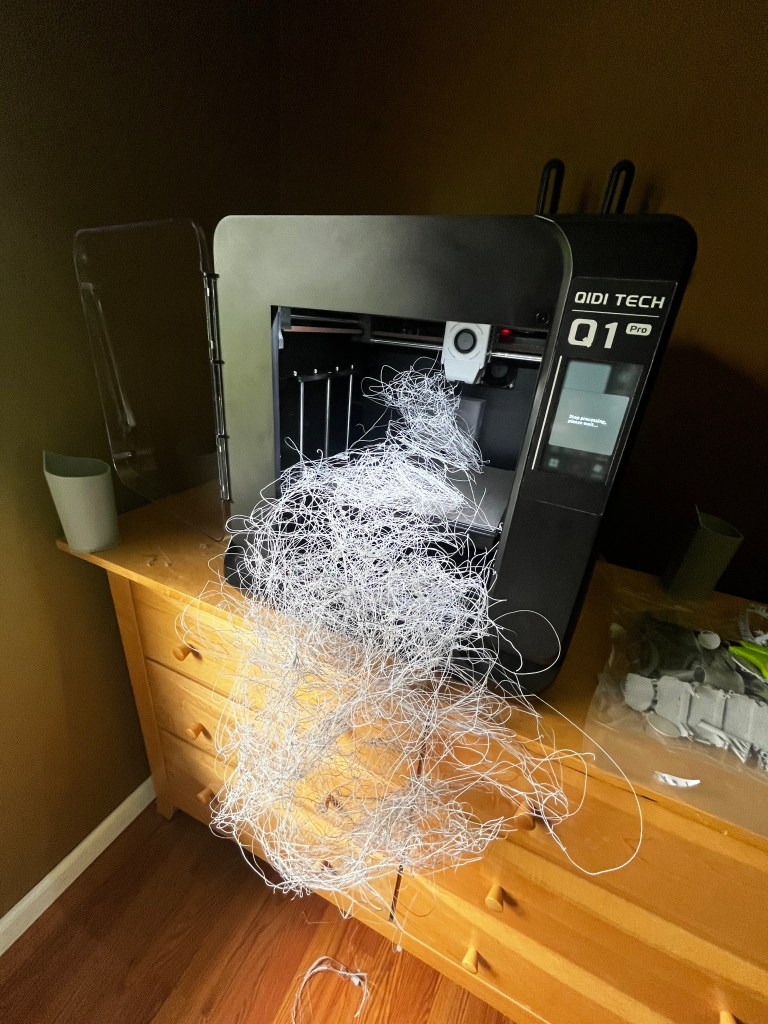
I’ll write a separate post on my thoughts of this 3d printer and link it here when it’s published. But for now I’ll just say that it is an incredible printer. I bought it in March of 2025, and from march up until October managed to clock in 1900 hours of print time with almost no breaks. In that time, the printer only broke once with a problem that was simpler to fix than pressing the button to print.
And so, after buying the printer, I decided for my first 3d printed cosplay that I would make Crosshair’s entire suit of armor and weapons. Making this cosplay would teach me just about everything I needed to know about using the software and hardware, without needing to learn 3d modeling as I found the STL files online. All of this cosplay’s files came from Galactic Armory. After the printer’s arrival, I printed a benchy and two random trinkets, before printing the first piece of the rifle.
And it never ended. I printed nonstop, making poor decisions and buying enough rolls of filament I didn’t want to think about it. And after months of blood, sweat and tears, Crosshair was finished the day before the photoshoot.
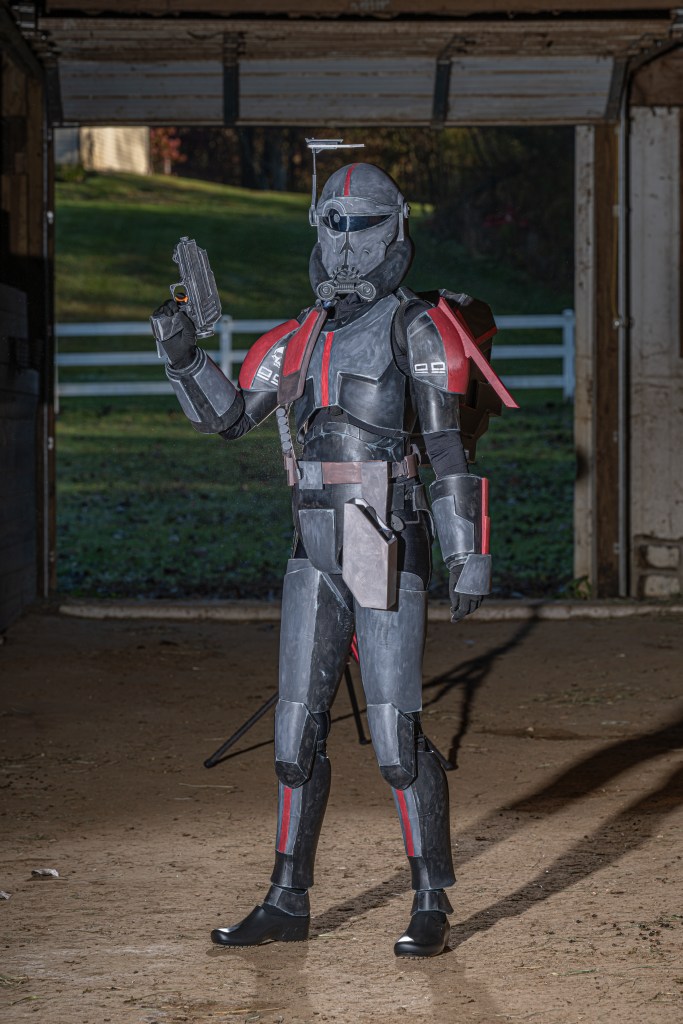
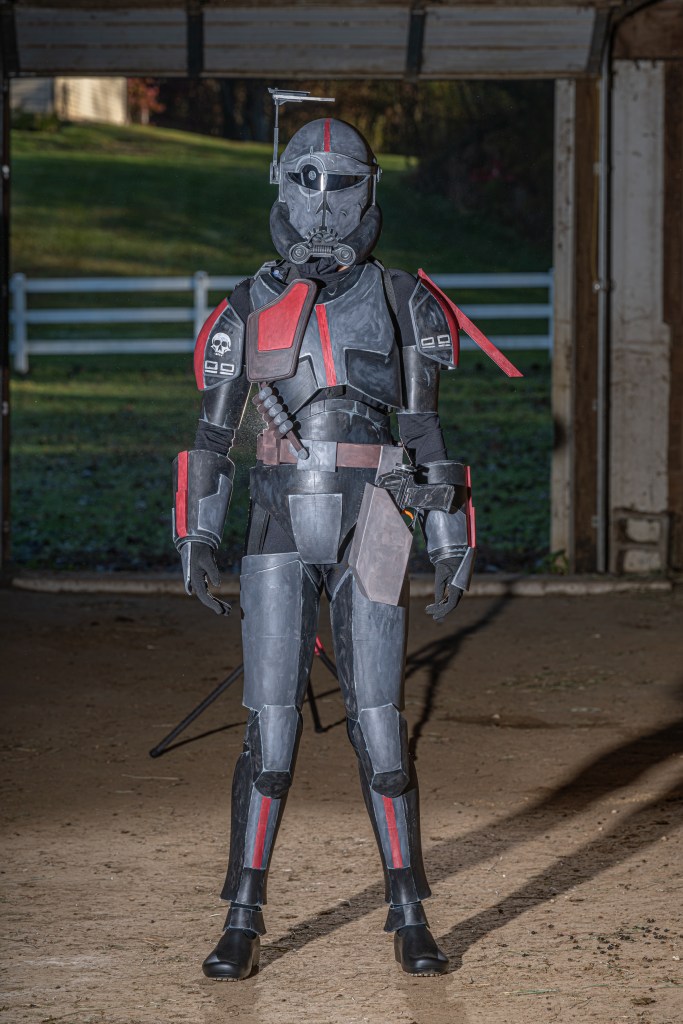
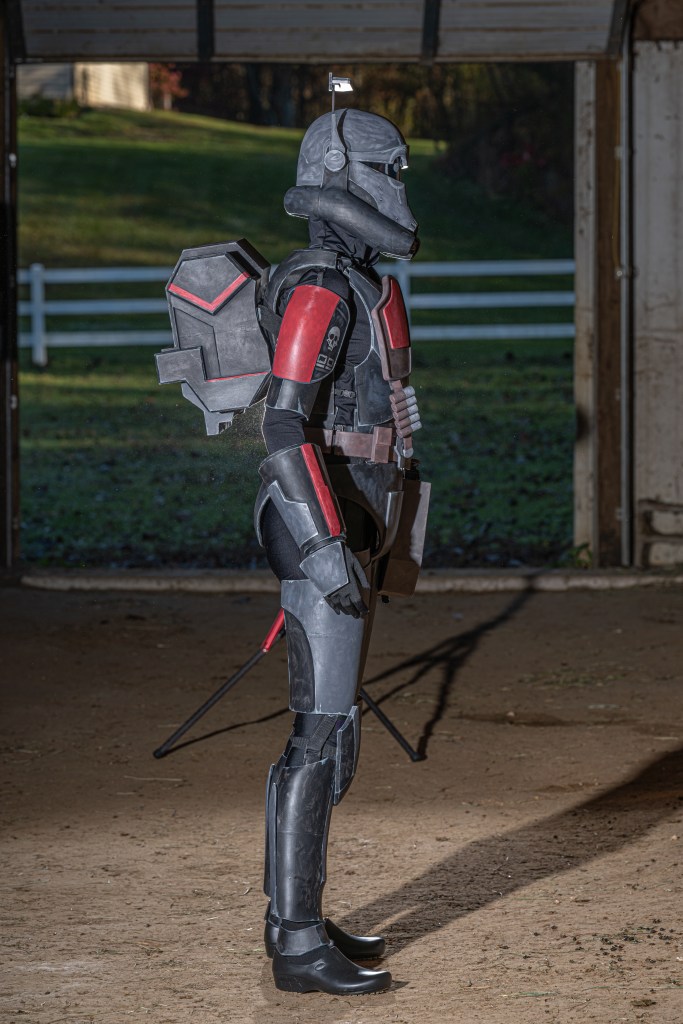
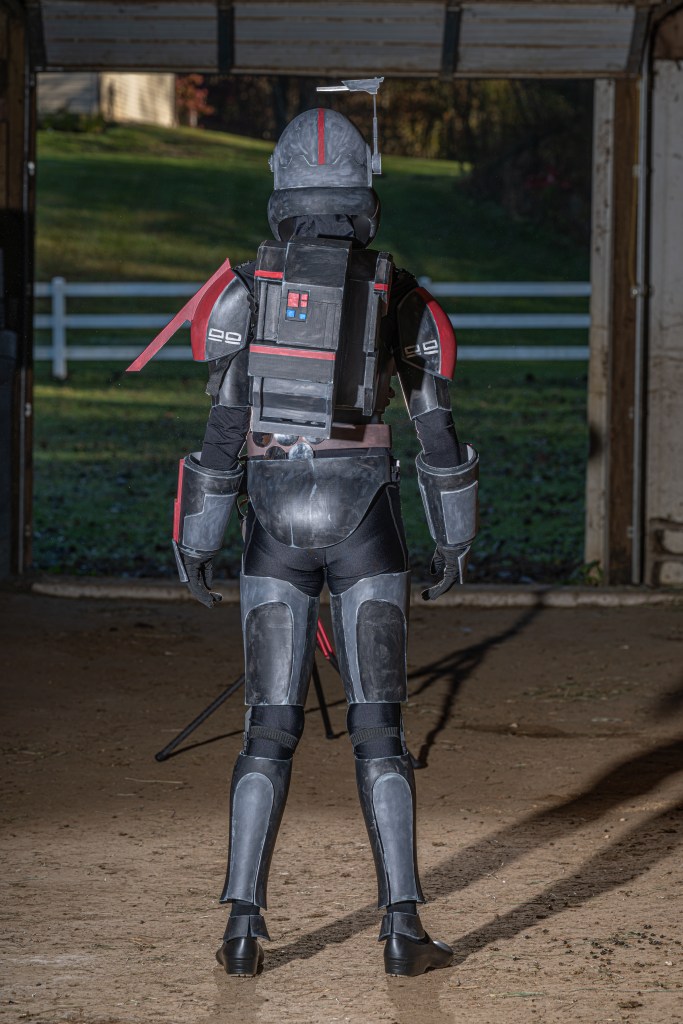
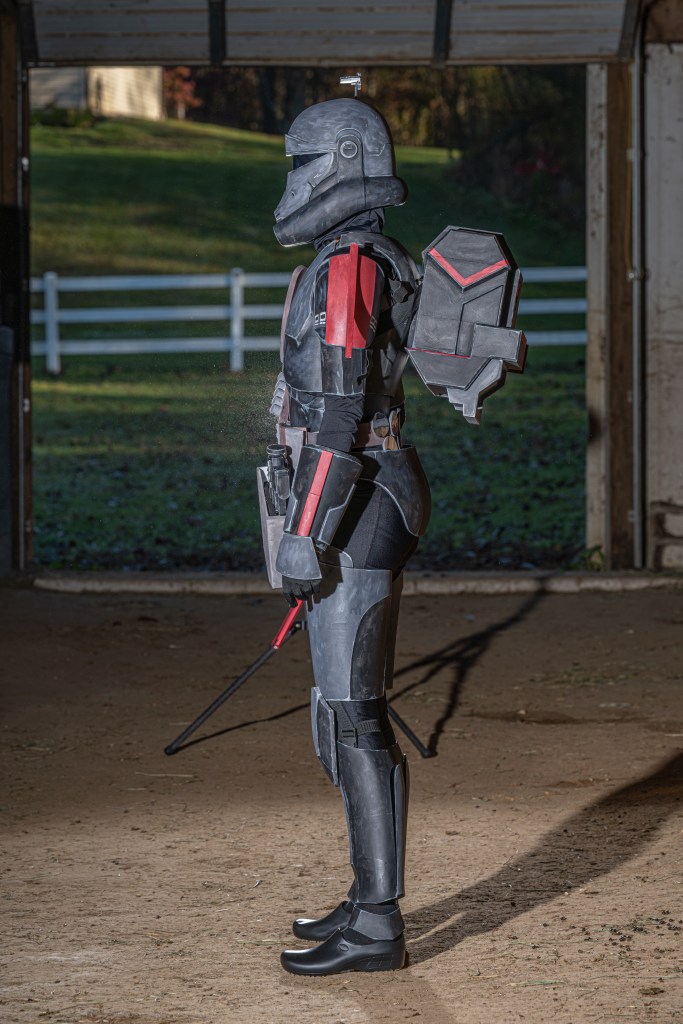
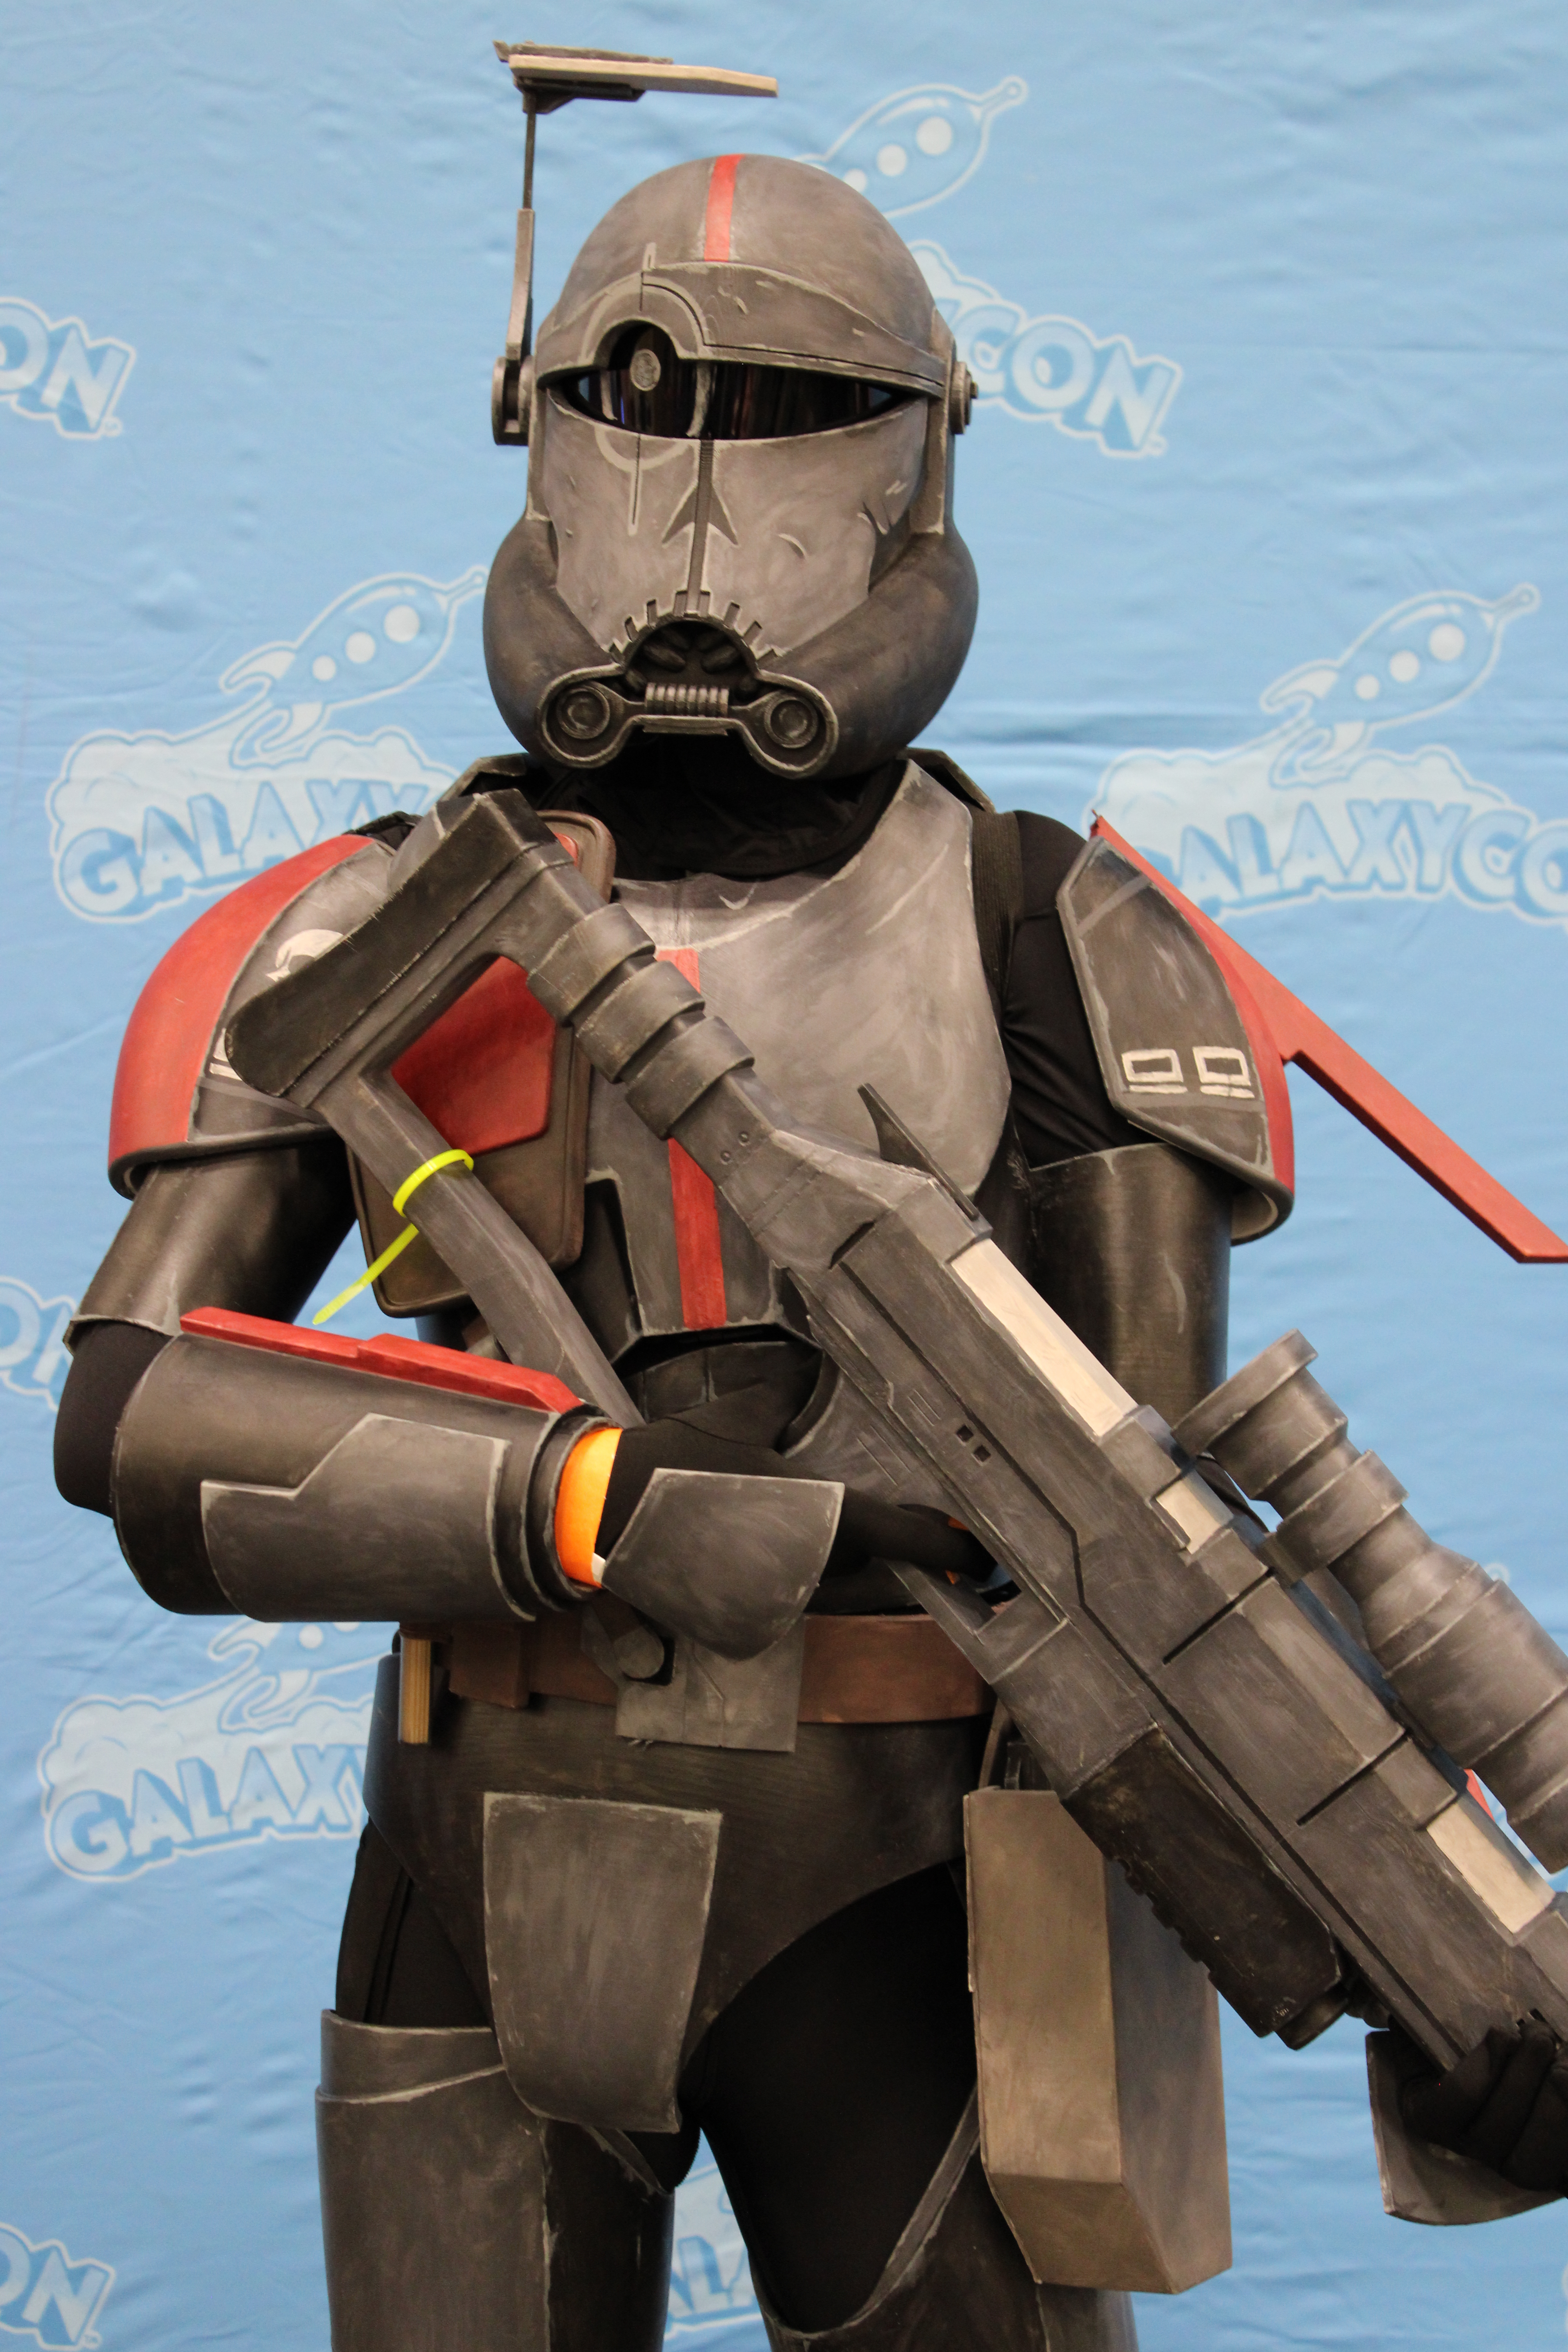
Crosshair’s due date was October 26th, as I was having a professional photoshoot done of three of my cosplays. The photos from that shoot are his portfolio ones done in my horse barn.
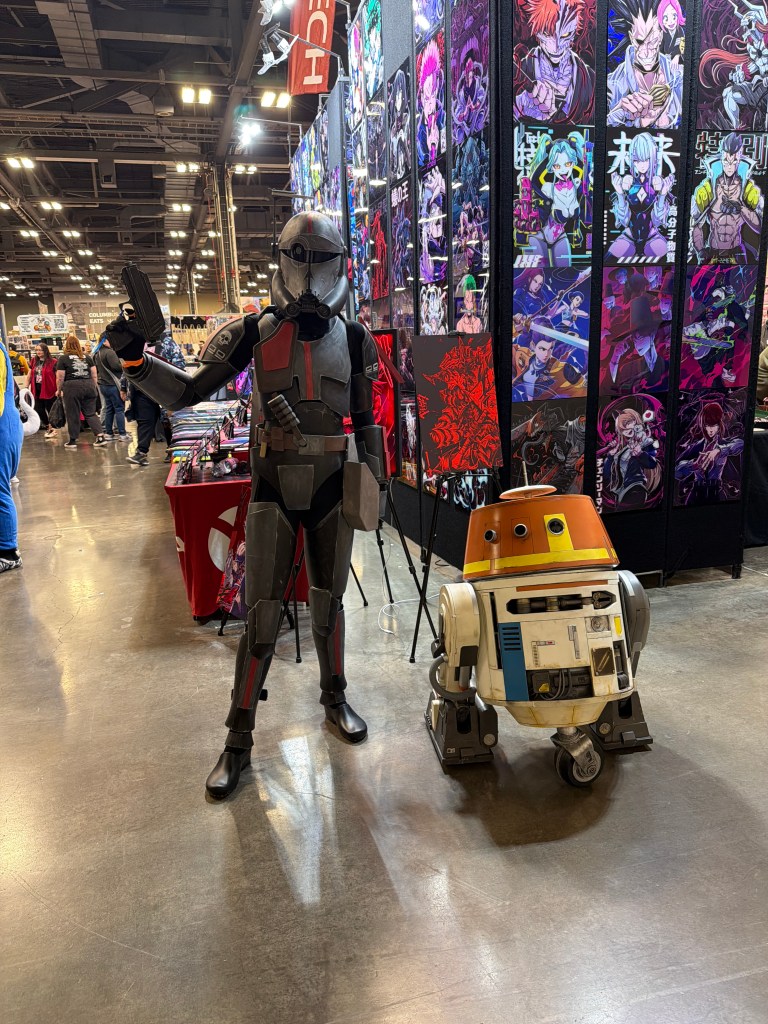
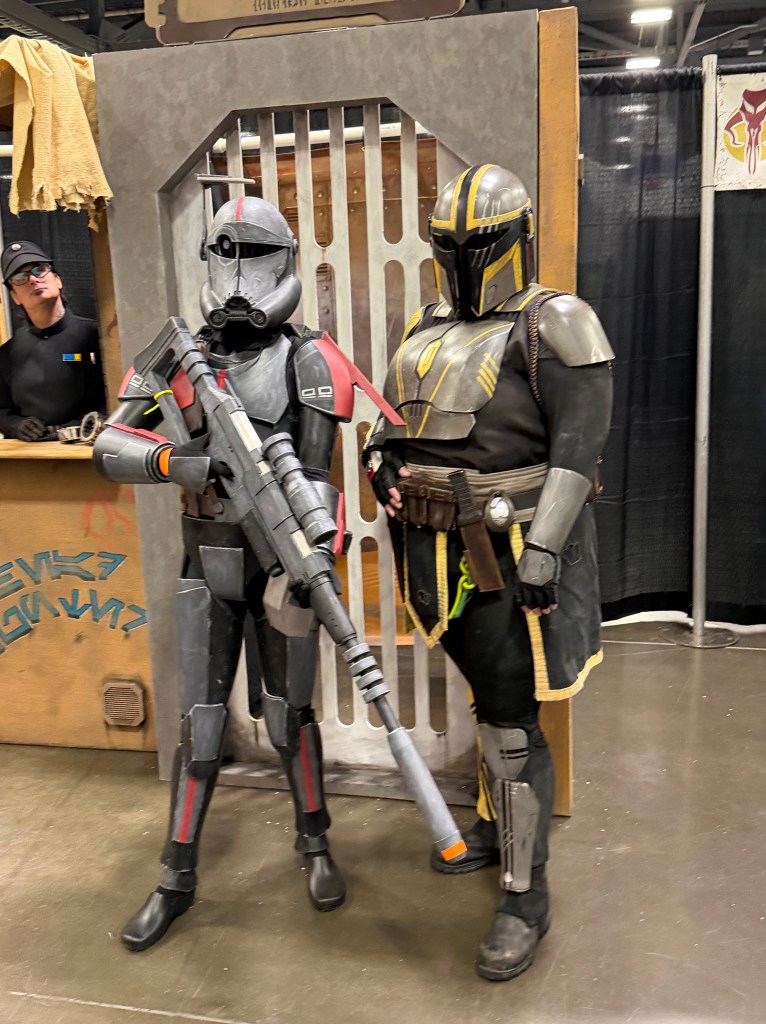
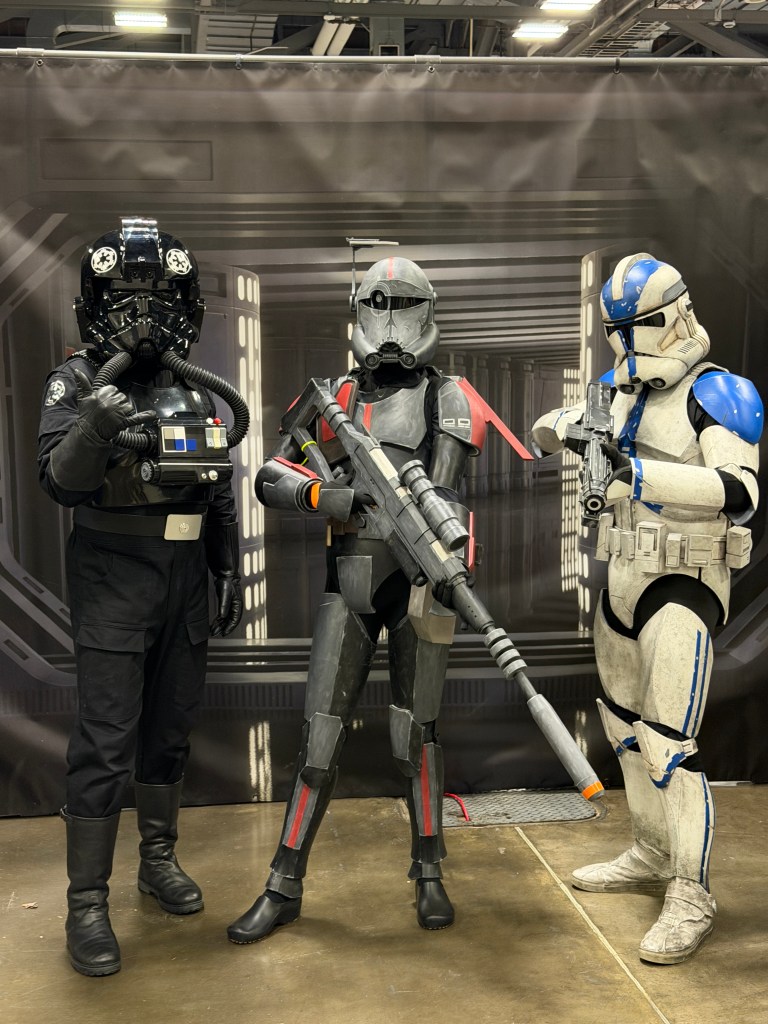
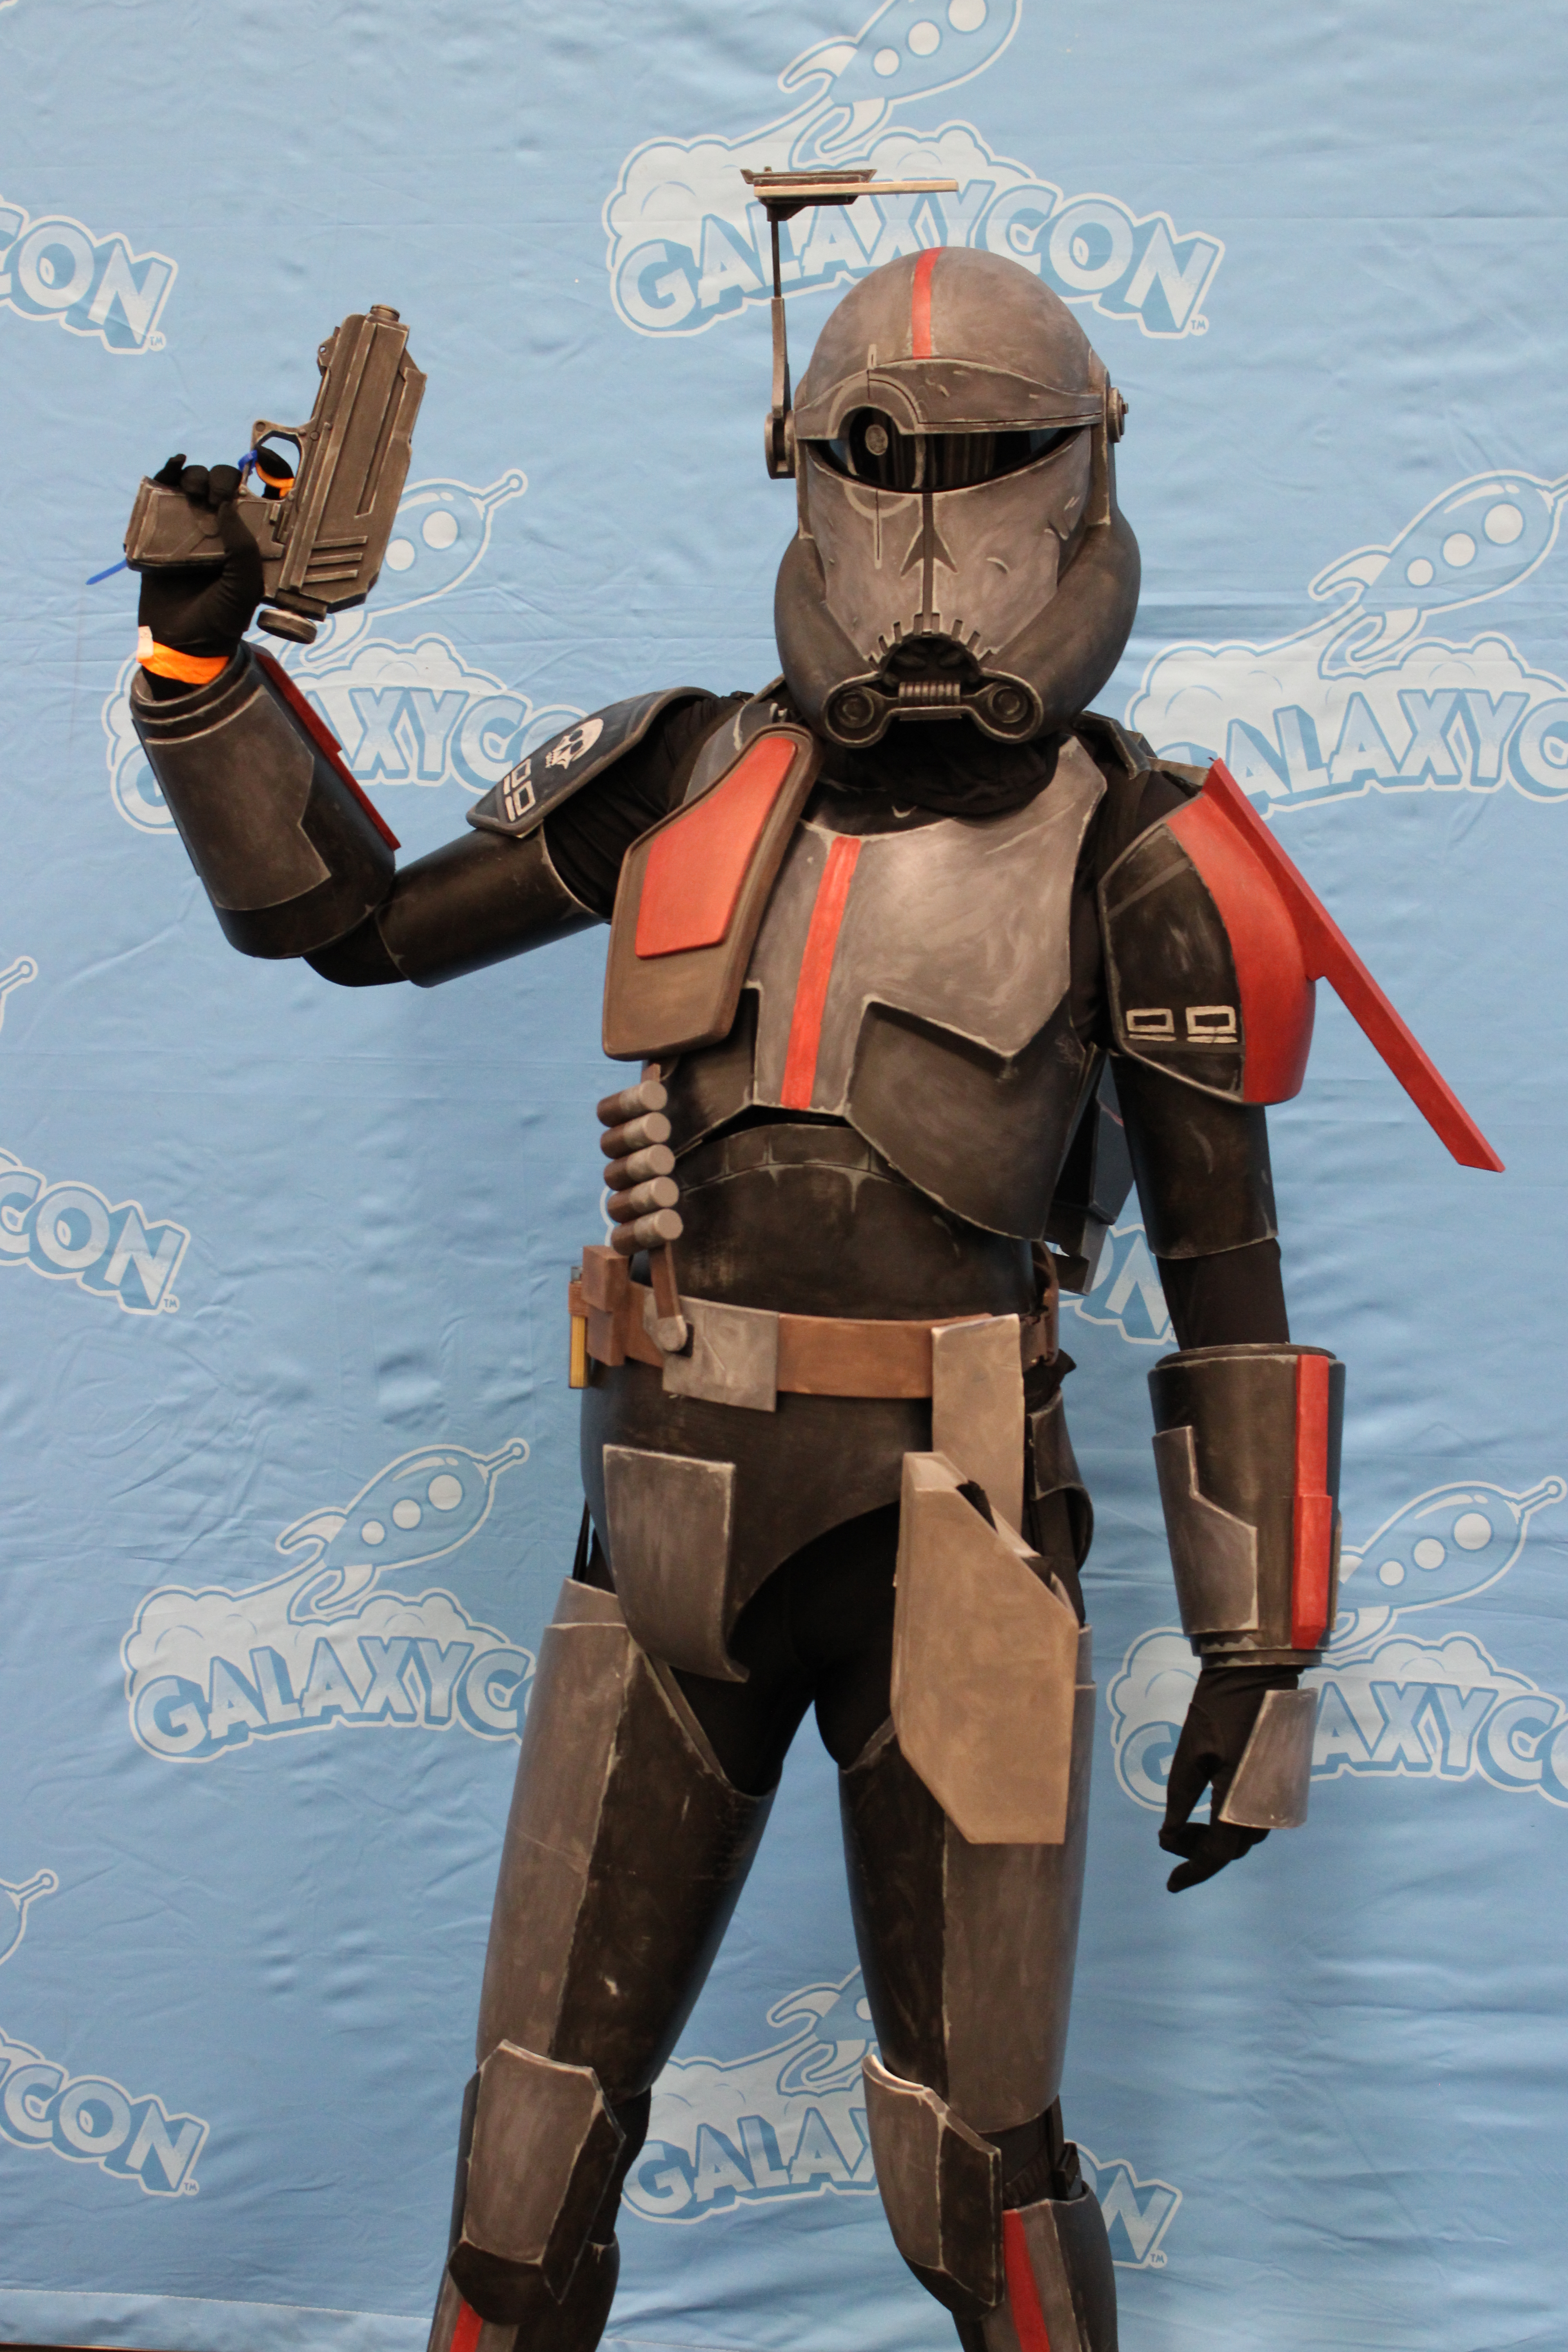
December 5th 2025 was Crosshair’s debut date. After all this work, Crosshair made his first and so far only appearance at GalaxyCon Columbus. At this convention Crosshair got to meet dozens of awesome cosplayers from the 501st Legion’s Ohio Garrison, the Mandalorian Mercs, and United Chaos. Just beforehand, I made my way to the cosplay lounge for the Star Wars cosplay meetup and got professional photos taken. And then I got to get my Thrawn: Lesser Evil poster signed by Timothy Zahn himself. If it wasn’t for my helmet fans, I would have never made it through the convention.
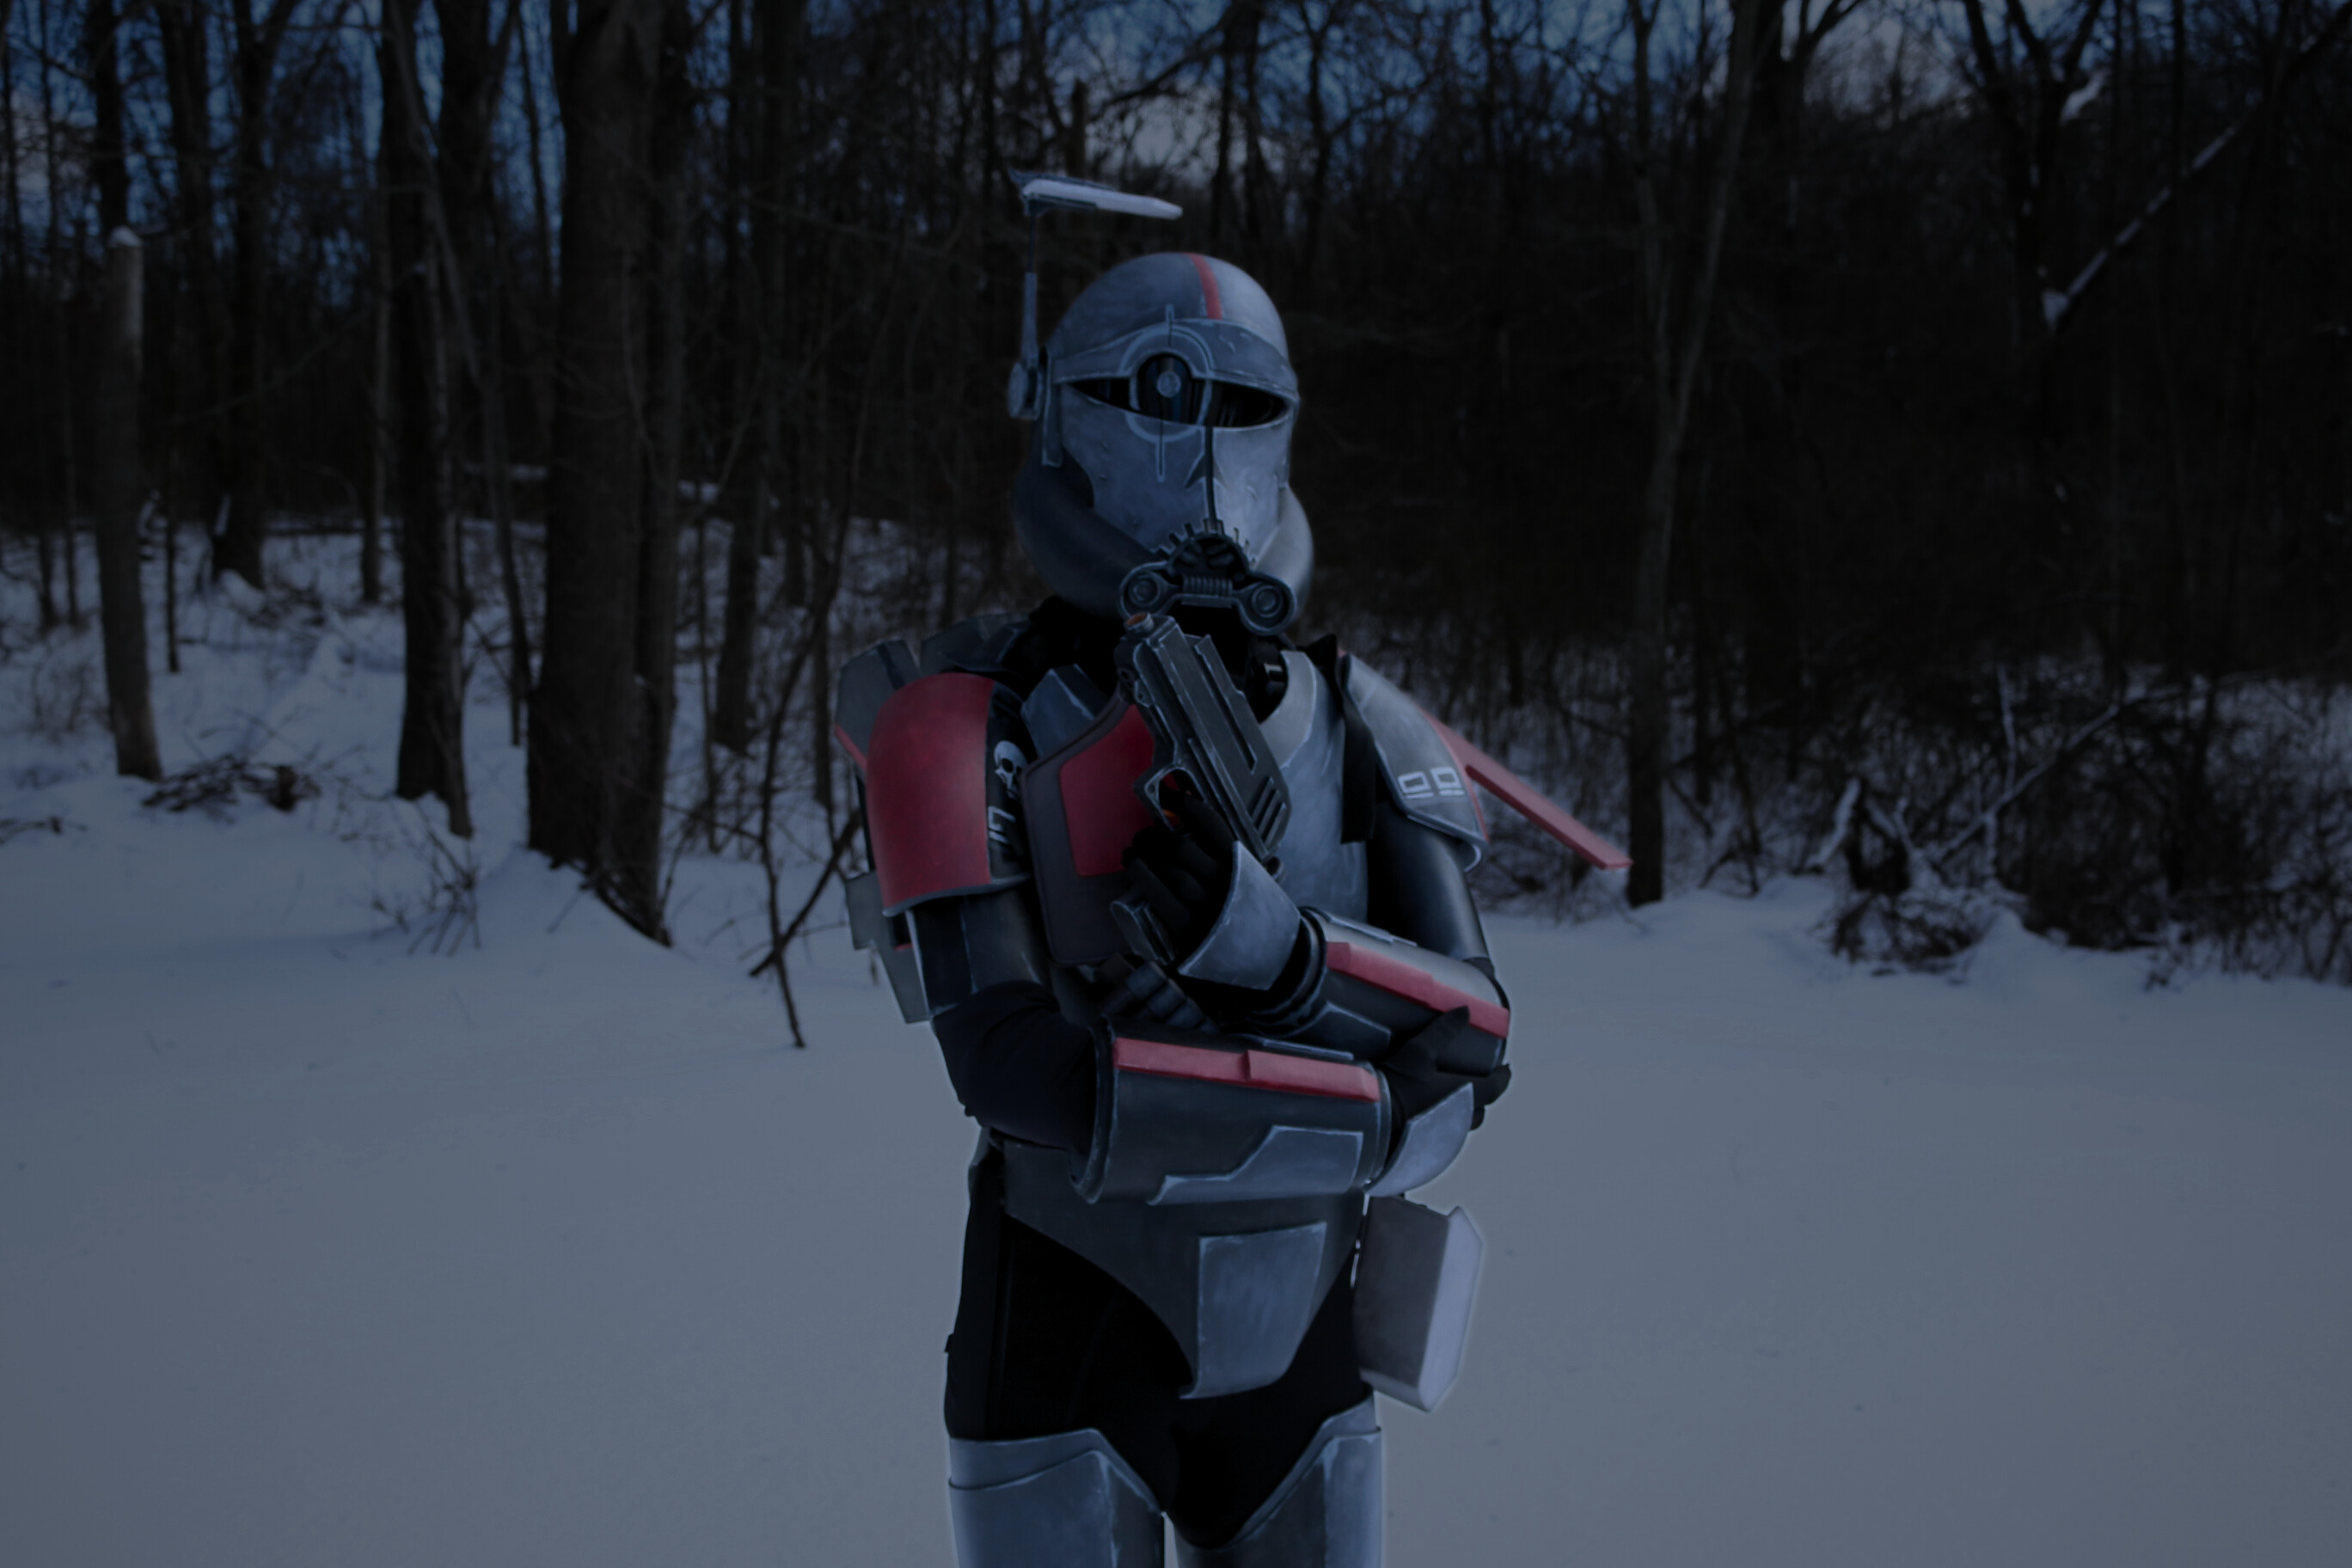
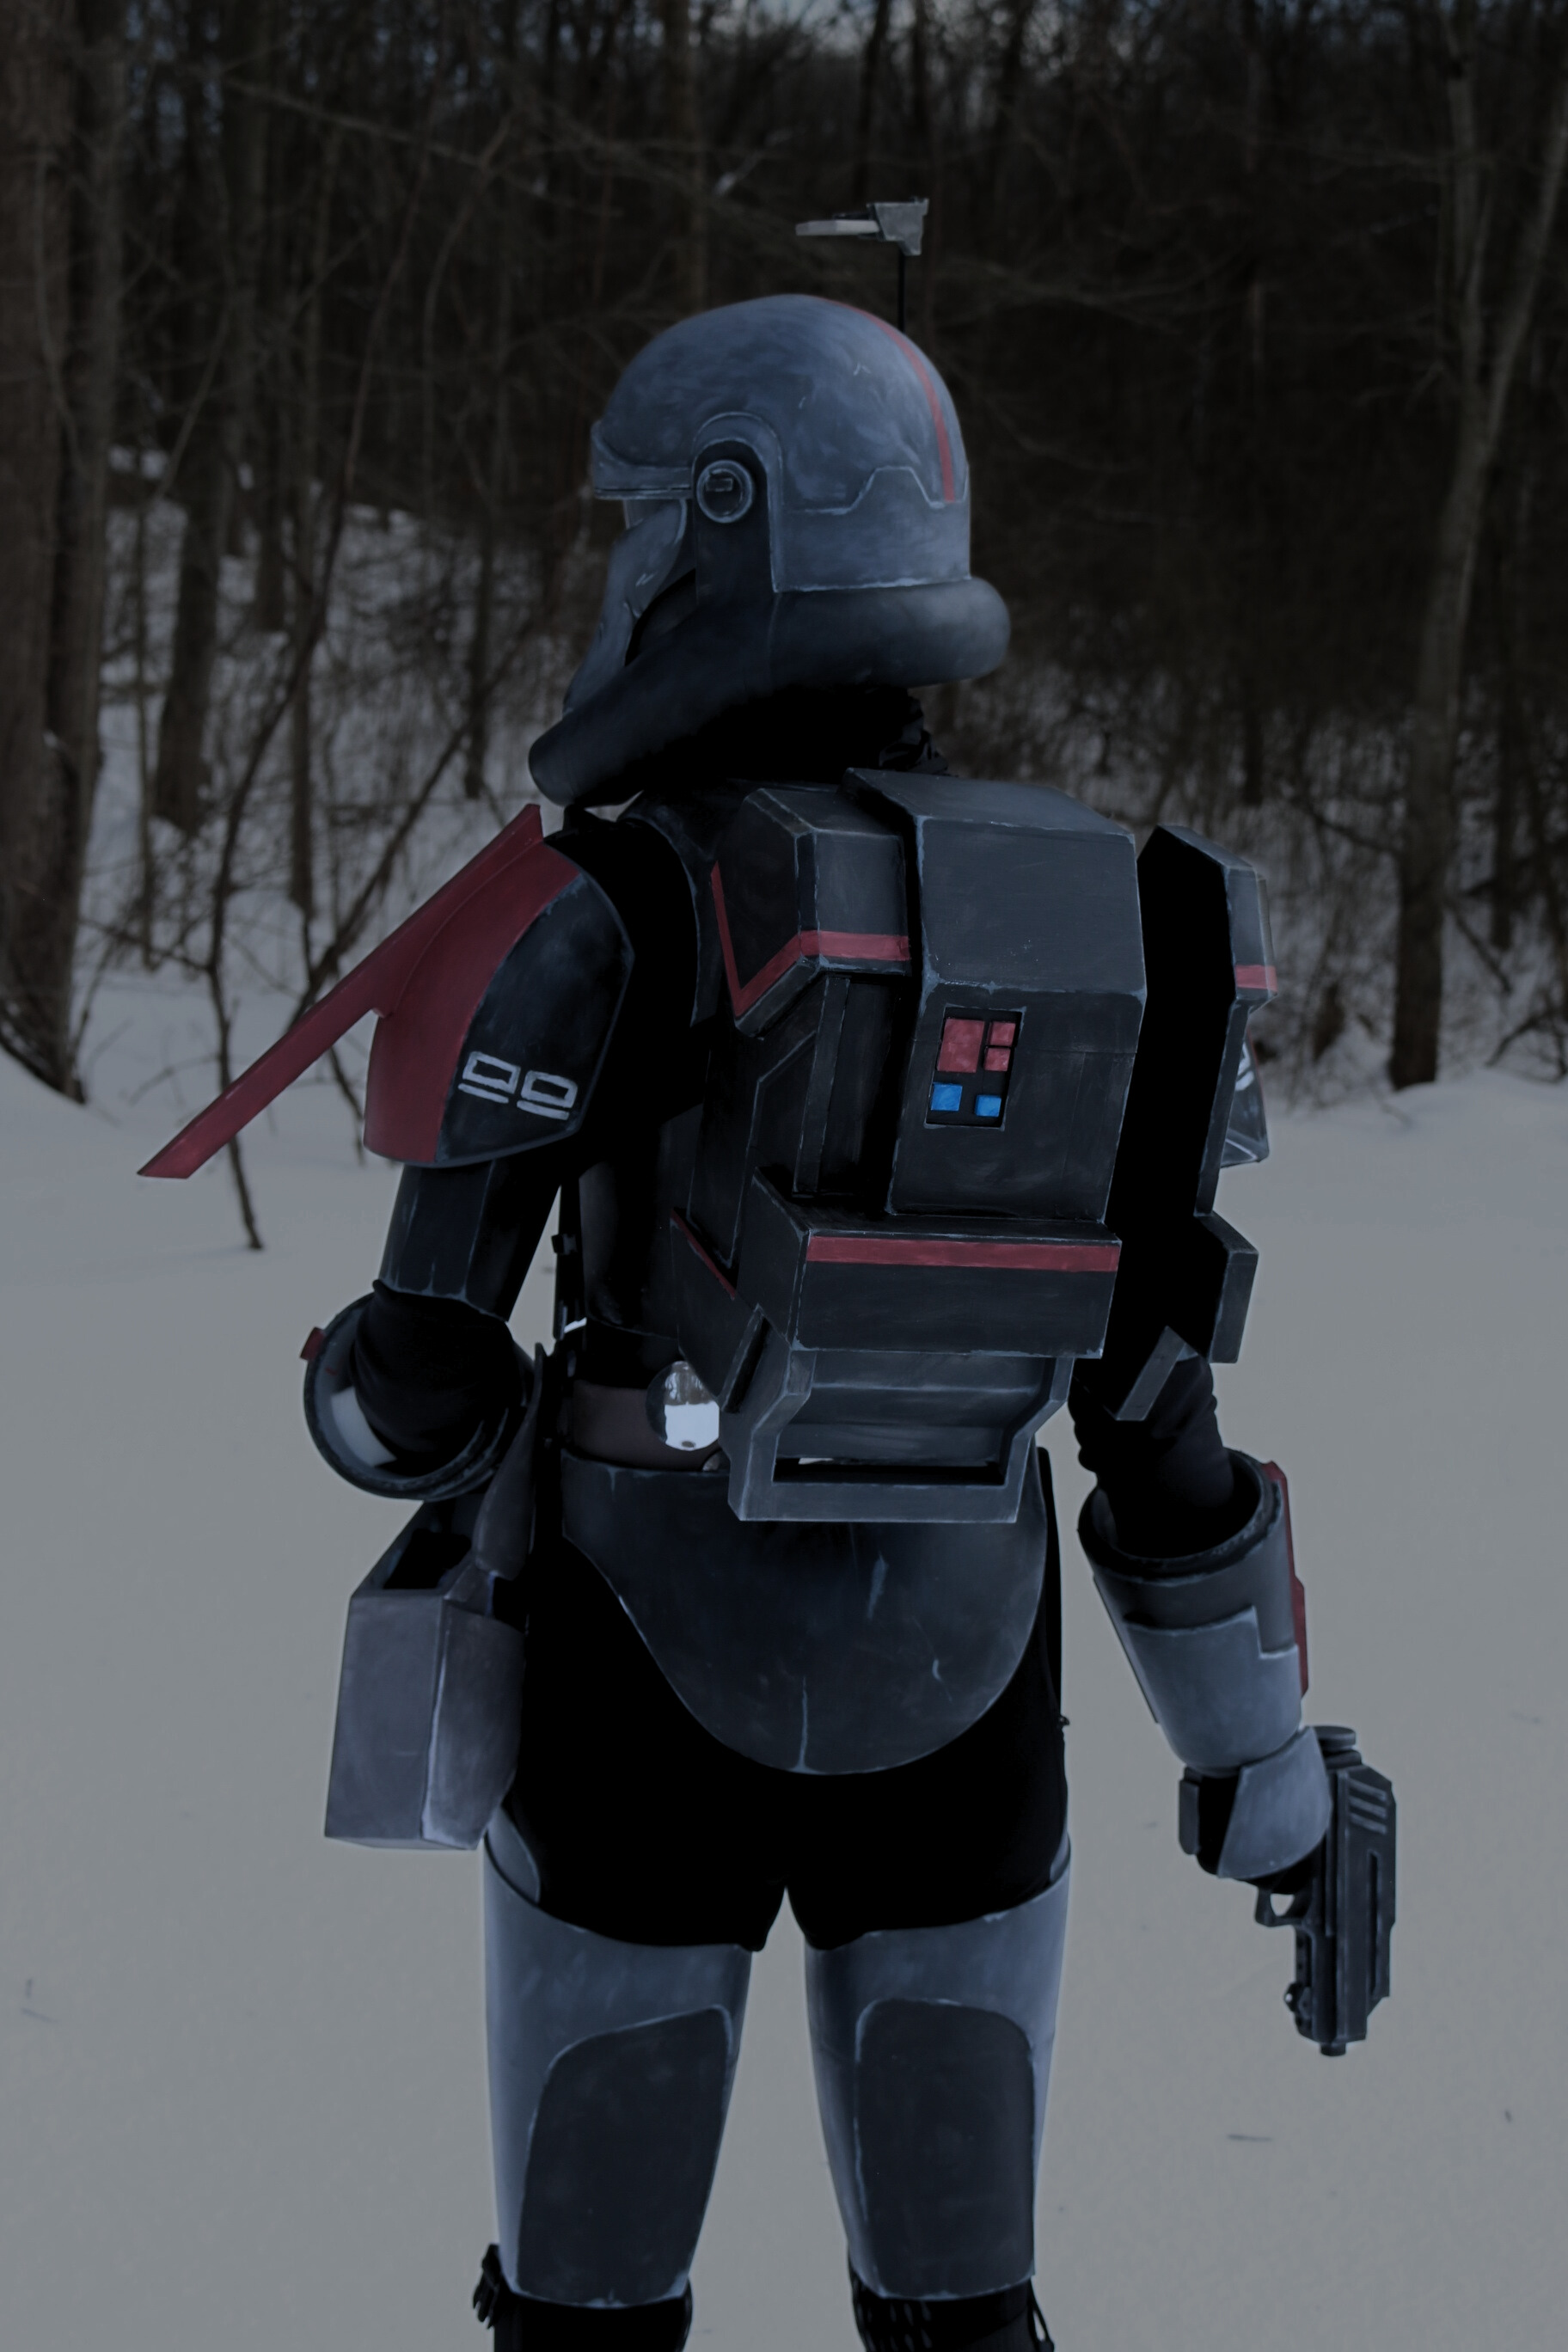
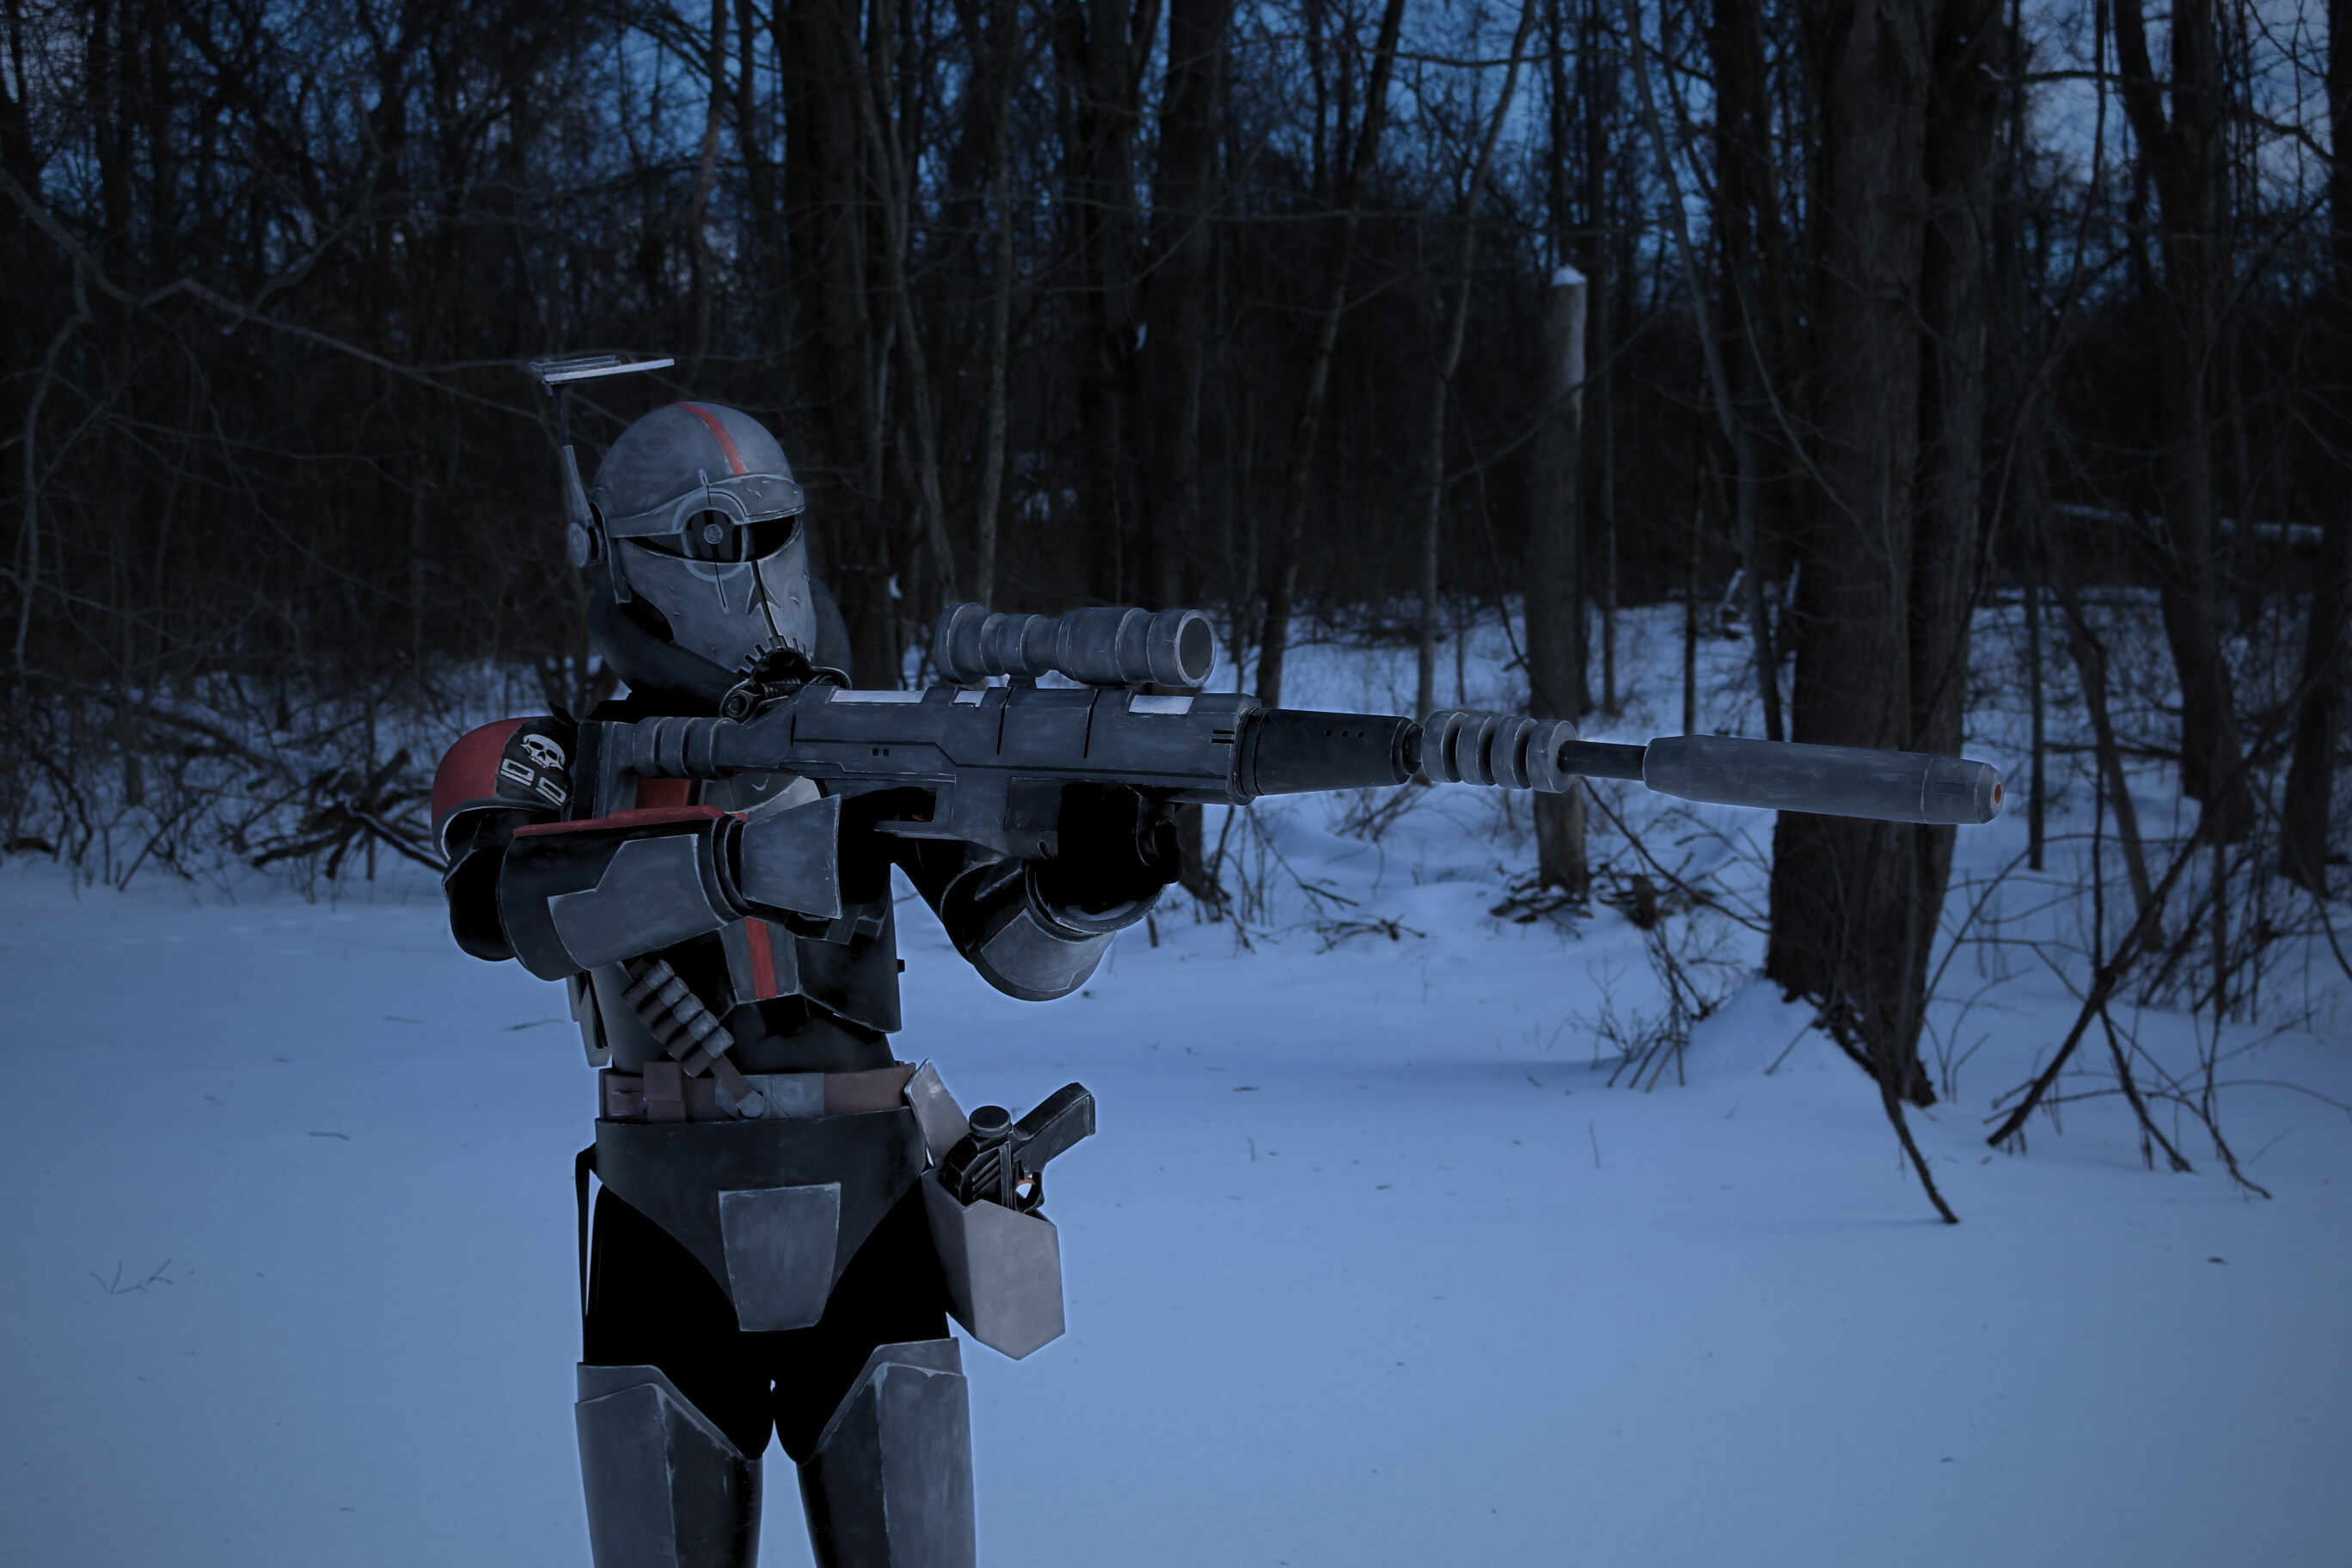
And Crosshair had one final event before his current likely retirement, which was a winter photoshoot done in the snow. I really wanted to get this done when I realized how similarly the outside looked like the cold planet that the first episode of The Bad Batch takes place on, Kaller.
Let’s start with the basics. Crosshair was printed on a Qidi q1 pro1, the STL files2 all came from Galactic Armory3, I used the Qidi slicer4, and I used exclusively Polymaker CosPLA version A5. It took over 1900 hours of print time, one replaced front fan, and an estimated 10 normal sized rolls of filament and 6 10kg rolls.
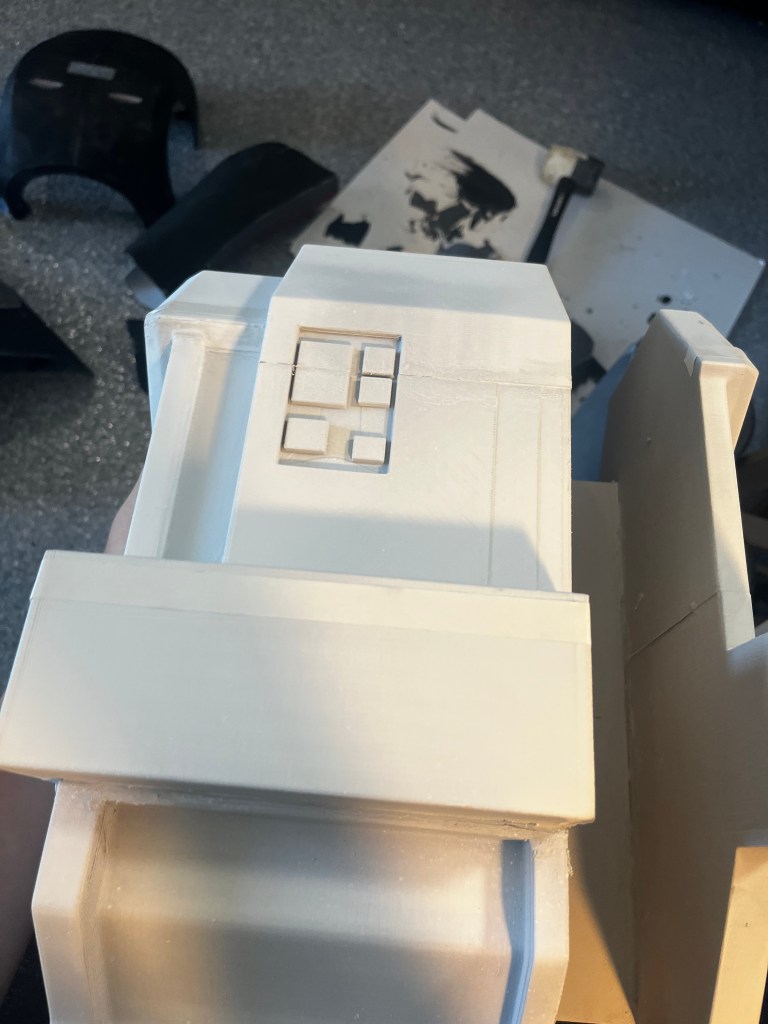
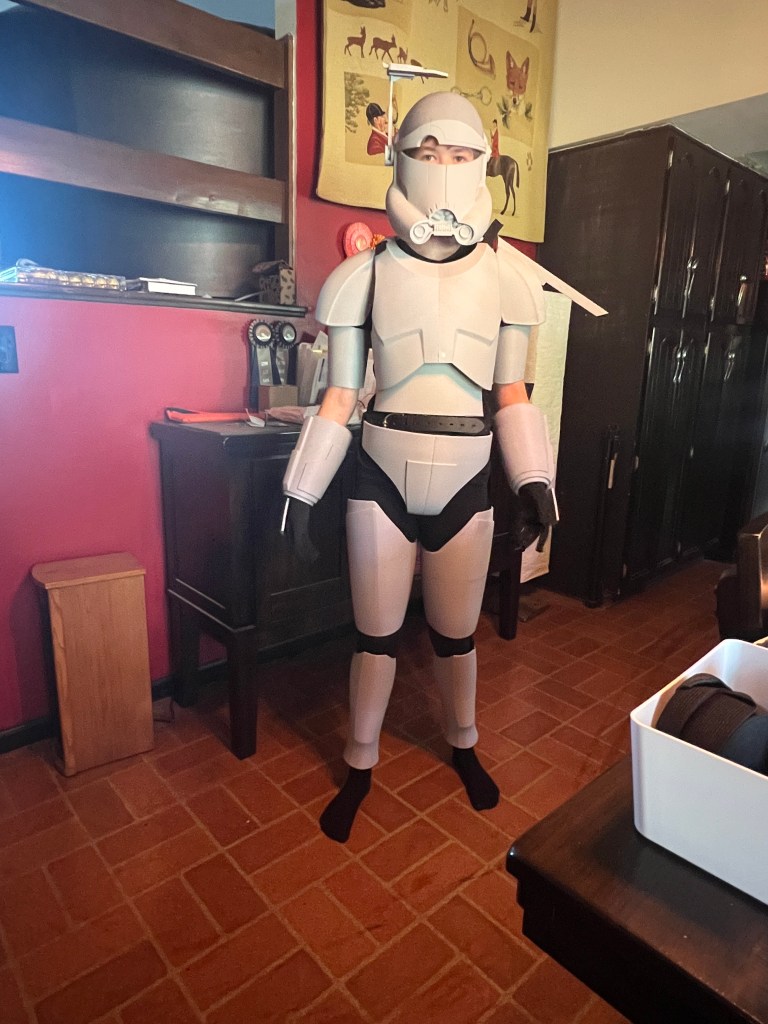
Sizing the armor to fit was by far the most difficult part of the process. The chestplate alone took some twelve or so tries. The armor was modeled to fit a 200lb 6 foot tall man, which, I am none of. After printing pieces, I had to glue them together. For this, I chose Weld-166, affectionately nicknamed “cancer glue,” due to the warnings on the back of the tube. The cancer glue is in my opinion the best adhesive for PLA, at one point glued a piece on upside down, and tried to pry it off some 5 or so minutes after applying the glue. The piece broke in three different places, none of which were close to where the glue bond was. When I wasn’t doing a plastic-to-plastic connection, for literally anything else, I used hot glue7. And then after gluing the armor together, I had to make it wearable.
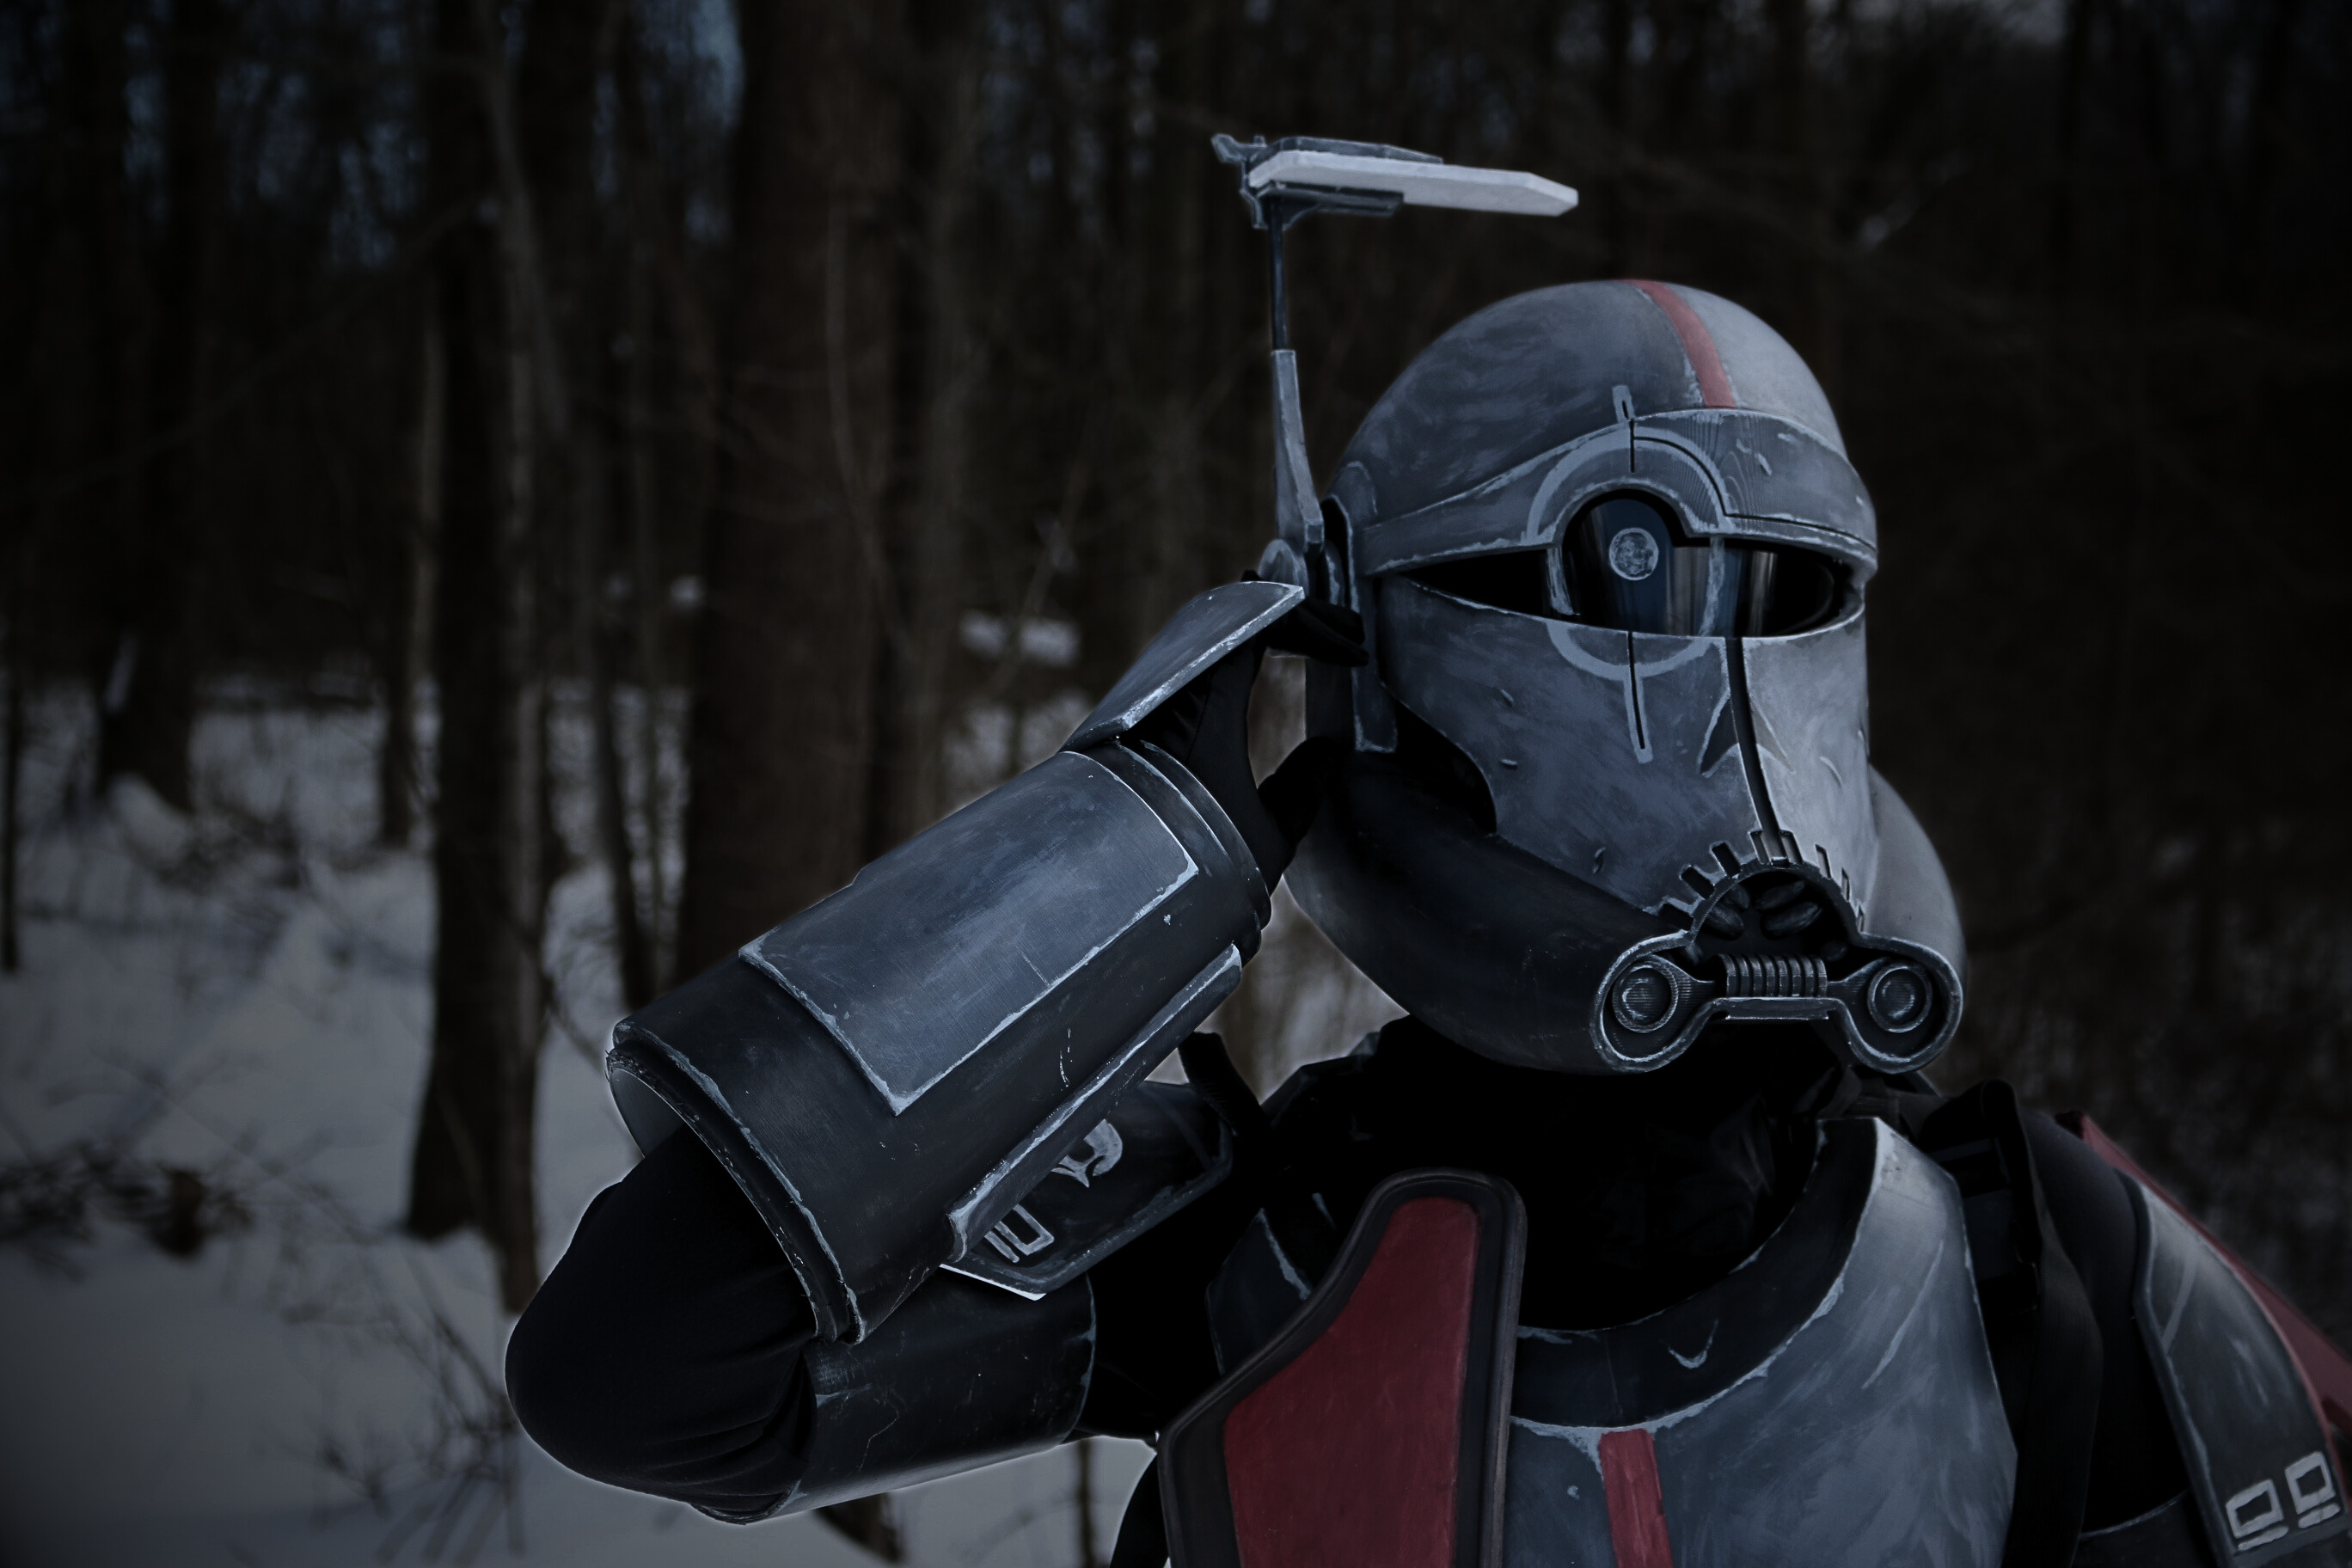
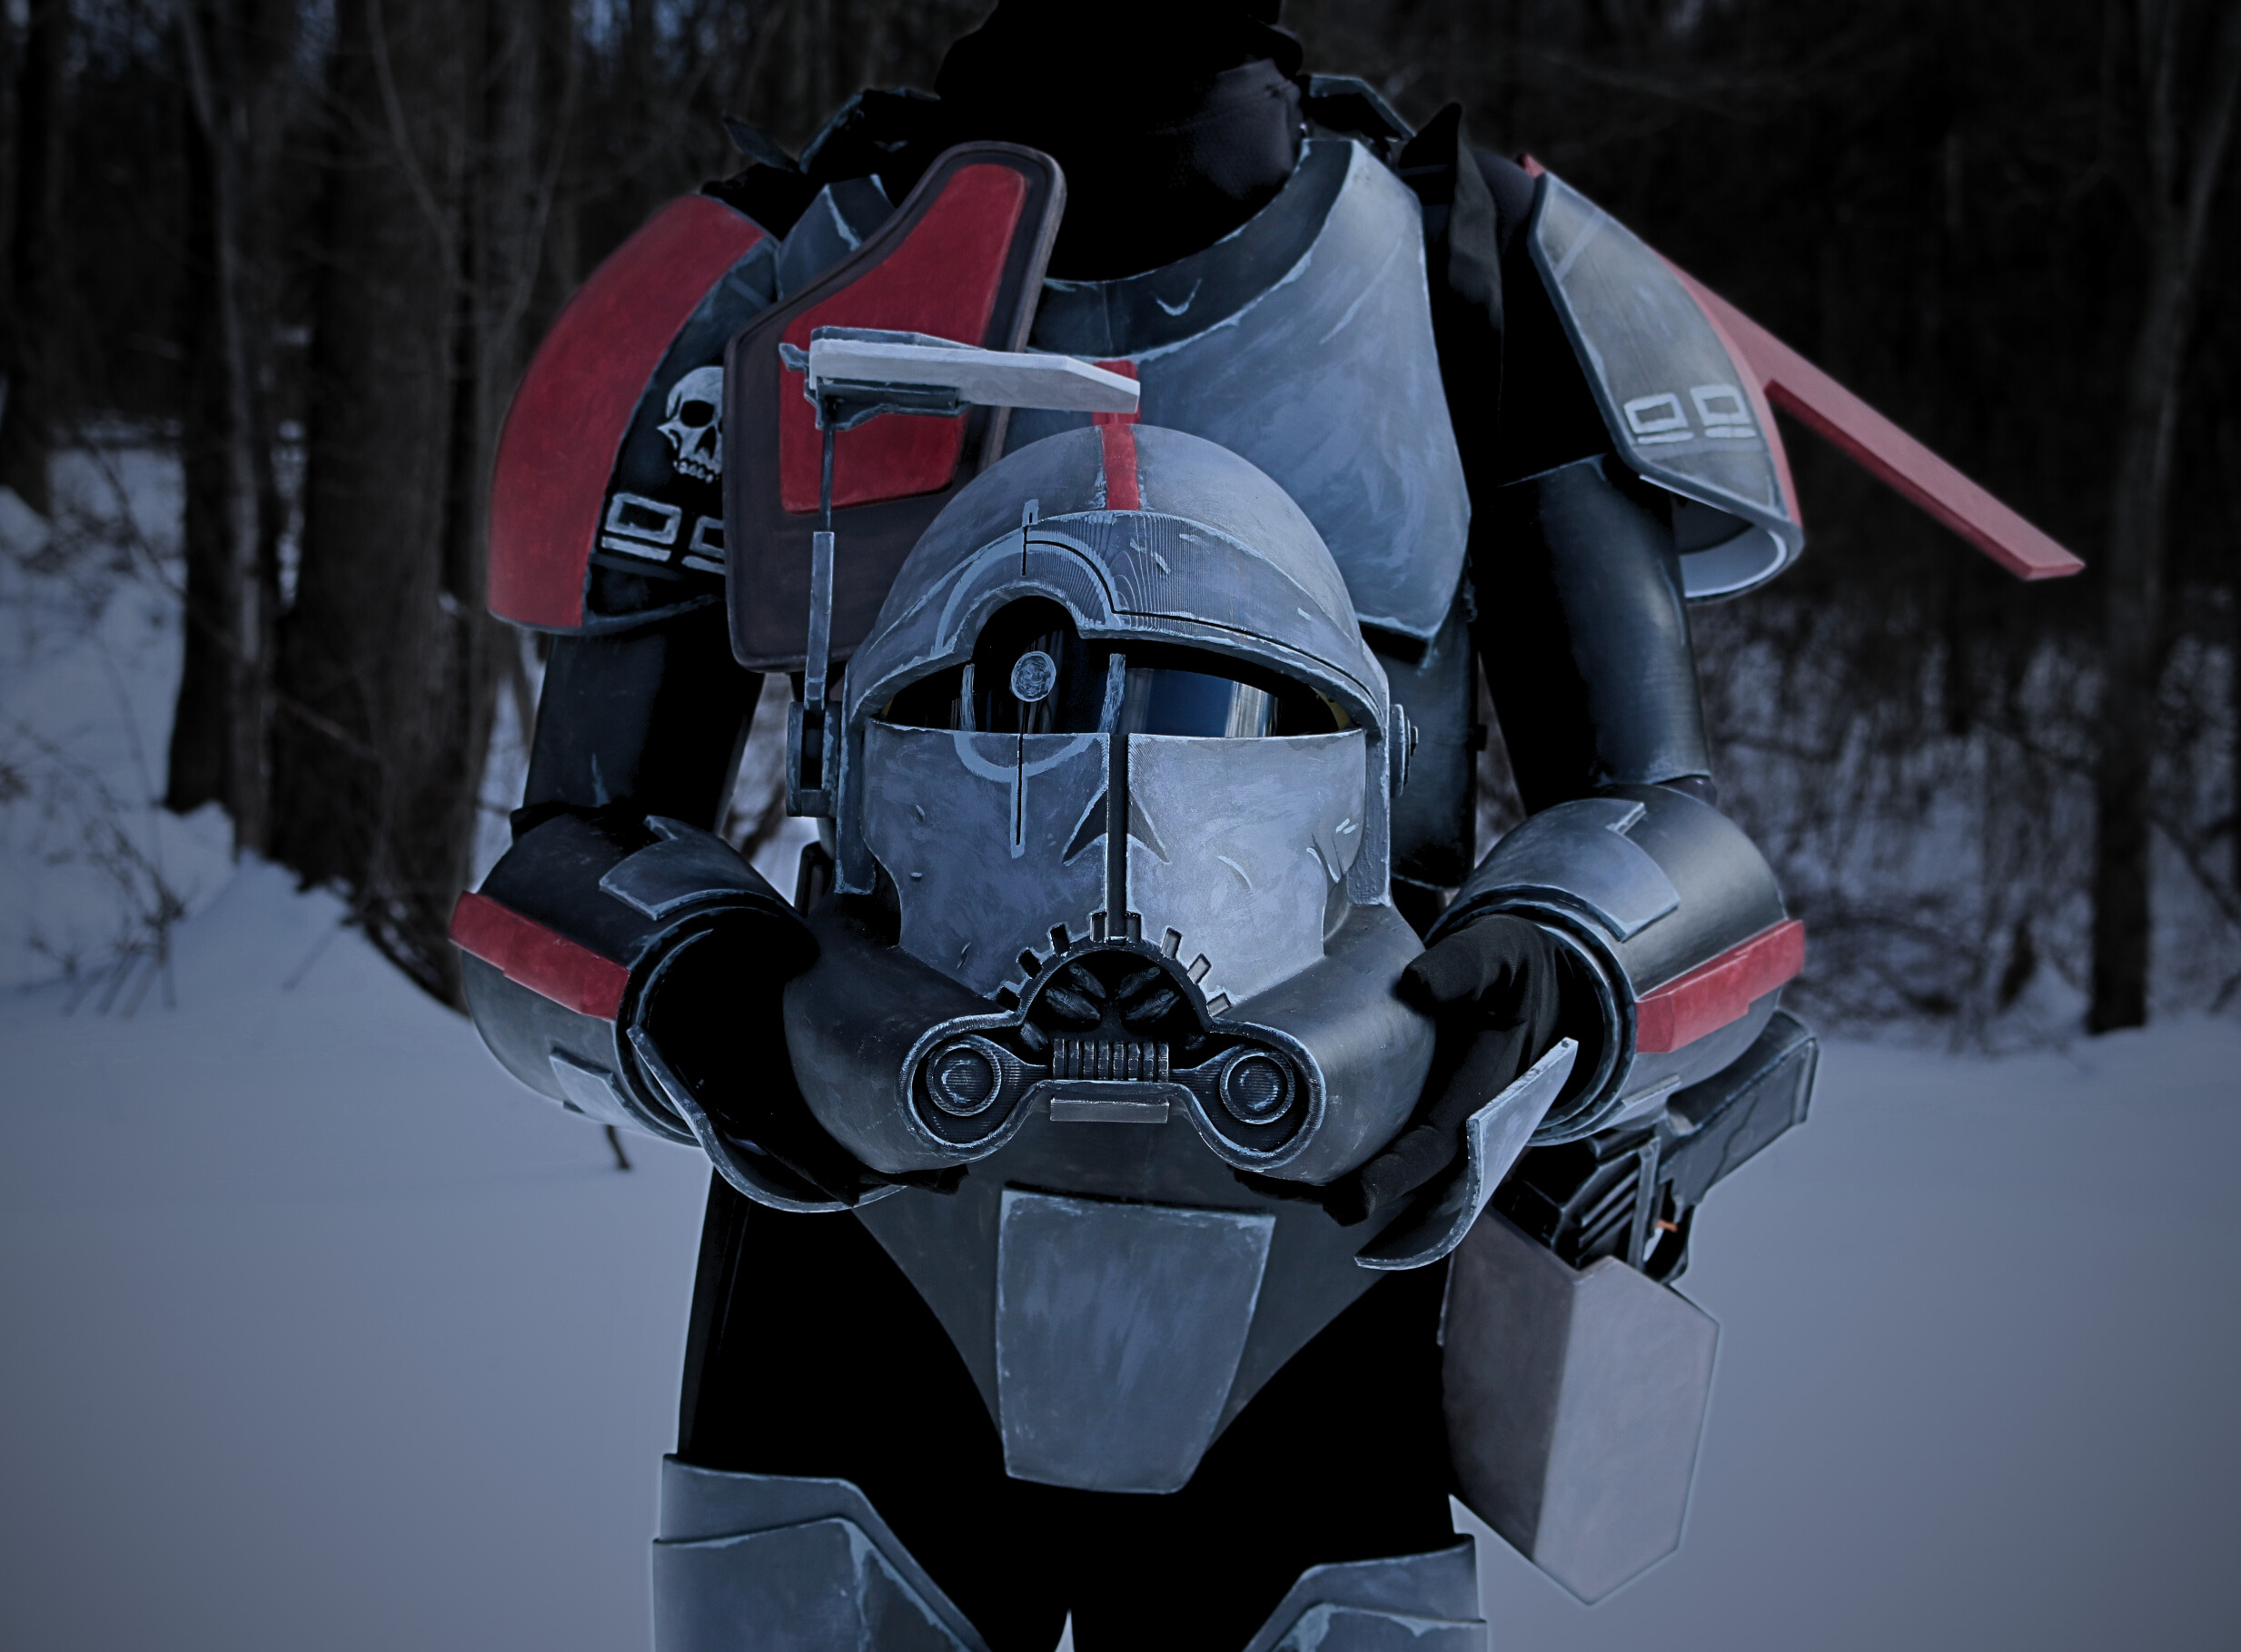
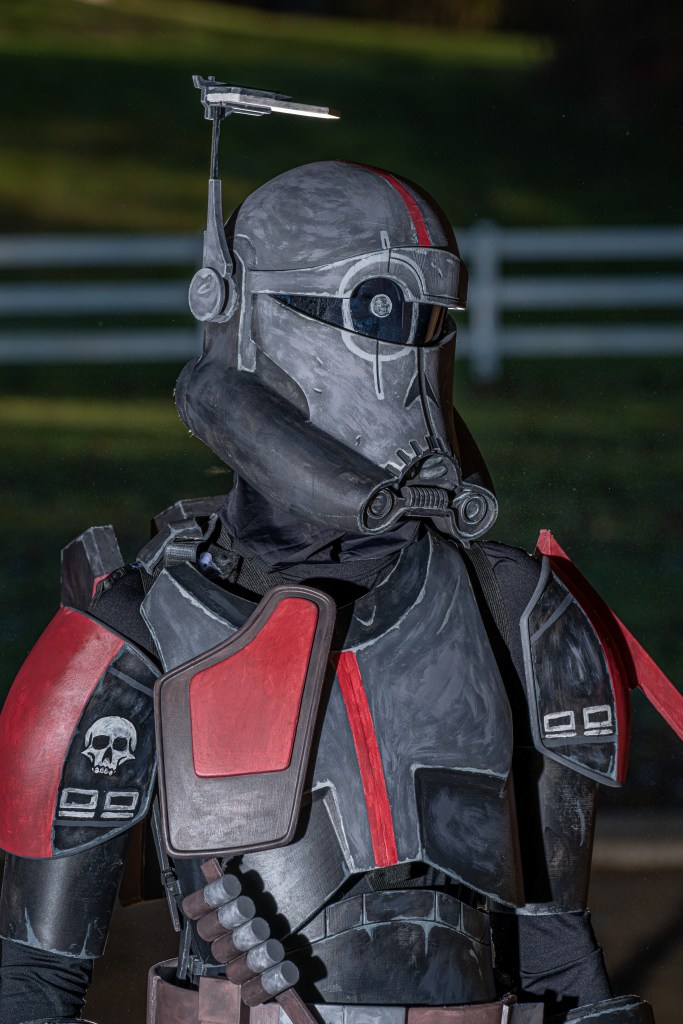
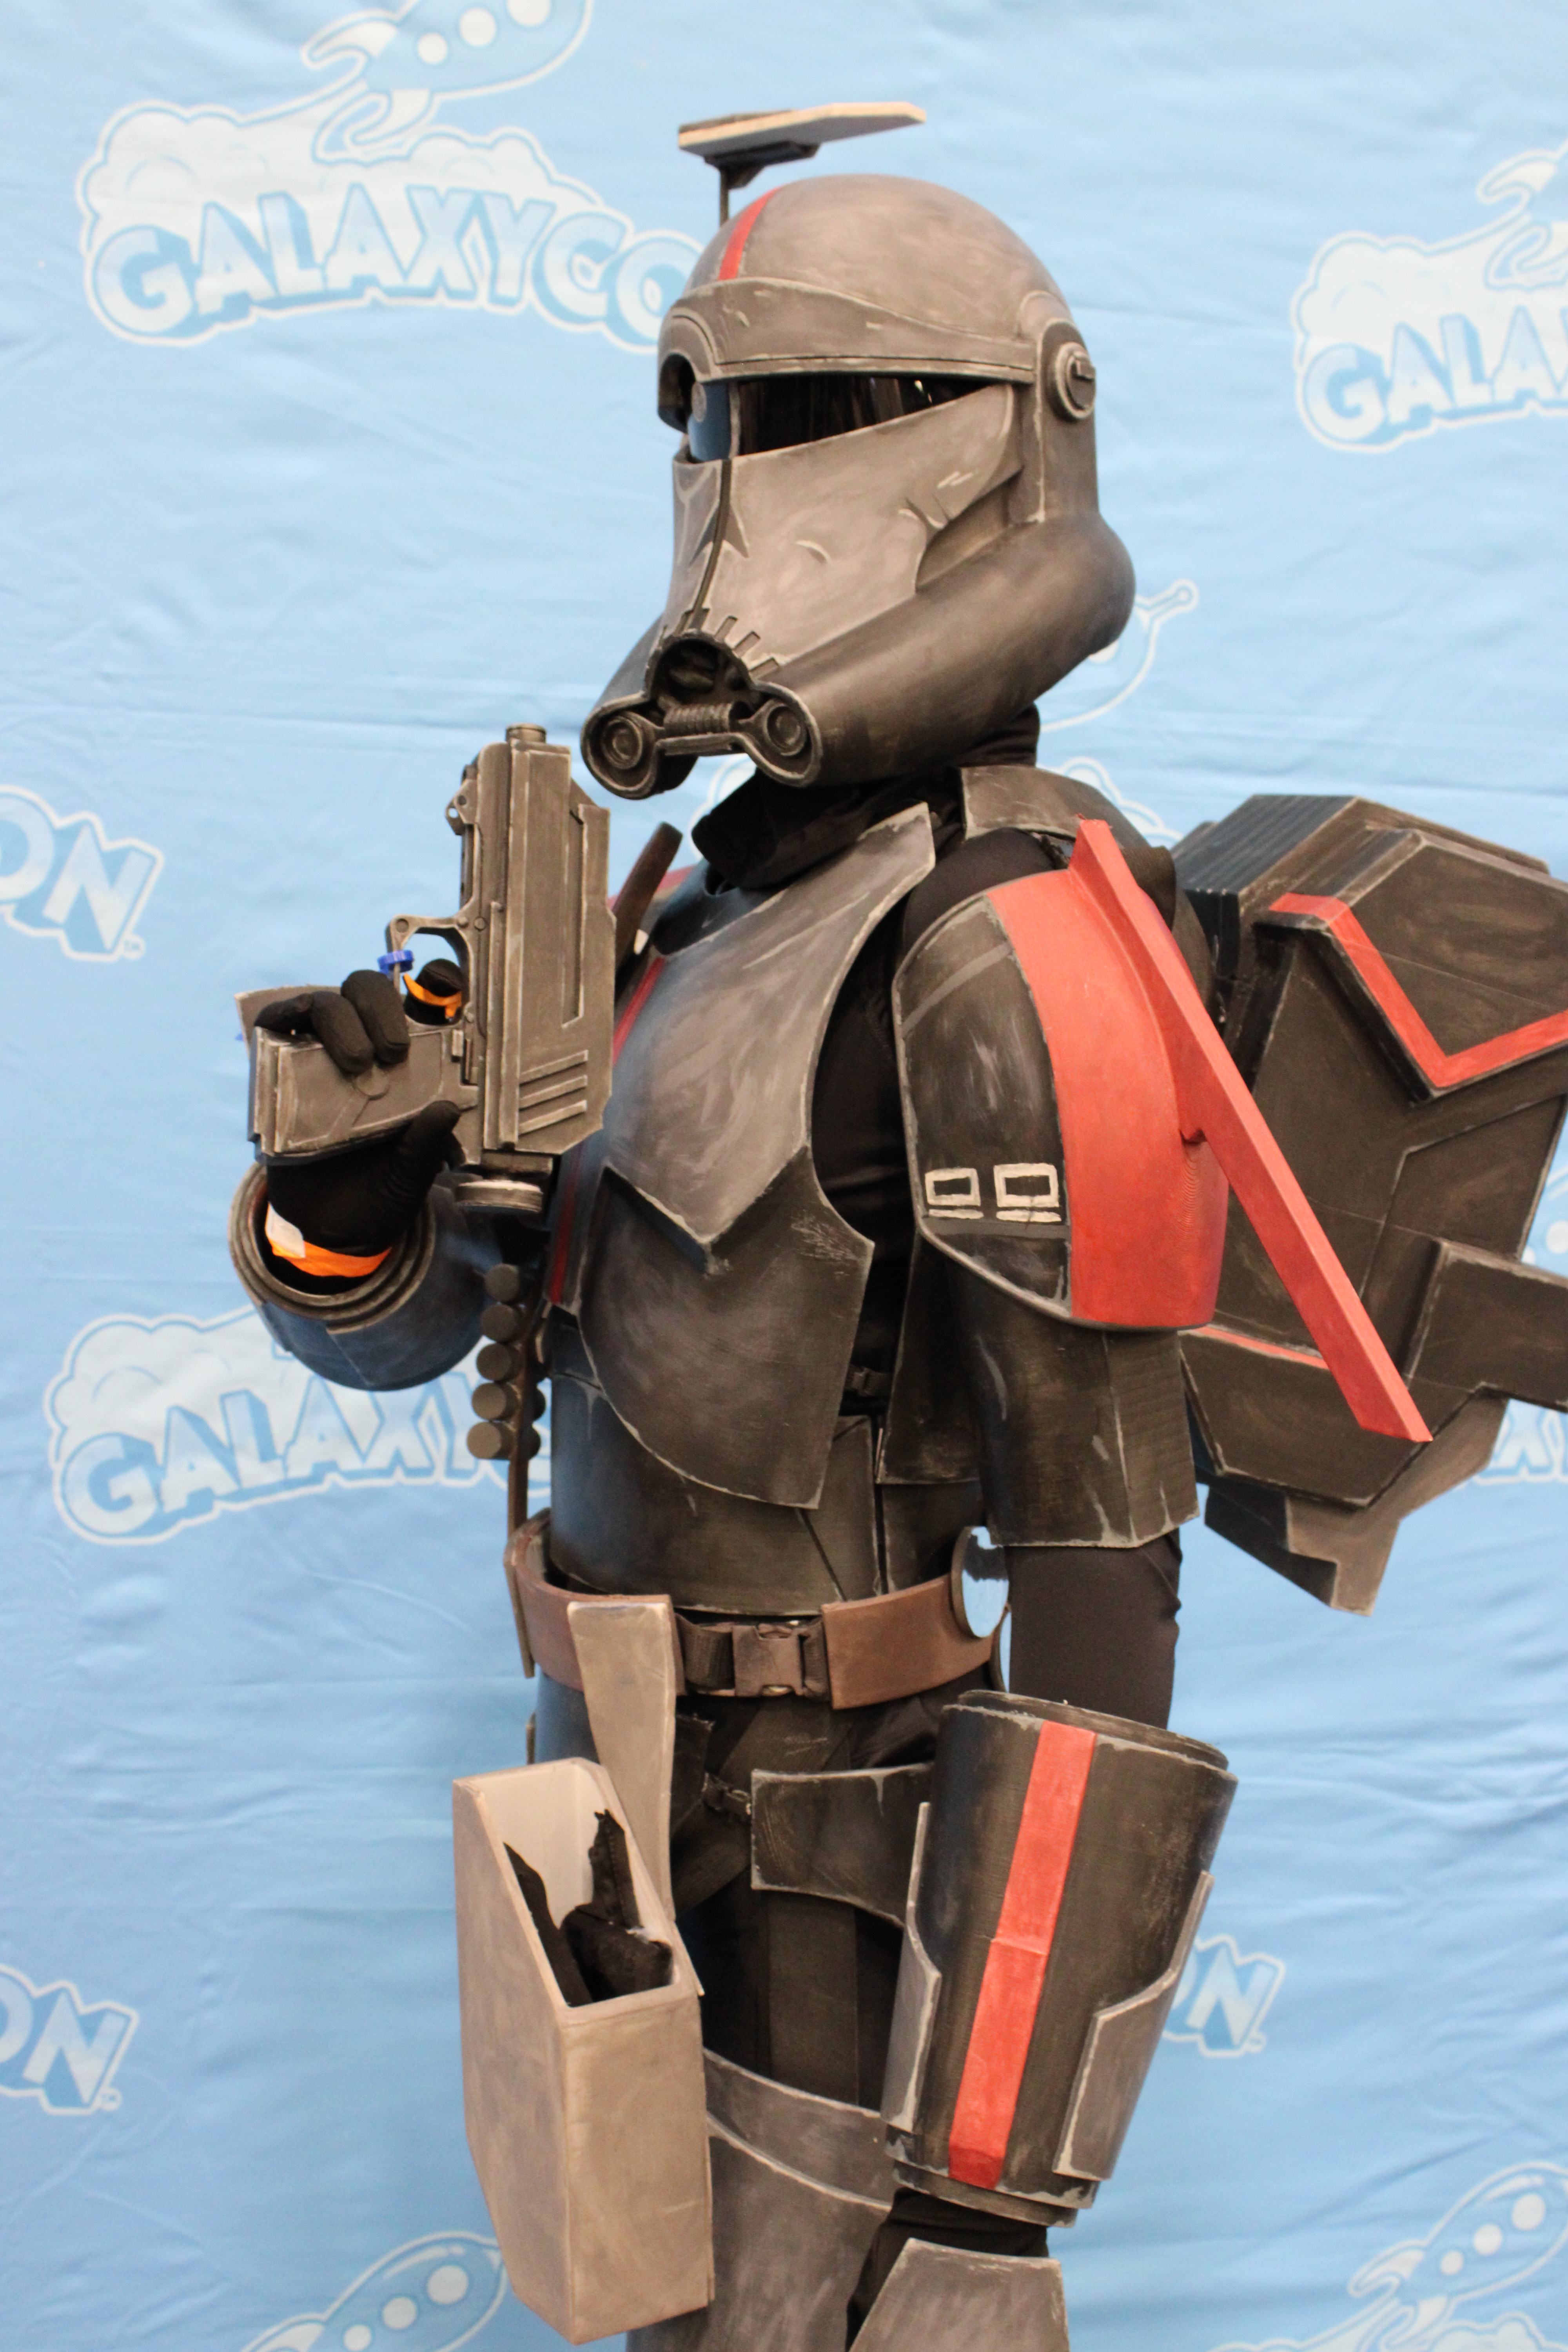
I used mostly elastic straps8 and parachute buckles9 to hold everything on. Areas I used these in were where the thighs connected to the calves, the chestplate to the back piece, the shoulders to the chestplate, and to close off the abs, cod, and belt. The ankle pieces just get pried open, the knees slide on with elastic loops, the hand plates Velcro10 onto the gloves, and the chest plate and bandolier both go on with Velcro as well. The forearms and biceps both just kind of…squish on? There are blocks of foam11 hot glued to the inside to make it a snug fit. The more complicated contraptions to make were for the holster and backpack. The holster has an elastic band that acts almost like a crossbody purse, which holds the weight and lays beneath all my armor so I can have the strap you do see Velcro to the belt. The files for the backpack and the hook mechanism they printed with did not work at all for me, I ended up drilling off the hooks with a dremel and gluing two elastic bands where each top hook was to create real backpack shoulder straps, and glued a third thicker one that goes horizontally across my chest. The visor is just a cut up welding mask visor12, that is held in place with magnets13. There are two Velcro patches inside the helmet for helmet fans14, the battery pack15 that powers them is located right in the center of my chestplate. One fan is in the front of the helmet, in the extended bit, which blows air downwards out of my helmer to keep the visor from fogging. The second is near my right cheek, which blows onto me to help keep me cool.
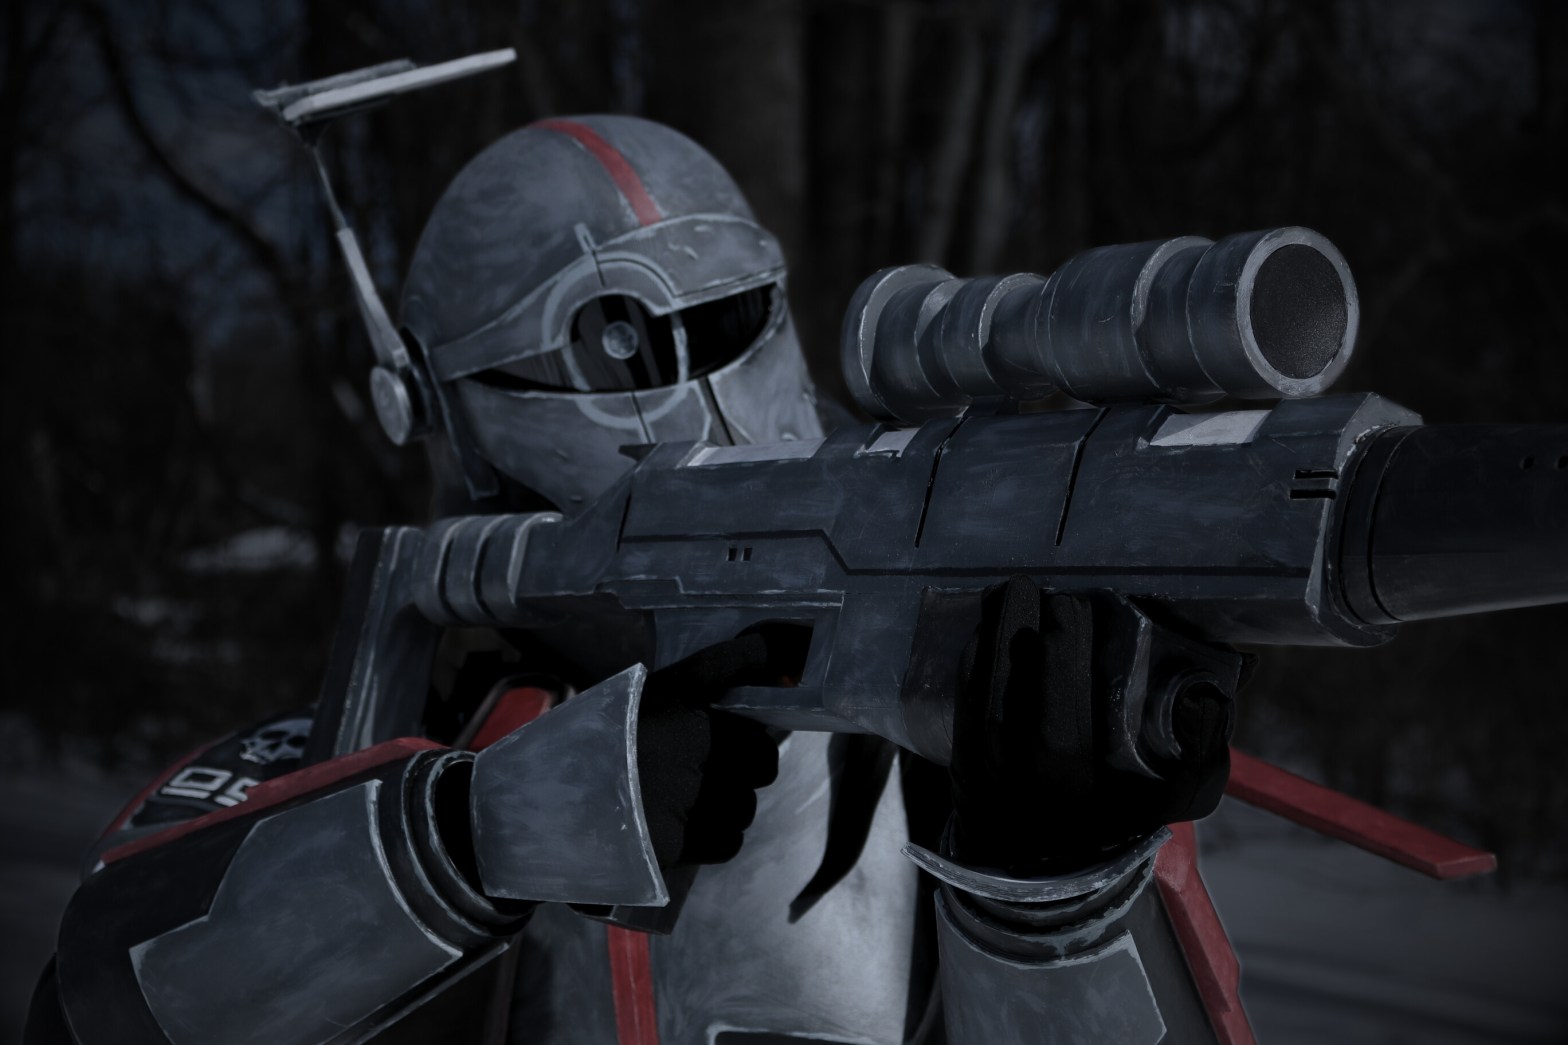
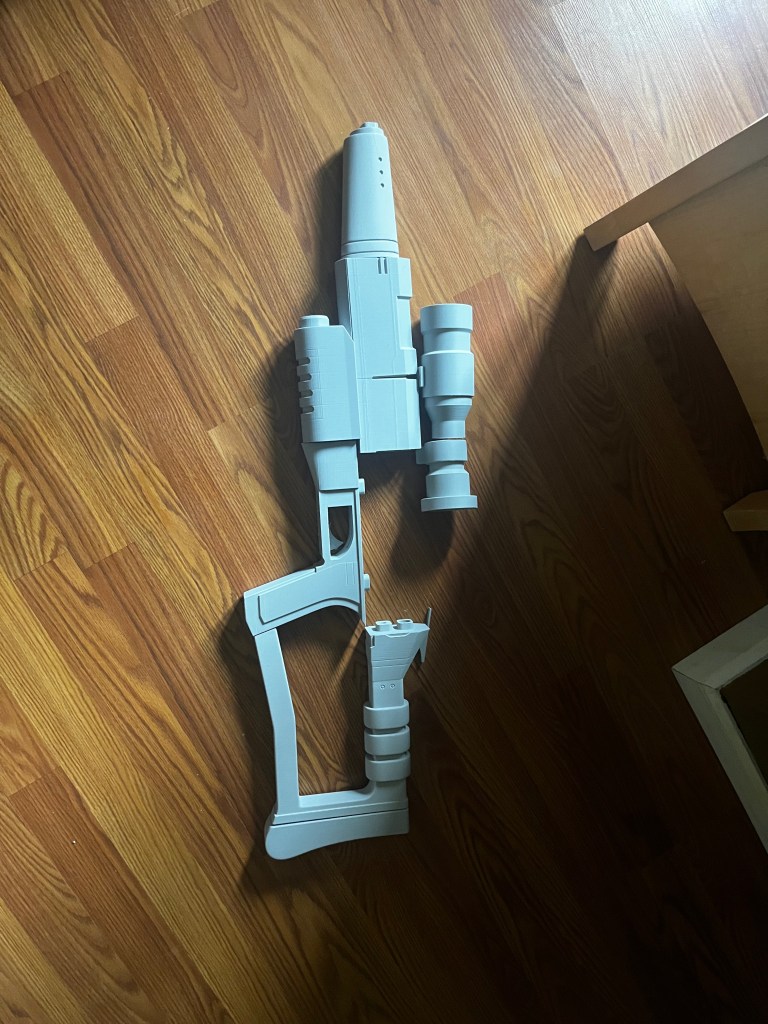
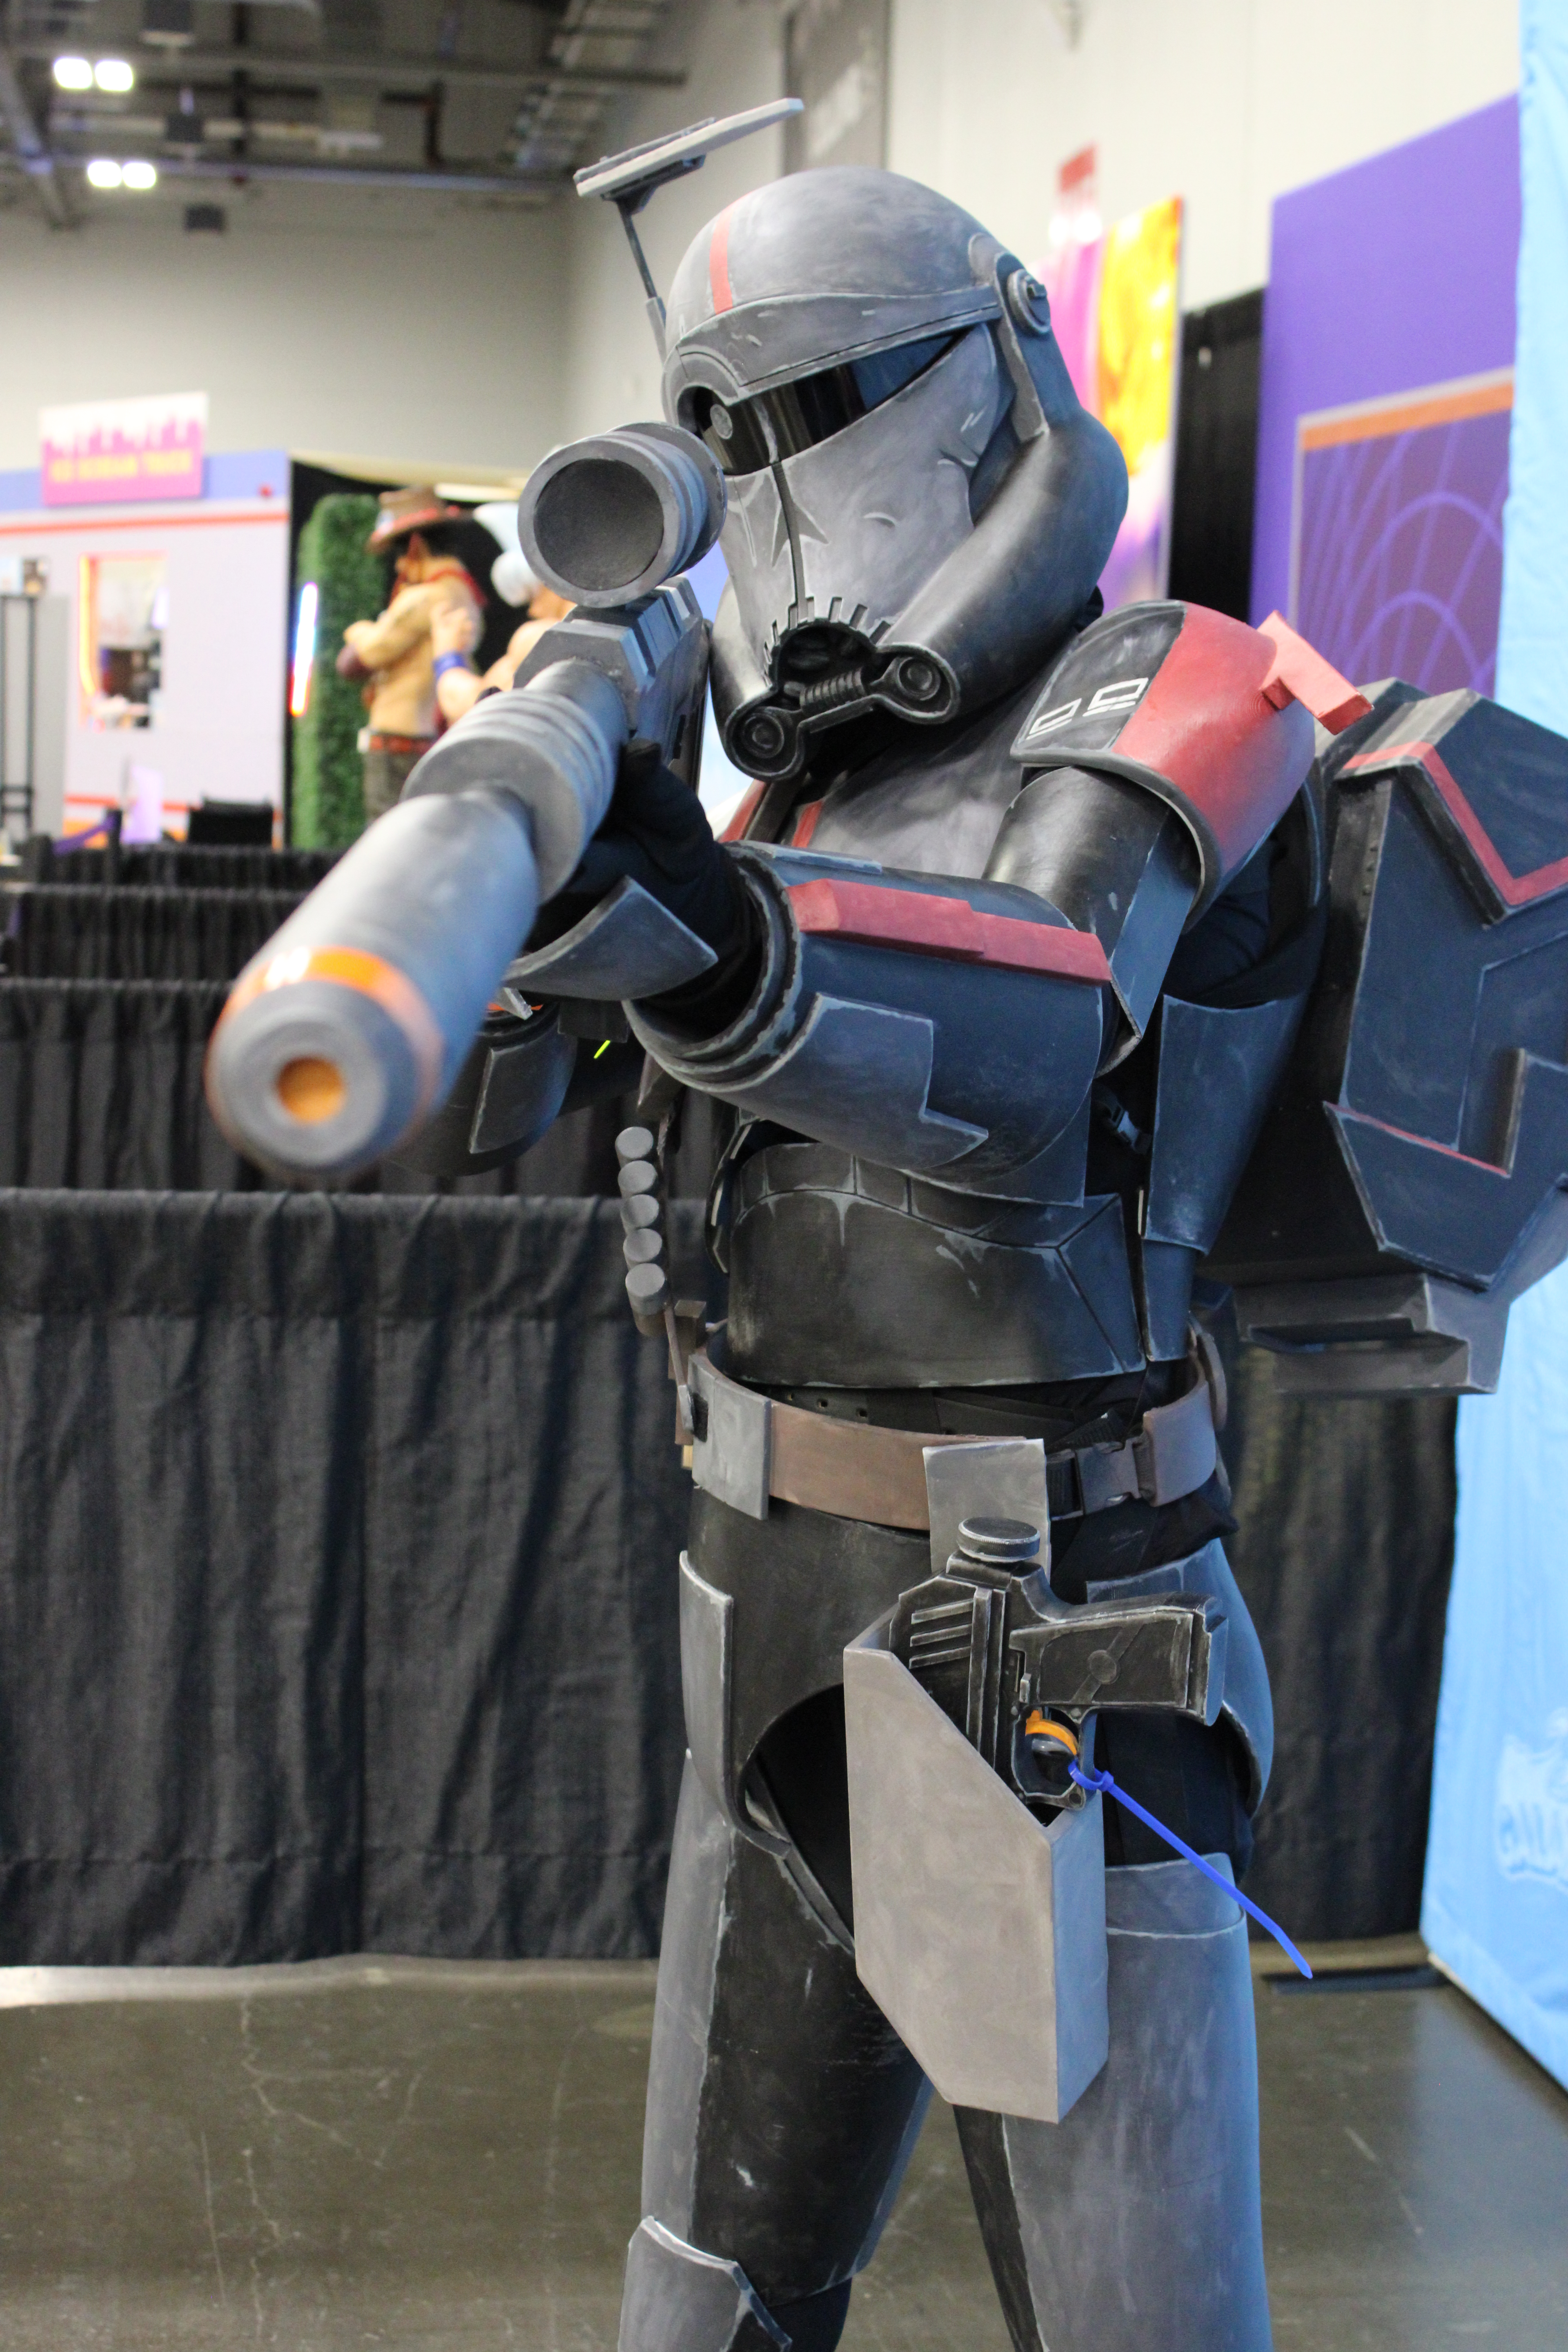
For the weapons, the pistol slides into my holster, which was heavily padded. The rifle was designed in the files to be a solid piece, with wooden dowels to support where the separated pieces adhere together. I thought it would be cool if the rifle came into two pieces, as it’s shown to do in both The Clone Wars and The Bad Batch. So after many weeks and failed attempts, I epoxy glued16 a threaded rod down the middle of the one end and a nut in the other. This worked. Except the barrel never laid flat against the chamber, every time it was screwed together or apart it made a horrifying cracking sound, and felt unstable to hold in my hands.
So I sawed out the rod.
And glued it back together. With great trials, gorilla super glue17, and some paper.
It feels…slightly better to hold. But the fact that this 4.5 foot long rifle is only held in one piece by some paper, discomforts me.
Anyways! I prepared the pieces for painting by sanding18 everything, using Bondo automotive repair19, sanding it again, and spray paint priming20 everything.
After all that, it was time to paint21. Every little thing on this cosplay is completely hand painted. The base coats even. I wanted to come as close as possible to The Clone Wars animation style as I could in the tight timeframe I had, by now it was about three weeks. I mixed up half a quart of paint for both the light and dark grey, storing it in reusable plastic paint cans22. And began painting. I started by getting everything’s base coat(s) done. After laying down the two primary grey coats, I put on the red. Once all the main colors were done and dry, I began slowly “weathering” the pieces by mixing up two lighter greys and painting them on the hard edges, layering it to be more opaque as I went to draw the eye to certain areas.
And then it was time to texture. For this I kind of…pseudo-dry brushed on everything just a slight value lighter than the base coats, and I made sure to make the texture more dense towards my upper body, as I once again was trying to lead a viewer’s eyes up towards my helmet.
Finally, it was time for final touches. The skull on the right shoulder pad was intimidating to start, but ended up being easier than expected. I blocked out the basic shapes in white and slowly built up the details, with the line art being painted on last. The crosshair on the helmet was also easier than expected, but the visor was not. I painted directly onto the visor — which I don’t think I could’ve avoided or done better, but the texture luckily ended up being pretty nice. And it didn’t get in the way of my vision. For the little surprise this cosplay has in store…after the October photoshoot, I added a small toothpick holder to the belt.
After all of that, I sealed everything with multiple coats of rustoleum matte sealant23, making sure to be generous with the sealant around the leg pieces as those experience the most damage.
All in all, the cosplay is pretty comfortable to wear! The backpack is very heavy, but that’s really the only complaint.
This blog diluted down the creation process to be short and readable, so I really undersold how hard this was at times. I failed many prints, mostly due to adhesion issues or strange supports. But in the end I had fun, and learned loads from it. Even if I’m not happy with it now, I have the knowledge on how to make a better one in the future.


Materials used:
- QIDI Q1 pro 3d printer ↩︎
- Galactic Armory ↩︎
- Crosshair STL files ↩︎
- QIDI slicer ↩︎
- Polymaker CosPLA ↩︎
- Weld-16 ↩︎
- Arrow hot glue ↩︎
- Elastic ↩︎
- Parachute buckles ↩︎
- Velcro ↩︎
- Upholstery foam ↩︎
- Shade 3 welding visor ↩︎
- Neodymium magnets ↩︎
- Dual y connection helmet fans ↩︎
- Compact battery pack ↩︎
- e600 epoxy glue ↩︎
- Gorilla super glue ↩︎
- Sandpaper ↩︎
- Bondo repair ↩︎
- Spray primer ↩︎
- FolkArt acrylic paint ↩︎
- Reusable paint cans ↩︎
- Rust-Oleum sealer ↩︎
