
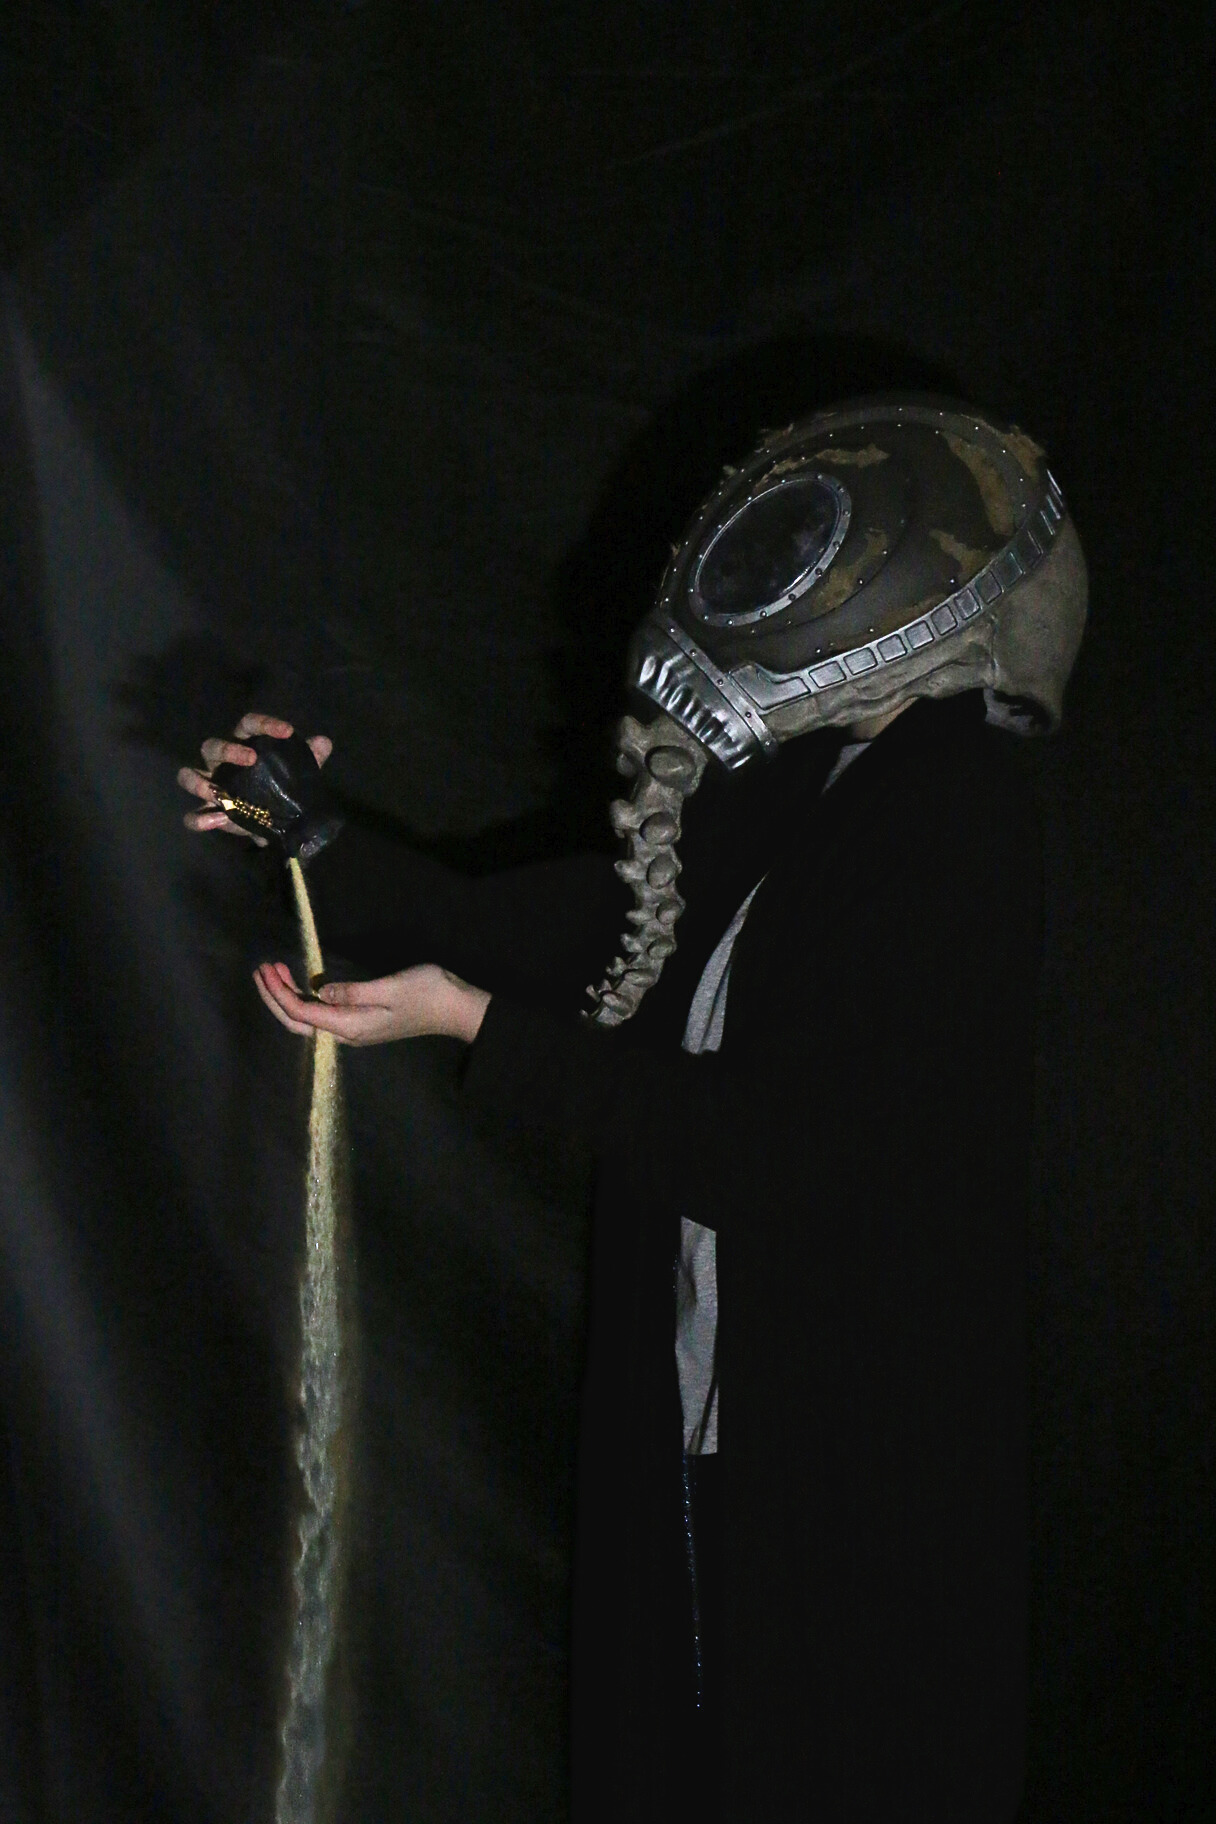
Morpheus and The Corinthian are characters from DC Comics: The Sandman, which was later adapted into a show on Netflix. Morpheus has many titles — though I will refer to him as either Morpheus or Dream. He’s also known as The Sandman. Morpheus is the endless of dreaming, meaning he is not a god but rather something greater. The embodiment and personification of dreams and nightmares. The Corinthian is a nightmare formed by Morpheus, whose eyes are replaced with mouths.


I watched The Sandman for the first time sometime in 2022, but it wasn’t until the second season came out in 2025 that both me and my mom decided to cosplay Dream and The Corinthian. I really wanted an excuse to make the Dream Helm, and she really likes the Corinthian. What more do we need?
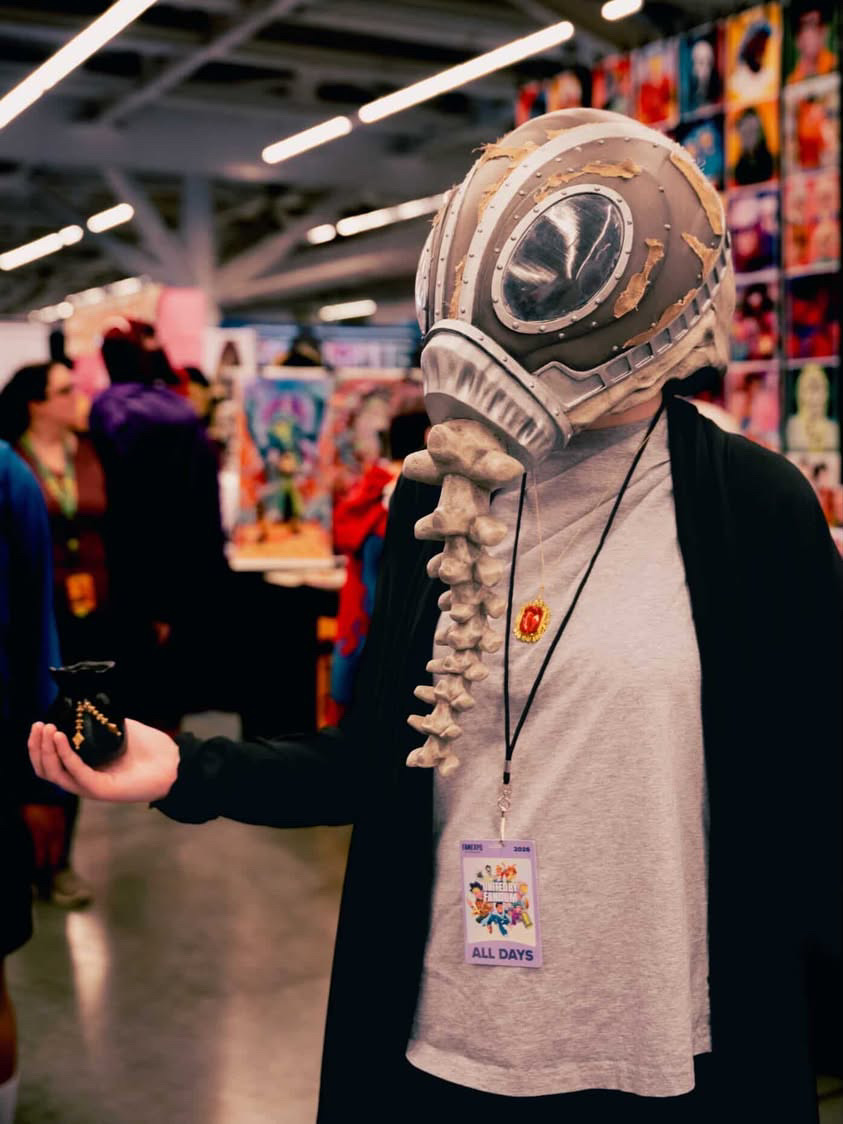
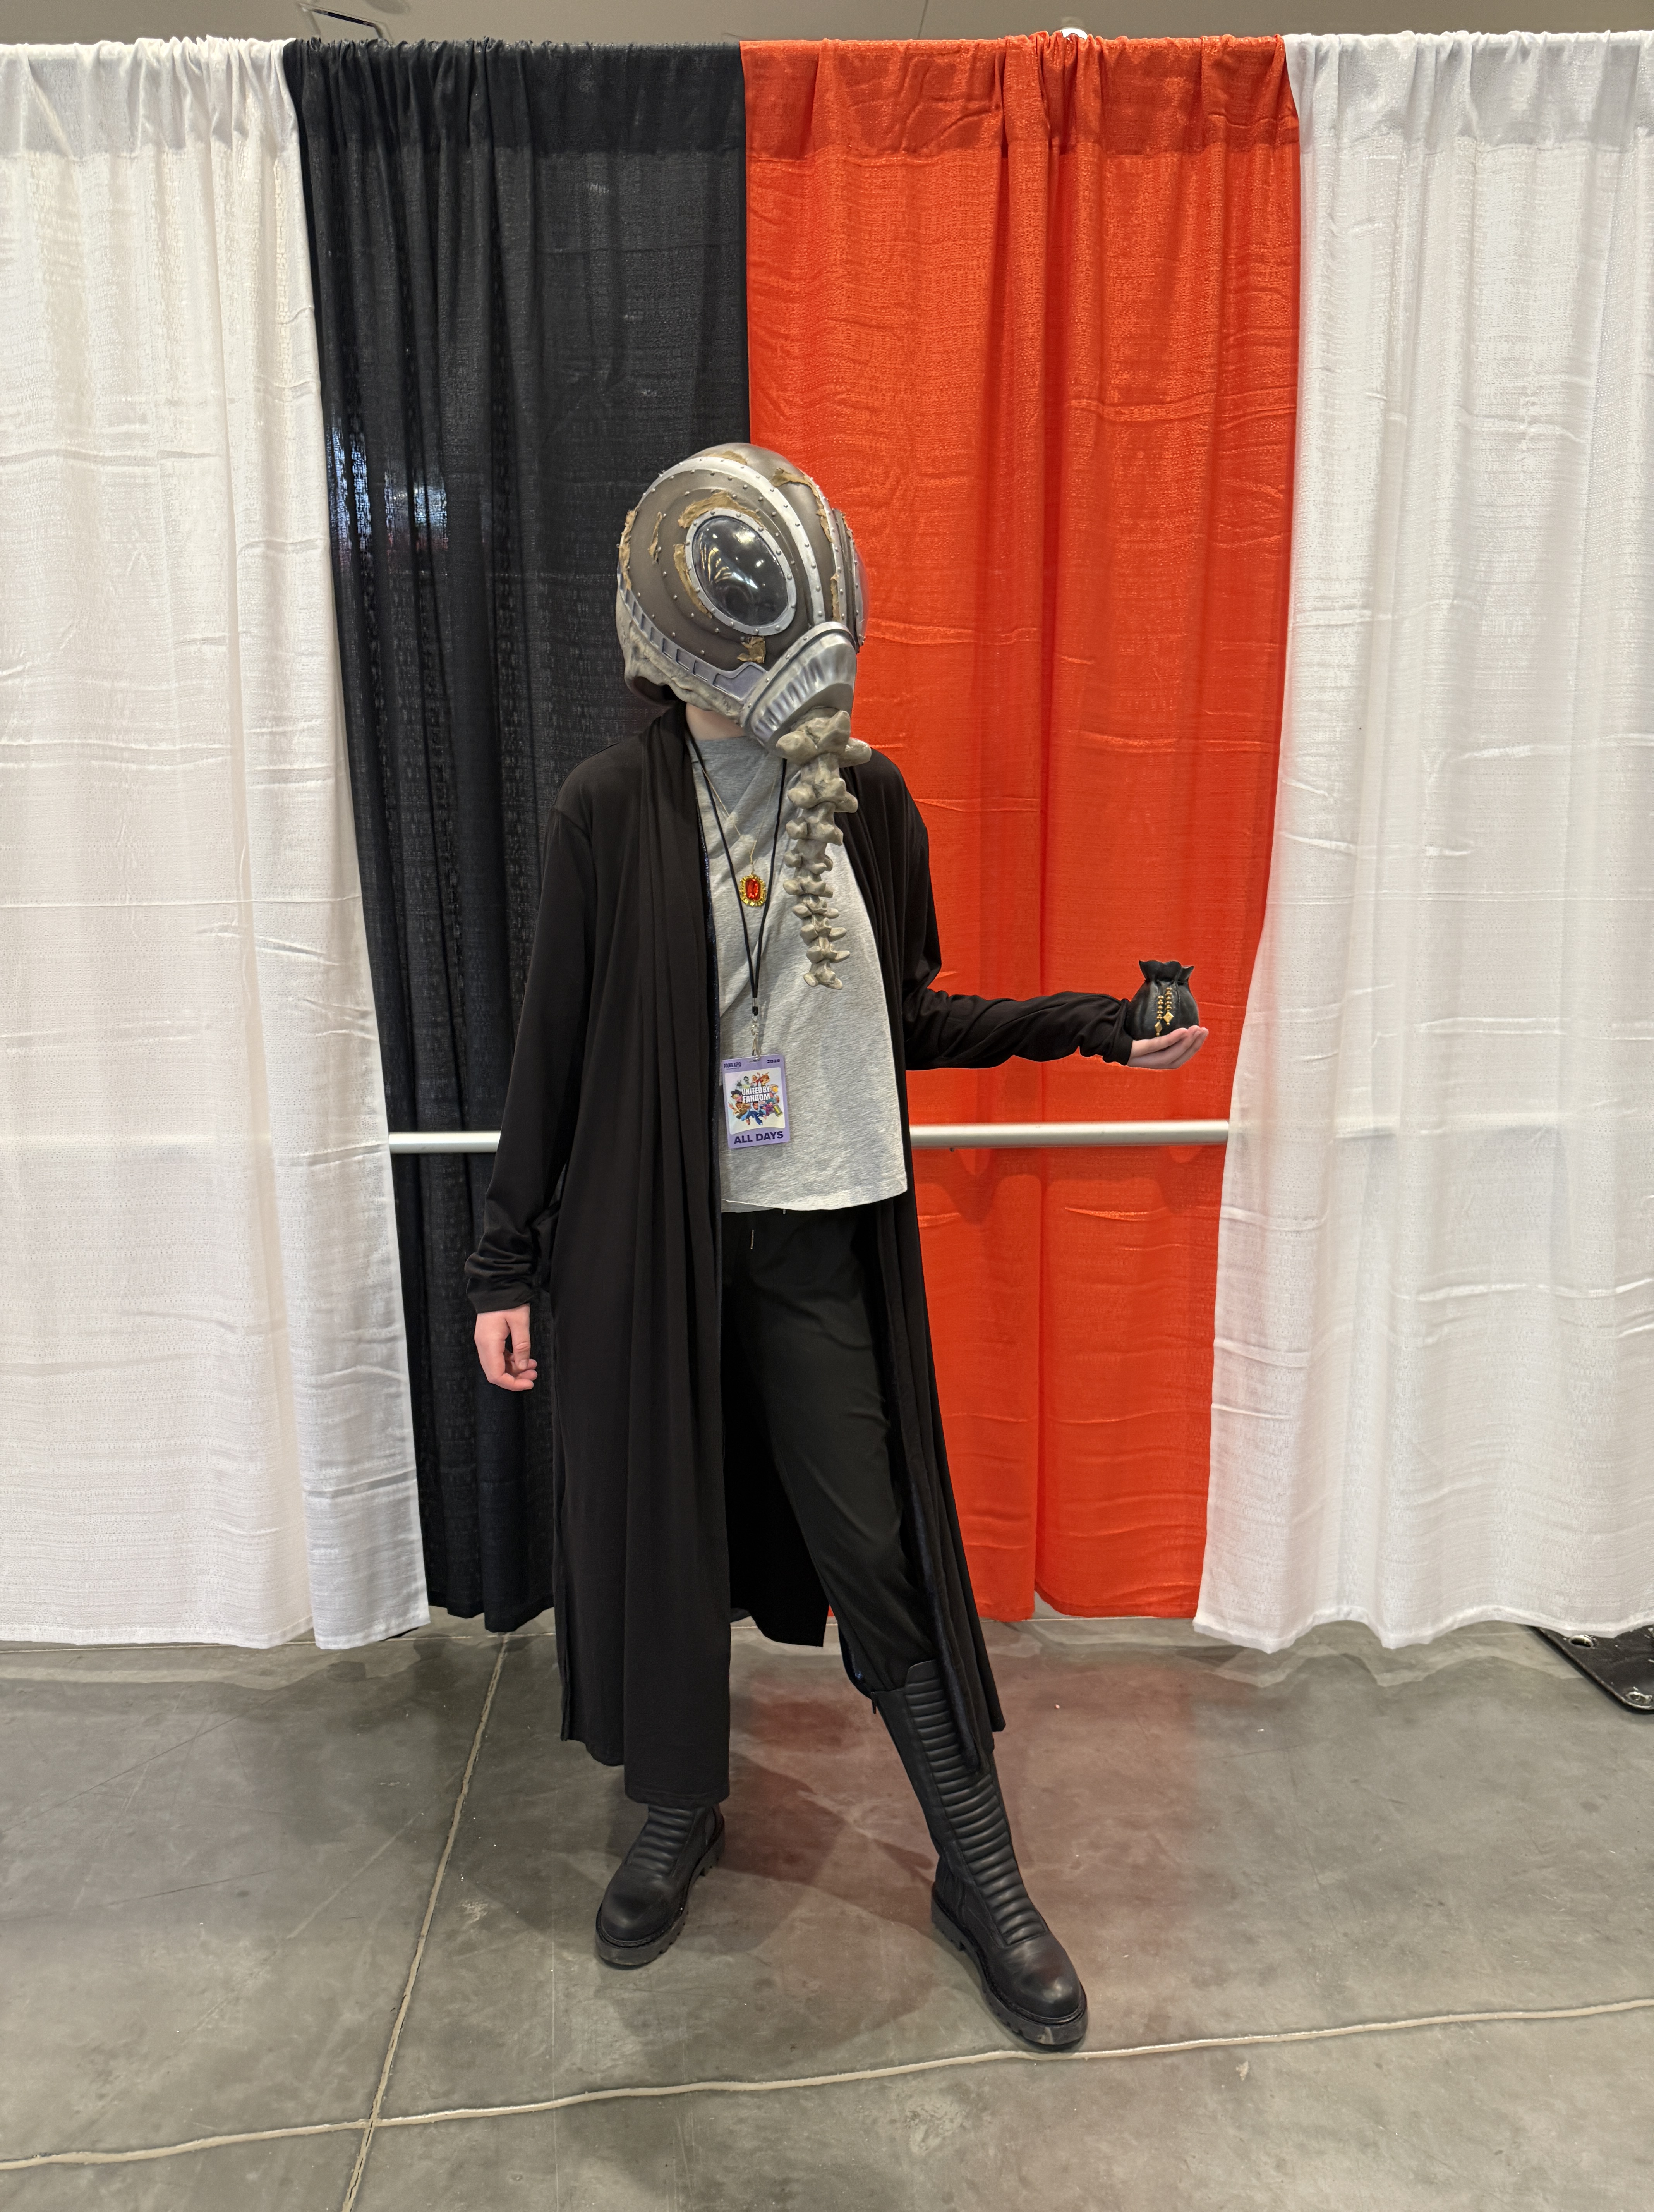
Dream first appeared at Steel City Comic-Con in August 2025, and after making his helm had a photoshoot in March of 2026. Then it attended Fan Expo Cleveland a few days later.
Now, how was Dream brought from his kingdom into the waking world?
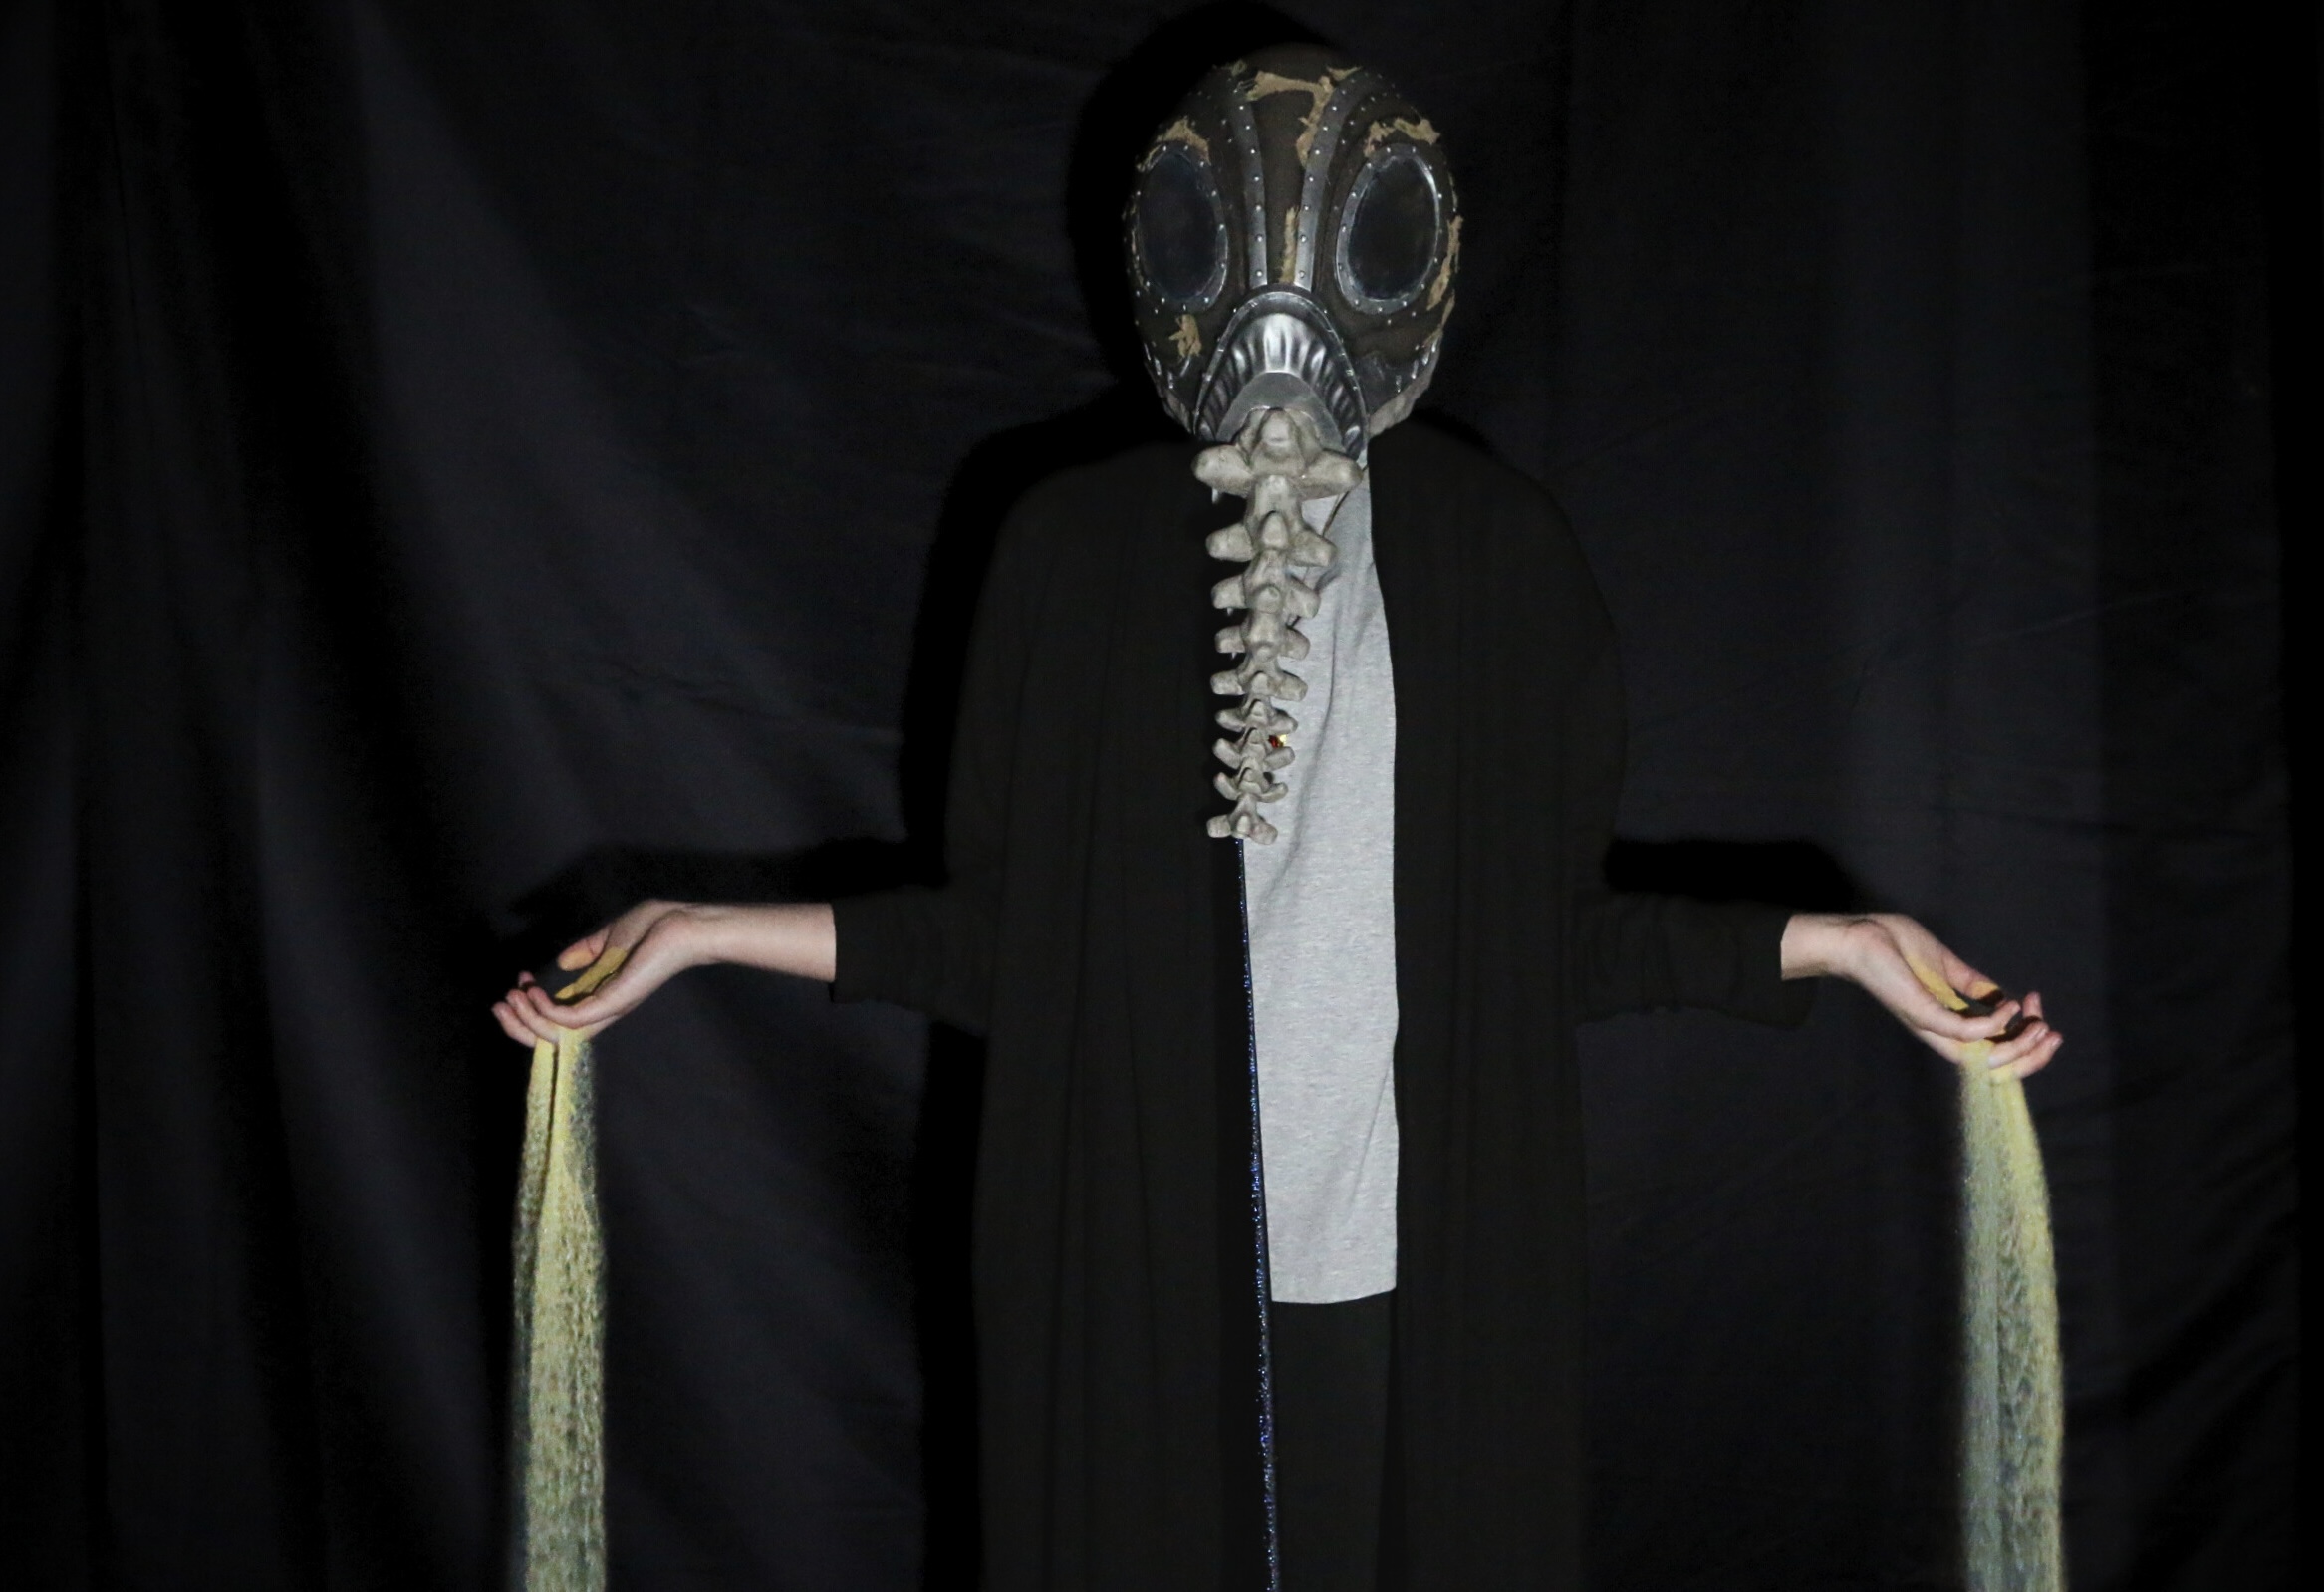
Dream’s iconic robe was just a black robe I found on Amazon! But this robe is deceiving, there’s more to it than just a black robe. In the show, specifically in the (second or third) episode, Dream has to talk to the Fates to try and figure out where his “tools” went, which leads to a scene where he catches a snake in his robe. For a very brief moment, if you pause the screen just as he’s standing up, you can see the universe in his robe. Swirling galaxies and worlds that seem to be an entirely separate entity from the robe. I adore this detail, and knew that when I got his robe I had to include it somehow. I found this wonderful shimmery fabric1 that seemed perfect for what I was envisioning, and got some help with lining the visible parts of the robe with it! On top of just looking awesome when you catch a glimpse of it and adding my favorite thing to abuse with cosplay, visual interest, the lining has added a bunch of extra weight right at the bottom of the robe. So now when I walk, it really flows behind me. And if anyone has seen the show, you know that Dream loves a dramatic cloak flow.
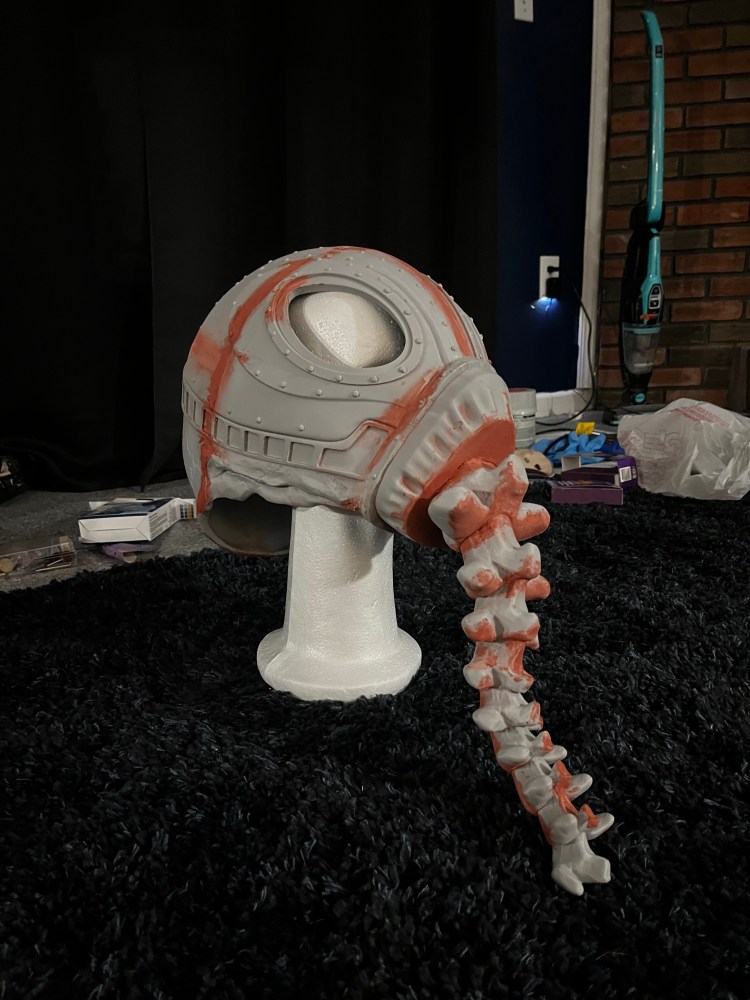
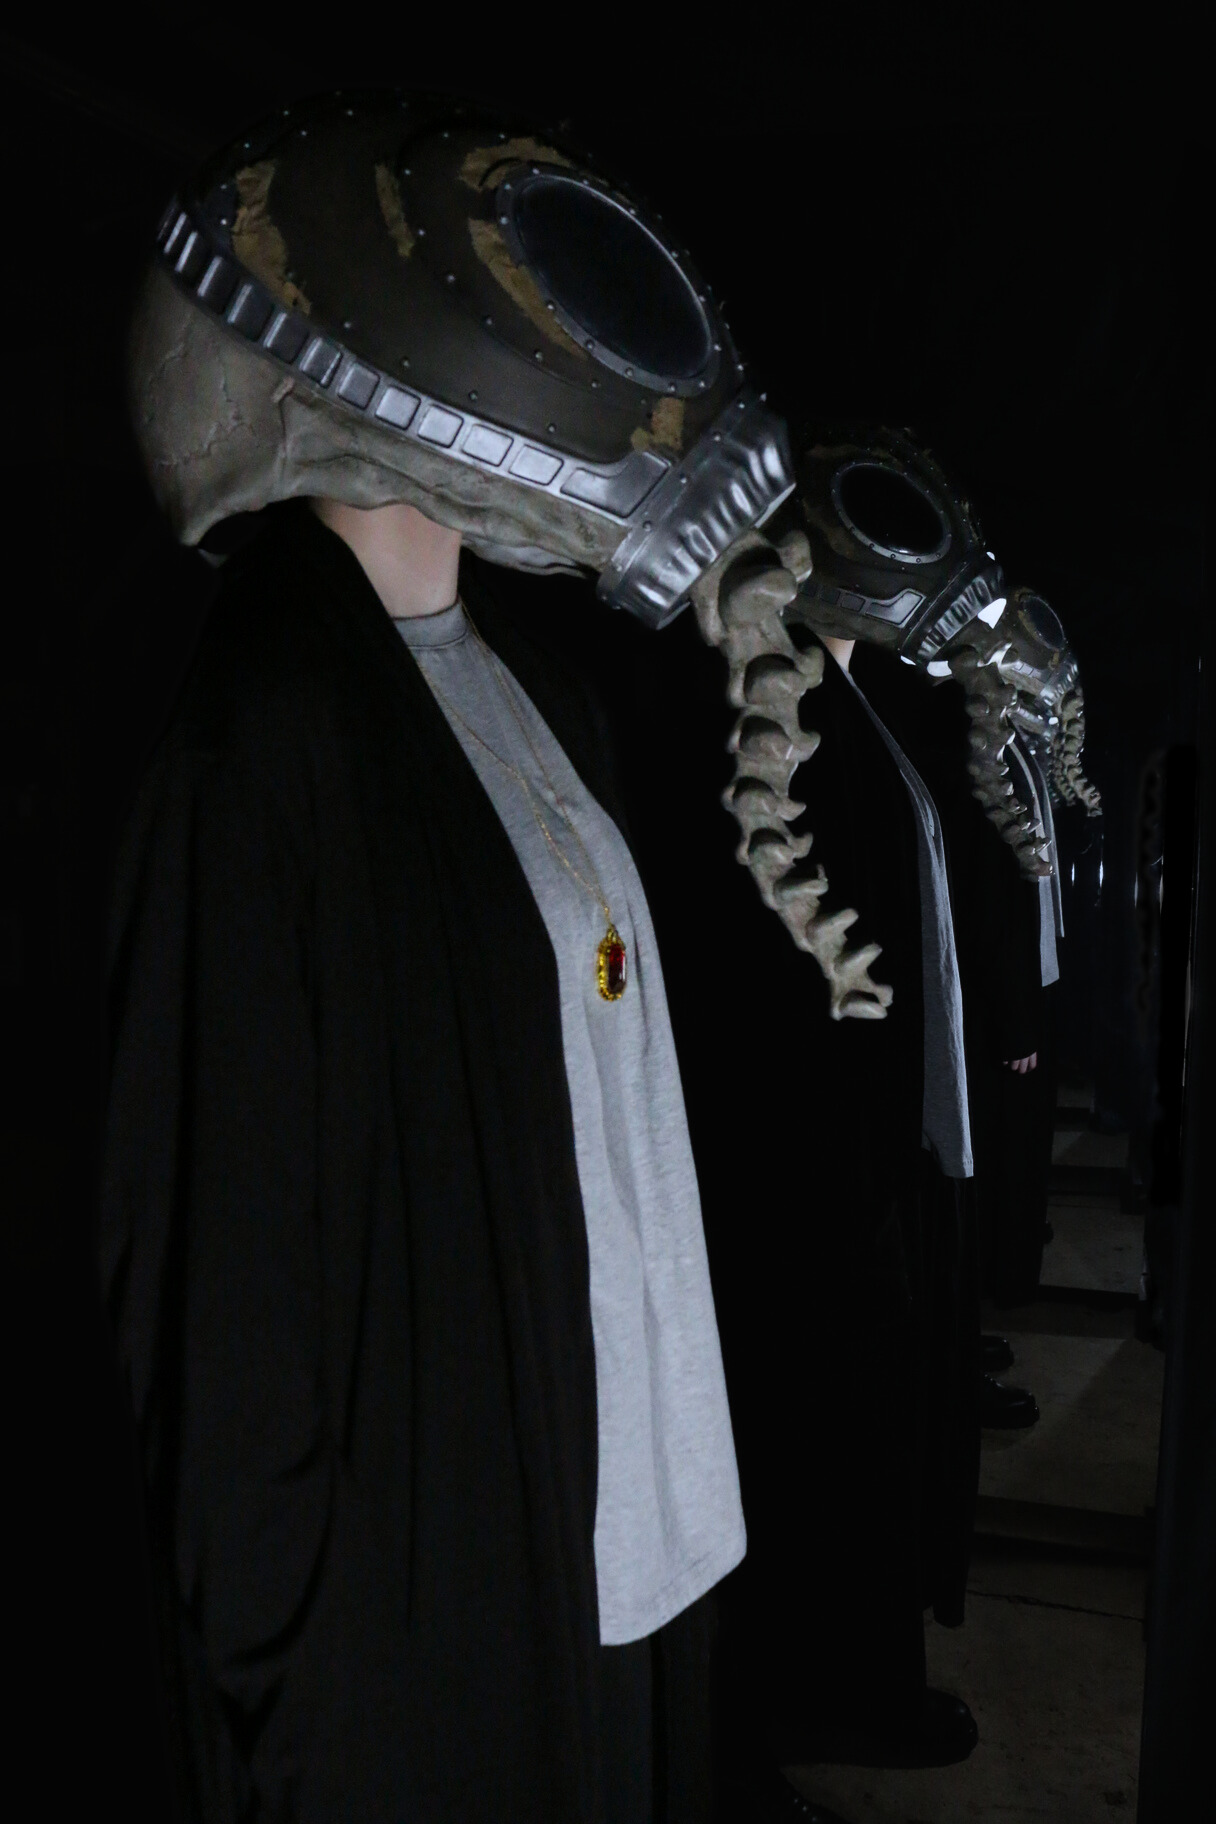
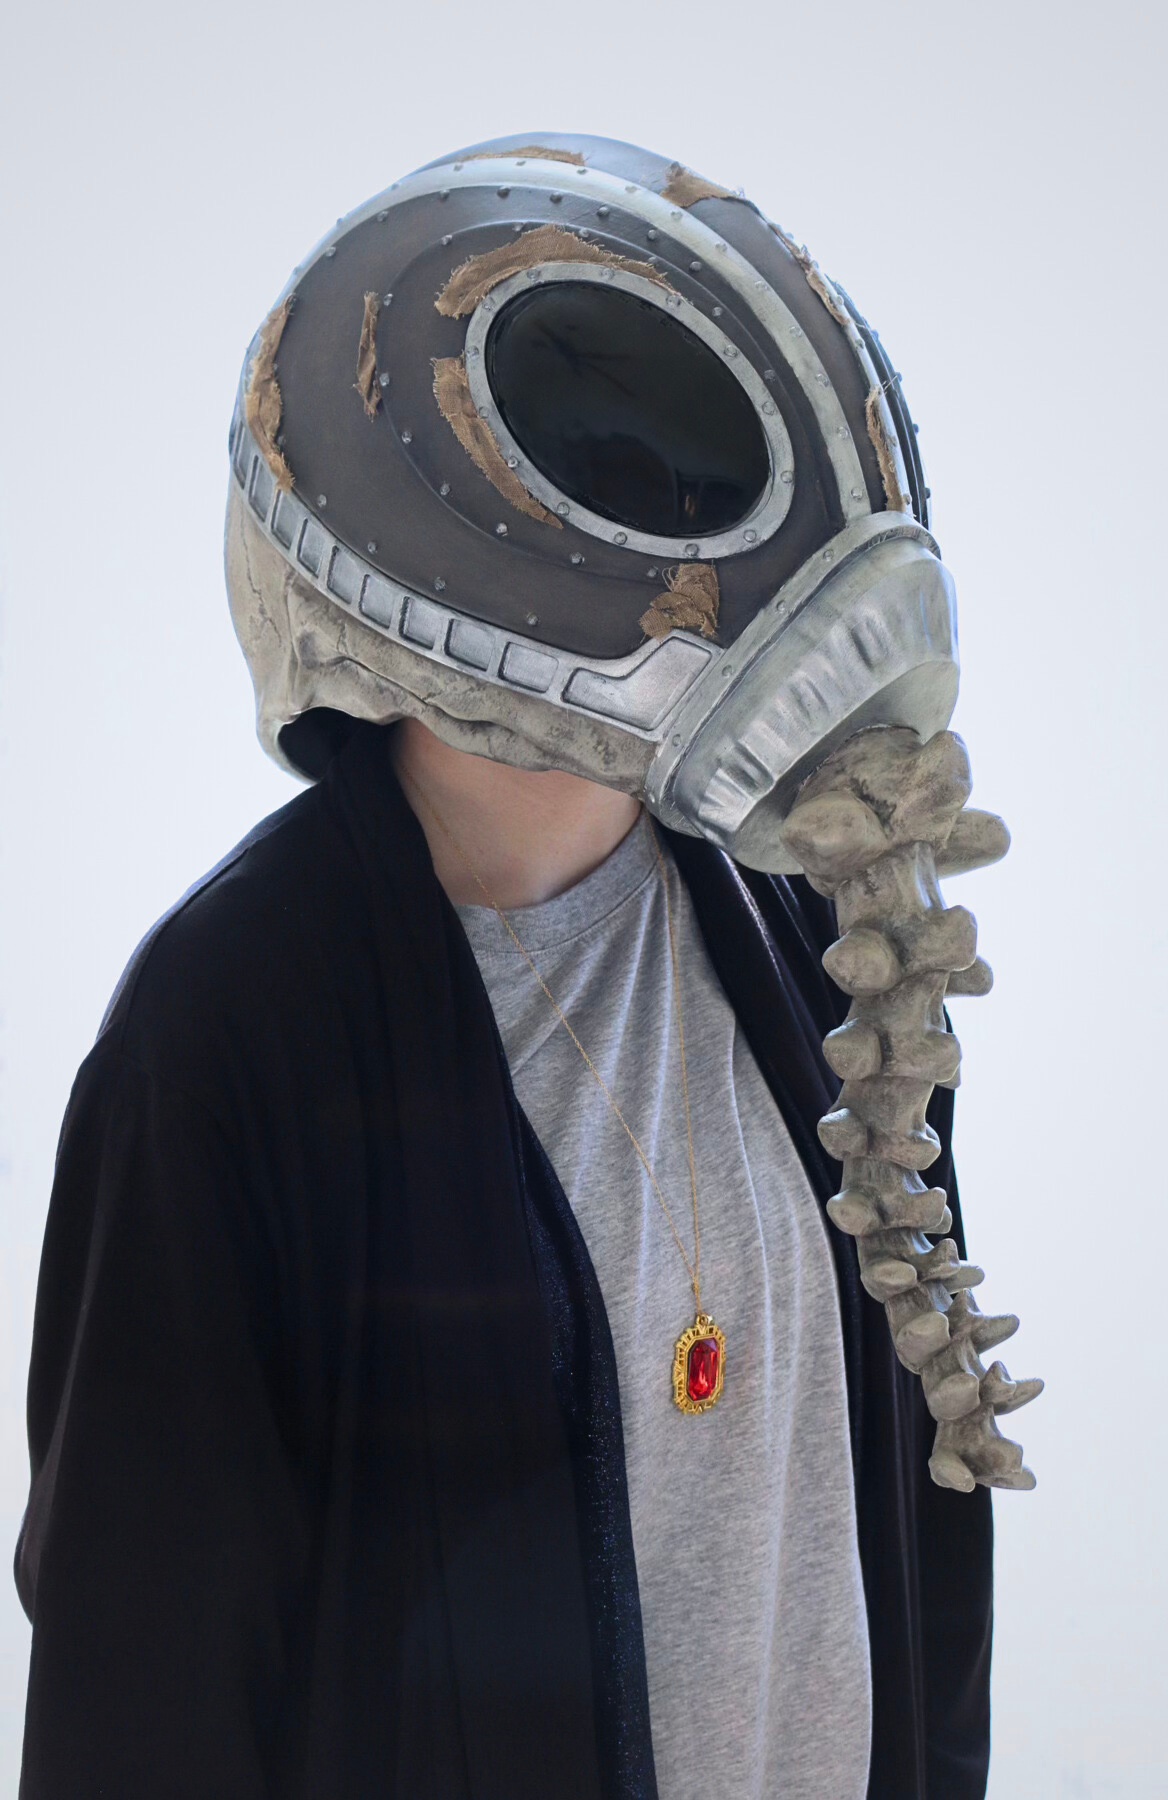
Now for the Dream Helm, the show piece. This helm is entirely 3D printed using MysteryMakers 3D’s STL files2 and Polymaker CosPLA3 on my QIDI q1 pro4. The helm took just over a week of inconsistent printing, thanks to the lovely creator of the files this helm came adapted to small print-beds so I didn’t need to do any nonsense cutting to fit my small printer myself. And even better, it came with built-in connectors. What more could a cosplayer want? Assembly was super easy thanks to those connectors, I just slapped on some Weld-165 on the pins and held it together for a few seconds. The great thing about Weld-16 besides the “causes cancer in the state of California” label is the fact I never have to worry about my prints falling apart at the seams, I’ve tried to undo recently (in the last 10 minutes) adhered pieces that I put on backwards, and the parts have always broken before the glue. I personally haven’t used 3d-gloop, but with the amount of glue I use this is much more affordable.
After I got the helm all glued together, it was time for prep. Now I really wanted the seams on this helm to be minimally visible, unfortunately some pieces didn’t fit quite right and still don’t, but at least the transition between said parts is smooth! Right…? Anyways, I first started off by applying a generous slathering of the regular blue-grey Bondo filler6 to the interior seams to add some extra strength, especially around where the vertebrae mount to the helm. After that dried I went through probably six or eight rounds of Bondo glaze7 and sanding. Bondo glaze is perfect for the seams where pieces meet, because unlike the regular Bondo that’s really textured and heavy, Bondo glaze still fills in narrow gaps but without all the texture normal Bondo has. I used a lot of 60-grit sandpaper8 to take down edges on the print, and 80-grit9 to take down the Bondo glaze until I was happy enough to start polishing it up. I probably should’ve gone higher, but I went from 120 grit10 to 320 grit11. It works well enough. Oh, I didn’t mention previously but Bondo glaze is also perfect for smoothing out rough spots in your prints, such as where supports connect or on round surfaces where layers might begin to be more obvious. Just after fully printing this, I learned about the automatic layer adjustment setting12 that allows a printer to make nearly perfectly curved surfaces. Of course. For those wondering, on Orca Slicer on your top toolbar you select adaptive layering, turn “quality / speed “ to zero, and turn radius to 10. Then click on “adaptive” and “smooth.” This setting can greatly increase print time, but I find it’s worth it.
After all that treacherous sanding, my fingertips were able to get a break from the agony I put them through as now it was priming time. As with crosshair, I used Krylon white primer13.
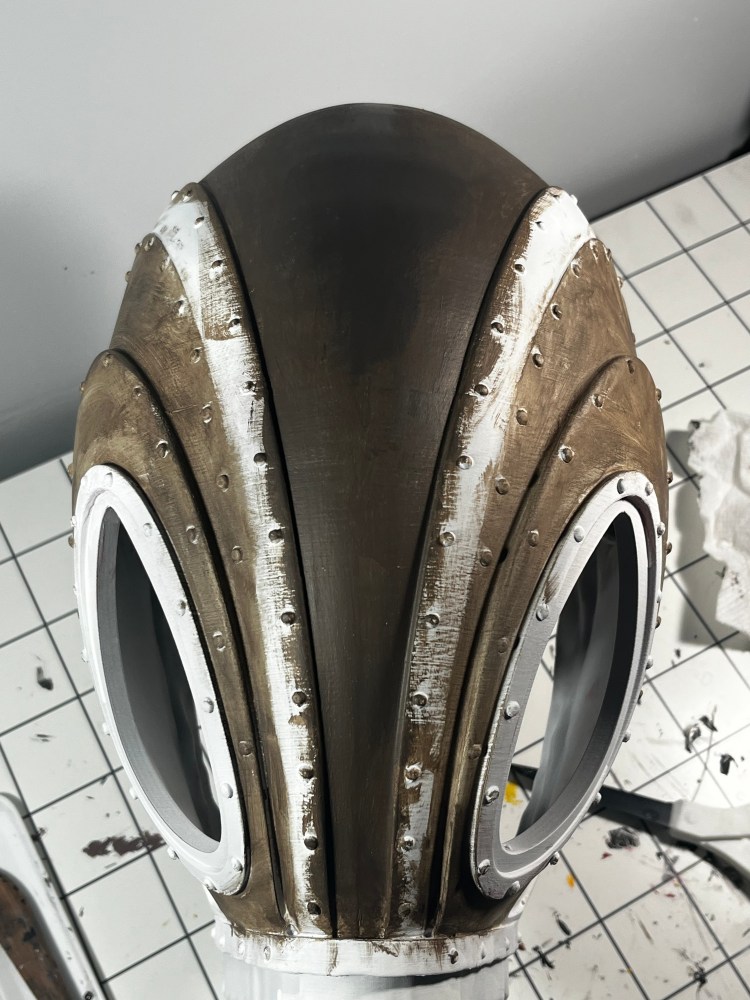
And then naturally came time to paint! Now, there isn’t a single good reference picture of this helm anywhere since the show has such drastic color adjustments and the prop used behind the scenes looks completely different from everything you see on screen. I’ll drop the image I referenced under this paragraph. I used FolkArt acrylic14 for this project. First I started with the brown, since that was going to be the hardest (and really only thing) to color match. I began with a light almost swampy brown to try and get it close to the behind the scenes shot, but after it looked horrible, I just decided to use it as an undertone and used thin layers to coat where the real brown would eventually lay. Then I mixed up a far darker and richer color, more like leather, and decided to use that as the base coat. After the leathery base coat was done, it was time to make it look more like leather than it currently did. With a shade type brush, I drybrushed on a really dark brown around every corner and edge. With a dirty and sad looking stencil brush I drybrushed on a lighter and oranger color like worn leather in the center and again on the very edges. I also dabbed it down in random spots to an effect similar to the pores in leather.
(image)
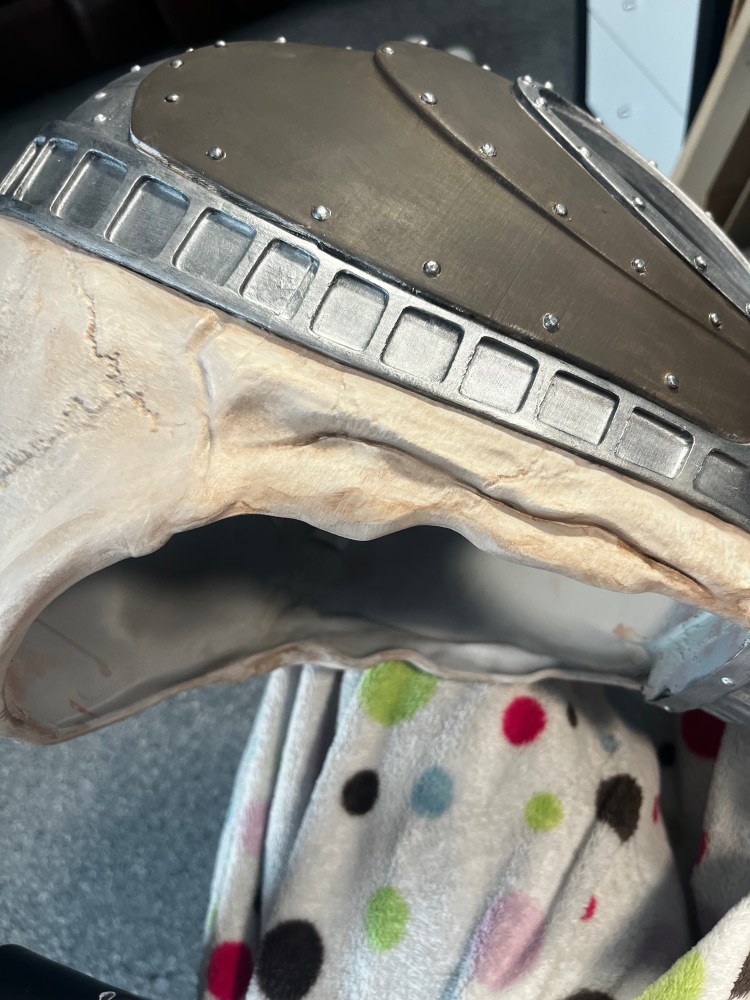
For the silver, I first started with a dark grey base coat, completely abandoning all previous knowledge I had ever had on how painting props works. After realizing that was not at all how to make something look metallic, I quickly repainted the grey to black. I then promptly completely overthought how to make something chrome with acrylic paint, thinking it was going to take very tedious and complicated washes and drybrushing. Instead of doing that, I found two metallic paints and one metallic “wax.” I did some test swatches on the back (having been too lazy to prime and paint a whole other piece, (I’m a bad cosplayer, I know.) and pretty quickly figured out the most accurate one. The first I used was the Bella Rose metallic wax15, this stuff came in a little pot that I sponged on. And it gave beautiful results, with a rich and reflective color and an amazing texture. But…it was too blue. So then I tried Plaid FX’s armor metallic acrylic paint16, which is technically meant for flexible surfaces like EVA foam. This paint went on a bit too thin, and would’ve required multiple coats when I had a very limited amount of paint left. But it gave a really nice dark kind of gunmetal color, which while I adored, was not at all what I needed. Finally, I tried the good old Delta Creative Ceramacoat17, my favorite acrylic paint (that can’t be found in stores anymore, thanks Joann’s.) and…it was the winner! The perfect warm tone silver with just the right amount of reflection. This took about three or four coats, not because it wasn’t opaque enough but because I did a bad job on the first coat and then everything was uneven afterwards.
The bones were secretly my worst enemy. It took five total repaints. Which was completely user-error. I just kept messing up the colors over and over, it was too saturated. Currently, it’s probably not dark enough, but I can’t be bothered to repaint it again. I started with a greyish/greenish/brownish light base coat, and used a wash to get the bone texture. The wash is just a darker mix of the previously mentioned base coat, precariously mixed with tap water and wiped off with paper towels. It did actually work. Once I was happy with the wash I very lightly drybrushed a color much lighter than the base coat on the edges that protruded the most, as they would be the cleanest.
After doing some quick touchups to paint that got where it shouldn’t have been, I sealed the helm with Rust-oleum matte spray18. And then it was interior time.
I used a construction helmet suspension19 piece to actually secure it on my head, which is always my preferred method of making any kind of helm or hat wearable. I hot glued20 it where it needed to sit, and glued a whole bunch of poly foam21 around it to keep it from wiggling around as much. Then I glued some Velcro22 in the front for fans and some elastic23 in a cross shape at the very back of the helmet, that I slide a mesh 1lb bag of lead diving weights24 into to counteract the front-heavy action of the vertebrae. (I will add that after the first photoshoot, the lack of fans inside the helm created condensation from my breath and I suspect the moisture made the hot glue break down. The inside of the helm is now padded with foam as I did not have a suspension replacement.)
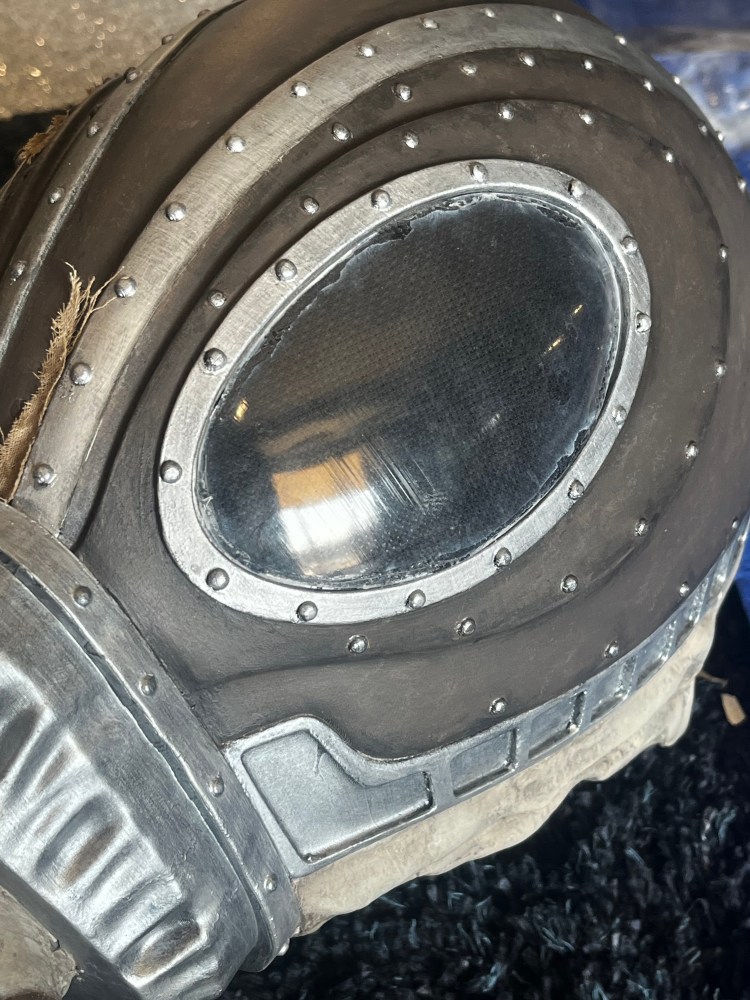
The lenses by far were the most complicated piece of the whole cosplay. I started off by heating up Worbla Transpart25 with a heat gun26 and molded it over some templates I 3d printed that the STL files came with. To get them dark, I originally tried to use automotive window tint. Unfortunately, it’s meant for glass and not plastic. And not dark enough—because it was legal. So then I tried spray tint and did a whole bunch of layers, but I really couldn’t see out of that and it was weird and cloudy. In a desperate attempt, I cut up some screen mesh into an oval with two slits on the short sides to try and glue to the inside of the lenses. But the mesh wouldn’t glue or sew together at the slits, which were needed as the mesh wasn’t flexible enough to bend to the curve of the lens. Just as I was on the brink of failure, I decided to try trusty cross stitch Aida fabric27. Which, surely, wouldn’t have any visibility because it was too far from my face, I thought.
Until it wasn’t. And worked perfectly, and was flexible enough I didn’t need to cut it. So I used Loctite superglue28, specifically the stuff in the black bottle with the red buttons(?) on the sides. I glued the fabric to the lens, and then the lens to the helm. And the problem was solved.
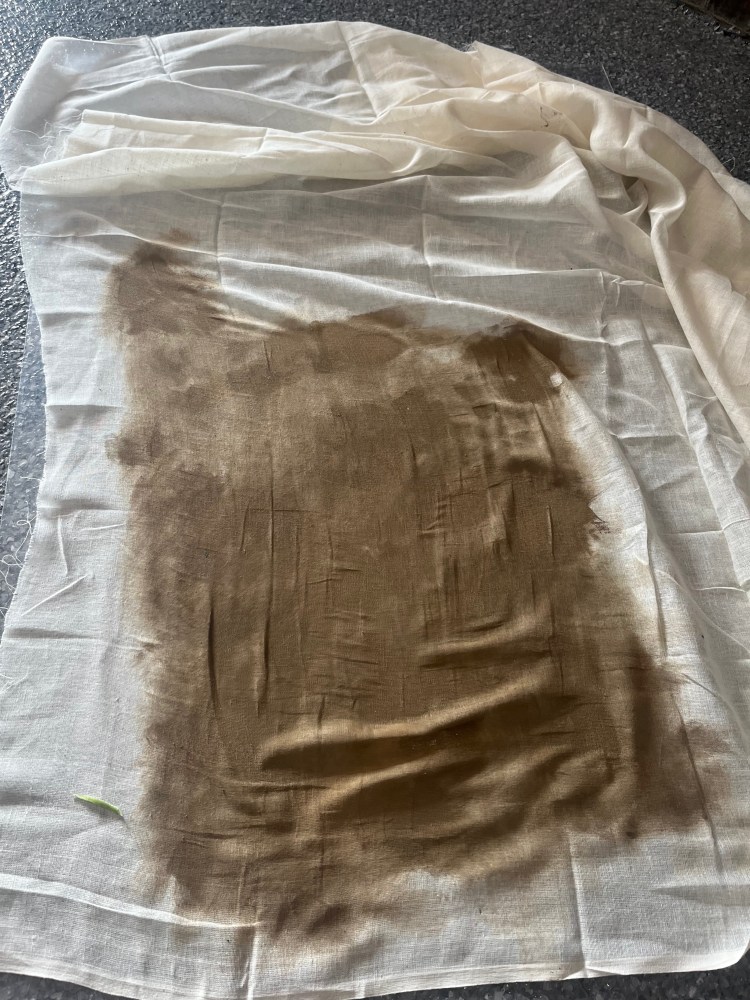
All that was left was to paint, cut up, weather, and glue…cheesecloth…to my helm. Now, if you watched the show you probably didn’t really ever notice it, but the Dream Helm has a bunch of swirly torn weird stuff on it. And the best closest I could think of that would actually work and look good to recreate that was cheesecloth. So I laid it out on a sheet of plastic, really watered down a bunch of paint I mixed up, and essentially stained a huge piece of the fabric. Then I used non painted pieces to make templates of the shapes I needed, and used those templates to cut out painted pieces. I tore up the edges of the painted pieces by pulling at the edges with my fingers and rather aggressively pulling it against half a brick I found on my porch. When it was sufficiently damaged, I glued it down with Loctite again.
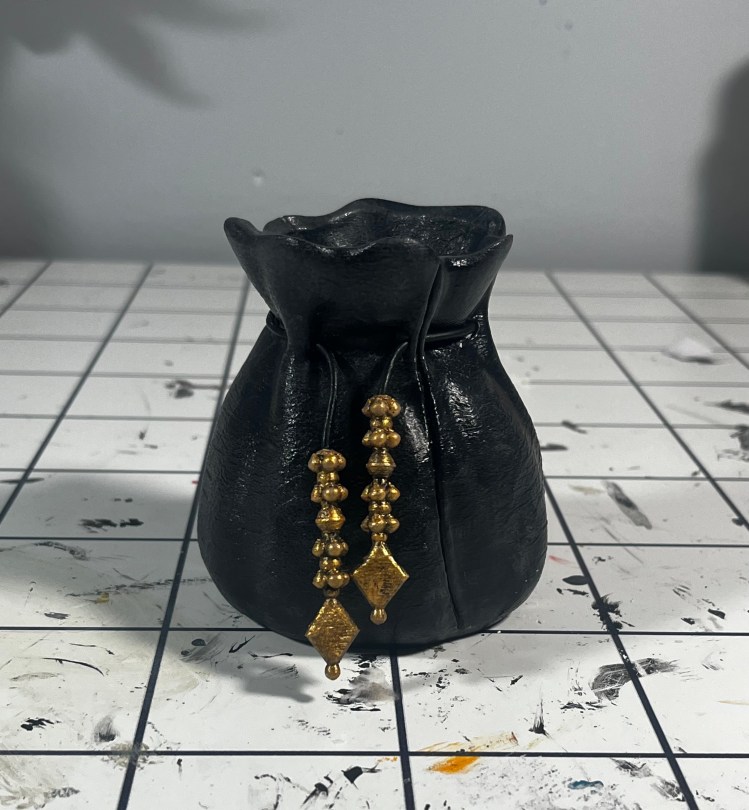
Now the helm was completed. So I made his leather sand pouch, which I 3d printed. Odd choice, I know, but I didn’t want to get a leather pouch for some reason. The files are also from MysteryMakers 3d29. I didn’t have to prep it, so I just primed it with gesso30 and went to painting it. I painted it straight black and lightly drybrushed some slightly lighter grey on it to give it depth, but I honestly would have preferred it pure black. I sealed it with gloss krylon31 to try and make it look slightly more like leather. The files also came with the charms that are on the drawstring of the bag, so I printed those, lightly prepped them, primed them, and painted them with Bella Rose metallic gold wax32. After the gold wax was opaque enough I did a wash of black and wiped it off, then touched up areas where the wax got rubbed off during the wash. Finally, I took black leather cord33, pushed it through the holes in the bag, and superglued the charms to the cord.
So, he has his sand pouch, but what about his sand?
I took black foam clay34, made it in a vague “sand pouring” shape, covered it in Elmer’s glue35, and dunked it in some sand36 I bought at Hobby Lobby. Then sealed it so it hopefully wouldn’t shed. I hotglued a magnet37 to the top piece that sticks out, and another to the inside of the sand pouch so I can attach the two. This makes a con-friendly way for me to have The Sandman’s iconic sand!
That completes all that was done for Morpheus—but what about The Corinthian?
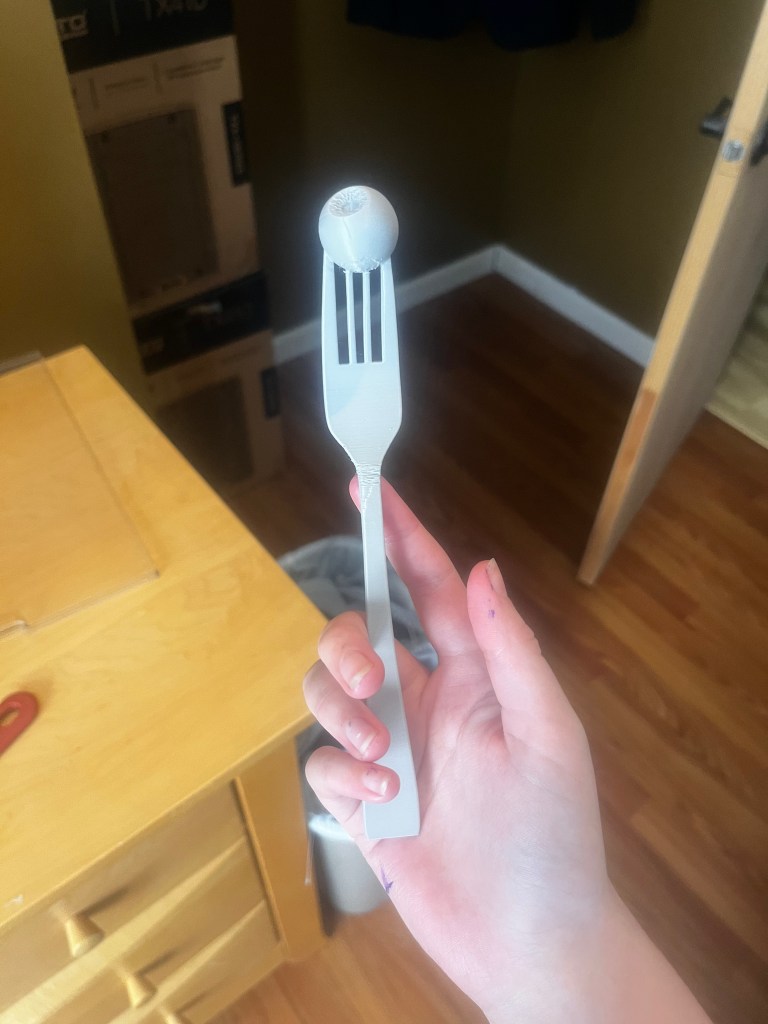
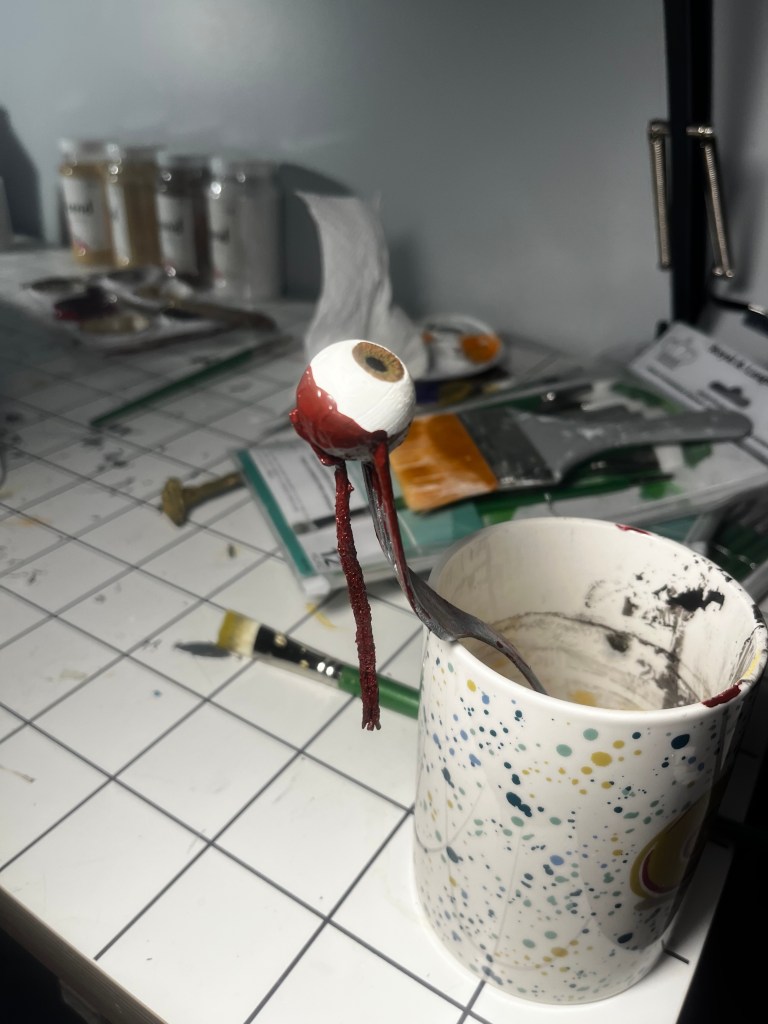
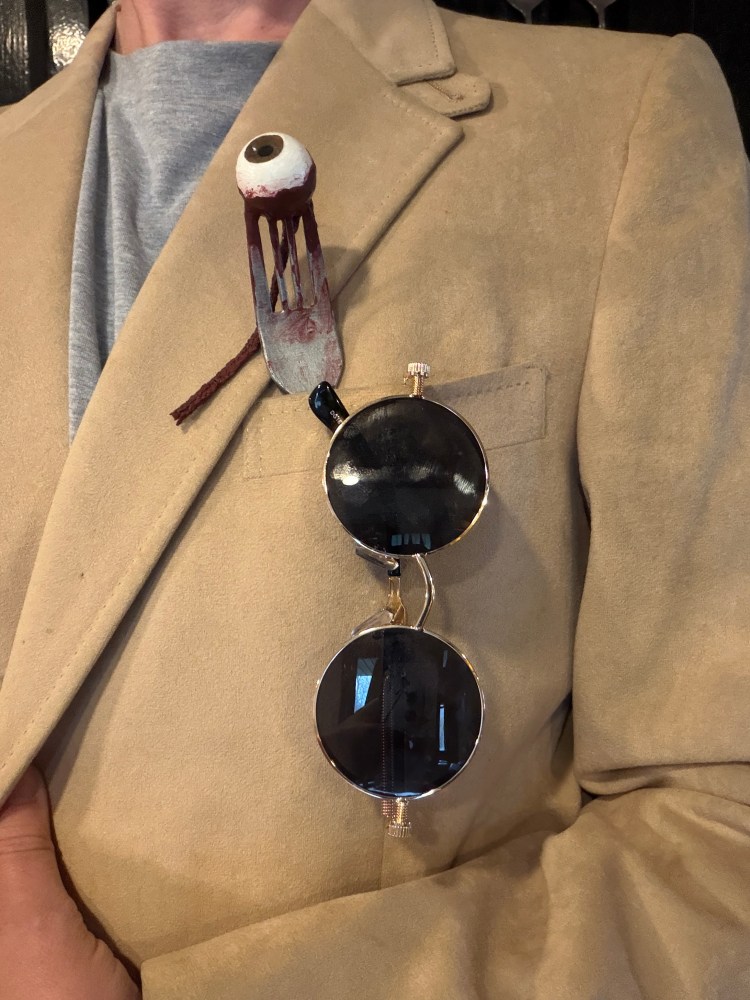
I admit, all of this cosplay was bought on Amazon (except for the blazer, which was a foxhunting coat). But I did make the eyeball fork prop, which I’m quite proud of.
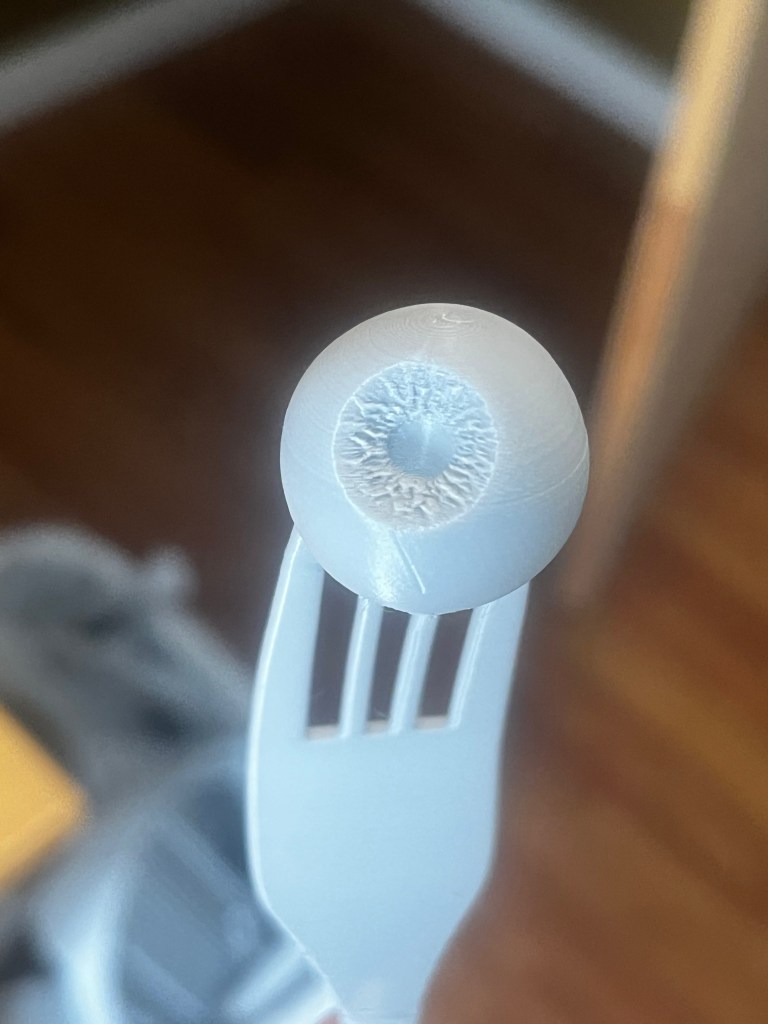
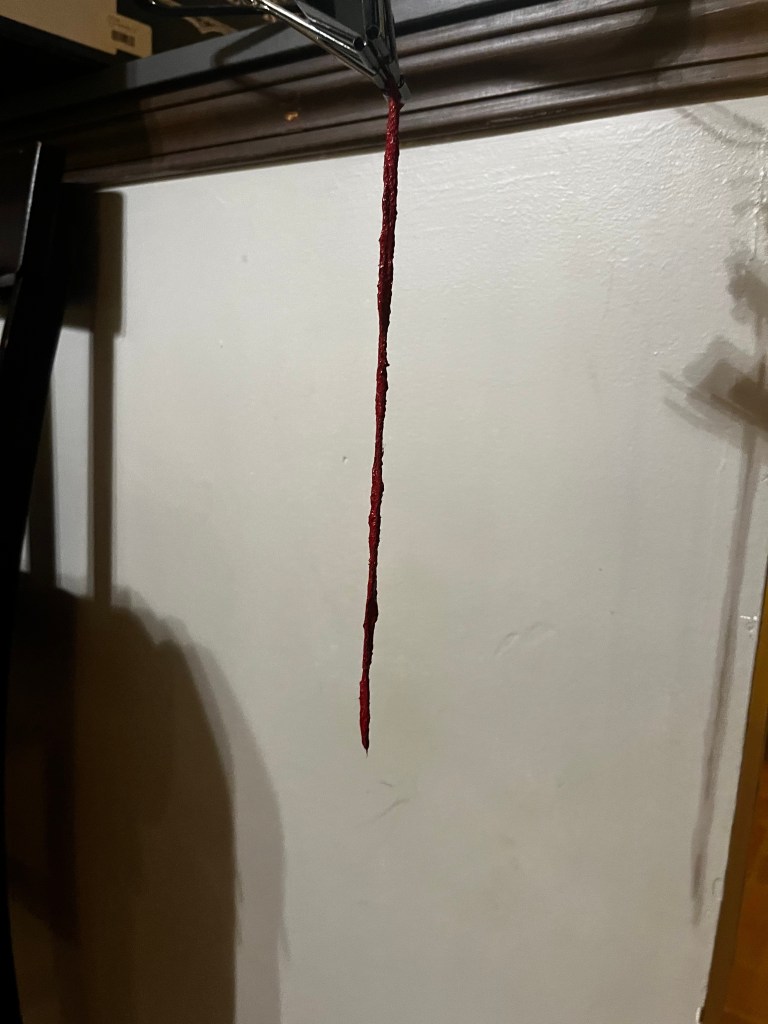
I found an eyeball and fork STL file online and put them into my slicer, adding the eyeball as a part to the fork and positioning it as needed. I thought modeling the two together was going to be far harder than this. I printed it, prepped it, primed it, and painted it. The metallic acrylic paint that I used for Morpheus is the same that I used to paint the fork with. For the eye, I mixed up a yellowish white for the actual eyeball and played around with colors for the iris until it looked believable. Then I mixed up some epoxy resin38 and poured it in the iris to make the lens—which I admit, cured quite crooked, but nobody should be looking that close anyways. For the gore, which I had been far too excited for, I started with the optical nerve. I got some white yarn39, “folded” it, and dunked it in liquid latex40 mixed with loads of acrylic paint. It was probably a 50/50 mix of paint and latex. I suspended it to dry, and the next day cut it to length (about 2-3 inches). I did the same for the surrounding muscle and flesh, applying around 3 coats of the same color latex to the back half of the eye. Because latex likes sticking to latex, I was able to just push on the nerve and smooth it out with more liquid latex a day or so later.
Out of the many duo cosplays I’ve done over the last several years, this is by far the best. I’m so happy with how both cosplays turned out, even if they were simple!


Materials used:
- Shimmery Stretch Polyester Velvet – Metallic Blue/Black | FABRICS & FABRICS – Fabrics & Fabrics ↩︎
- Dream Helmet ( Stl Files Digital Download Only ) – Etsy ↩︎
- PolyLite™ CosPLA ↩︎
- QIDI Tech Q1 Pro ↩︎
- WELD-ON 16383 16 Acrylic Plastic Cement ↩︎
- J-B Weld Body Filler ↩︎
- 3M Bondo Glazing and Spot Putty ↩︎
- 60-Grit Sheet Sandpaper ↩︎
- 80 Grit Faster Sanding Sheet ↩︎
- 120 Grit Faster Sanding Sheets ↩︎
- 320-Grit Sheet Sandpaper ↩︎
- Orca Slicer Adaptive and Variable Layer Height: A Guide to Smoother 3D Prints | Obico ↩︎
- Krylon COLORmaxx Primer Spray Paint ↩︎
- FolkArt acrylic paint ↩︎
- Metallic Wax ↩︎
- PlaidFX Metallic Flexible Acrylic Paint ↩︎
- Delta Creative Ceramcoat Metallic ↩︎
- Rust-Oleum Spray Paint, Matte Clear ↩︎
- MILWAUKEE, Hard Hats, Ratchet (4-Point), Hard Hat Suspension ↩︎
- Arrow All Purpose Hot Glue Sticks ↩︎
- Premium Poly Foam ↩︎
- VELCRO 7/8 in. Sticky Back Squares ↩︎
- Knit Heavy Stretch Elastic ↩︎
- Sea Pearls Soft Mesh Weights-Black-1LB ↩︎
- Worbla’s TranspArt ↩︎
- Wagner Furno 300 Dual Temperature Corded Heat Gun ↩︎
- 18-Count Aida Cross Stitch Fabric ↩︎
- Loctite Ultra Liquid Control Super Glue ↩︎
- Sandman Pouch ( Stl Files – Digital Download) – Etsy ↩︎
- Liquitex Acrylic Gesso ↩︎
- Krylon UV-Resistant Clear Gloss ↩︎
- Metallic Wax ↩︎
- Round Leather Lace ↩︎
- Cosplay Air Dry Foam Clay ↩︎
- Elmer’s Washable School Glue ↩︎
- Craft Sand ↩︎
- Neodymium Rare-Earth Magnet Discs ↩︎
- EasyCast Casting Epoxy ↩︎
- Yarn Bee Mini Maker Yarn ↩︎
- Creature Liquid Latex ↩︎
