
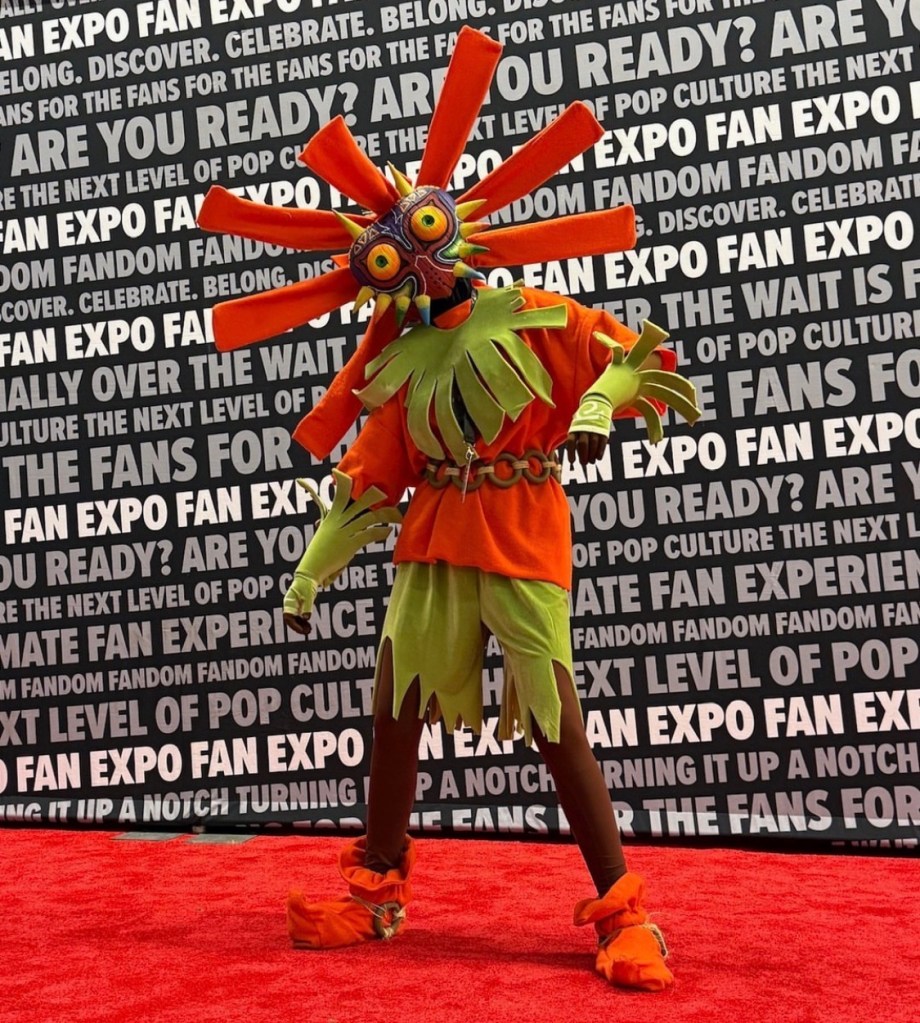
Skullkid is a character from the insanely popular n64 game, The Legend of Zelda: Majora’s Mask. Majora’s Mask is a sequel Nintendo batted out into existence after the unparalleled and ground-breaking success of The Legend of Zelda: Ocarina of Time, that instead focuses more on a slow-burn horror theme than the fairytale theme it’s prequel had. Majora’s Mask is beloved by generations for its heart wrenching story and characters, and Skullkid is no exception. Skullkid is—a Skullkid, a woodland dwelling scarecrow-like humanoid, that found a mysterious mask in the woods. Little to its knowledge, this mask would quickly to possess it like a puppet, warping the previously cheeky and playful creature into a malevolent and creepy being that continuously antagonizes Link throughout the game.
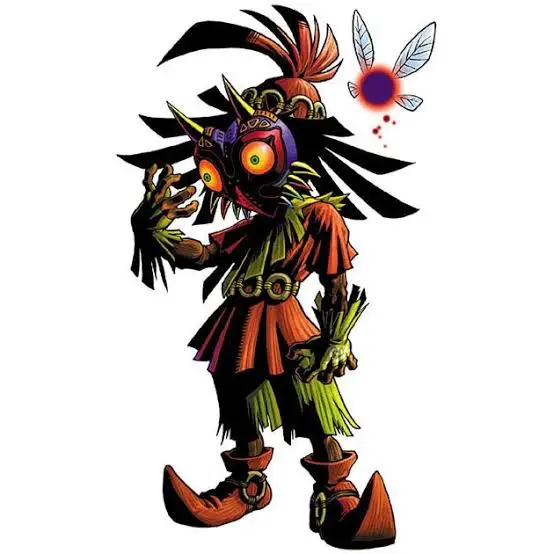
Now, I will admit, as a hardcore and long-time Zelda fan, I have not played much of Majora’s Mask as of this blog’s release. I know, what heinous crimes I’ve committed. Look, I just don’t find the n64 games as appealing as the newer 3d games. I’ve said it. But despite this, I still find Skullkid to be a fascinating character with a great arc and story. And, a cool design. A design that is cartoony and would be striking to bring into reality, though still dark and a bit creepy. The perfect design for a cosplay. I’ve seen my fair share of Skullkid cosplays, in person at conventions primarily but also online. And while it’s not usually in-character of me to cosplay such a popular character, I just needed to make my own.
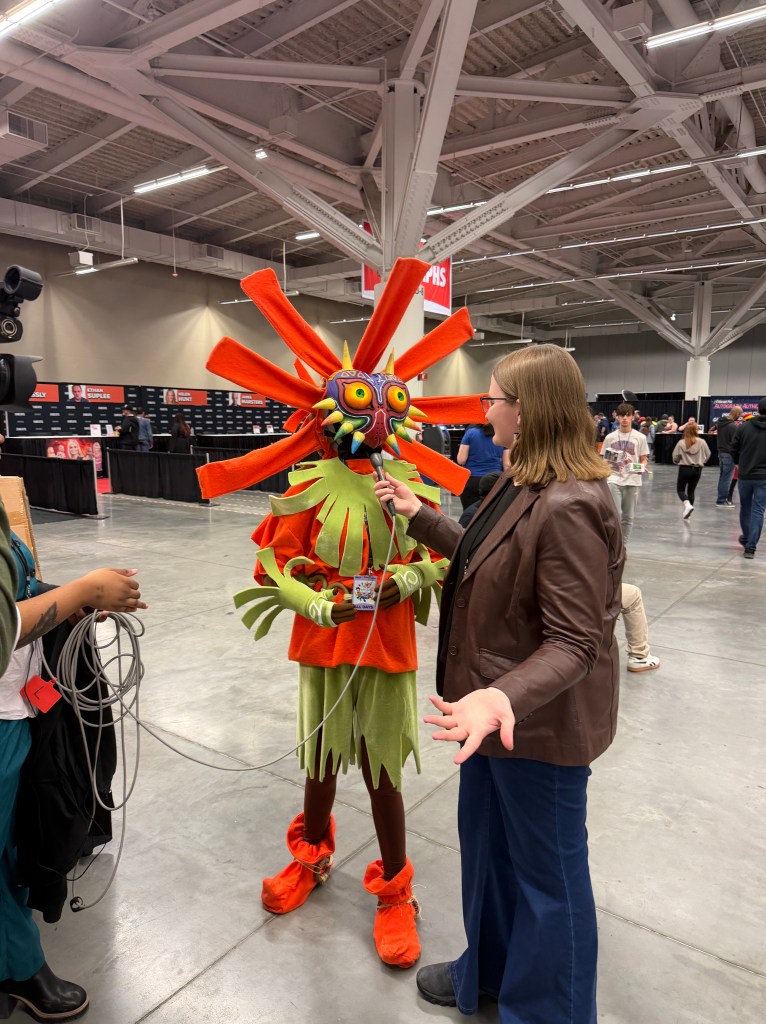
This cosplay first debuted at Fan Expo Cleveland 2026 on the Friday. At this con it got around 40 pictures with other congoers, went second on the red carpet (and can be found on all Friday red carpet posts), and got interviewed by Kent State!
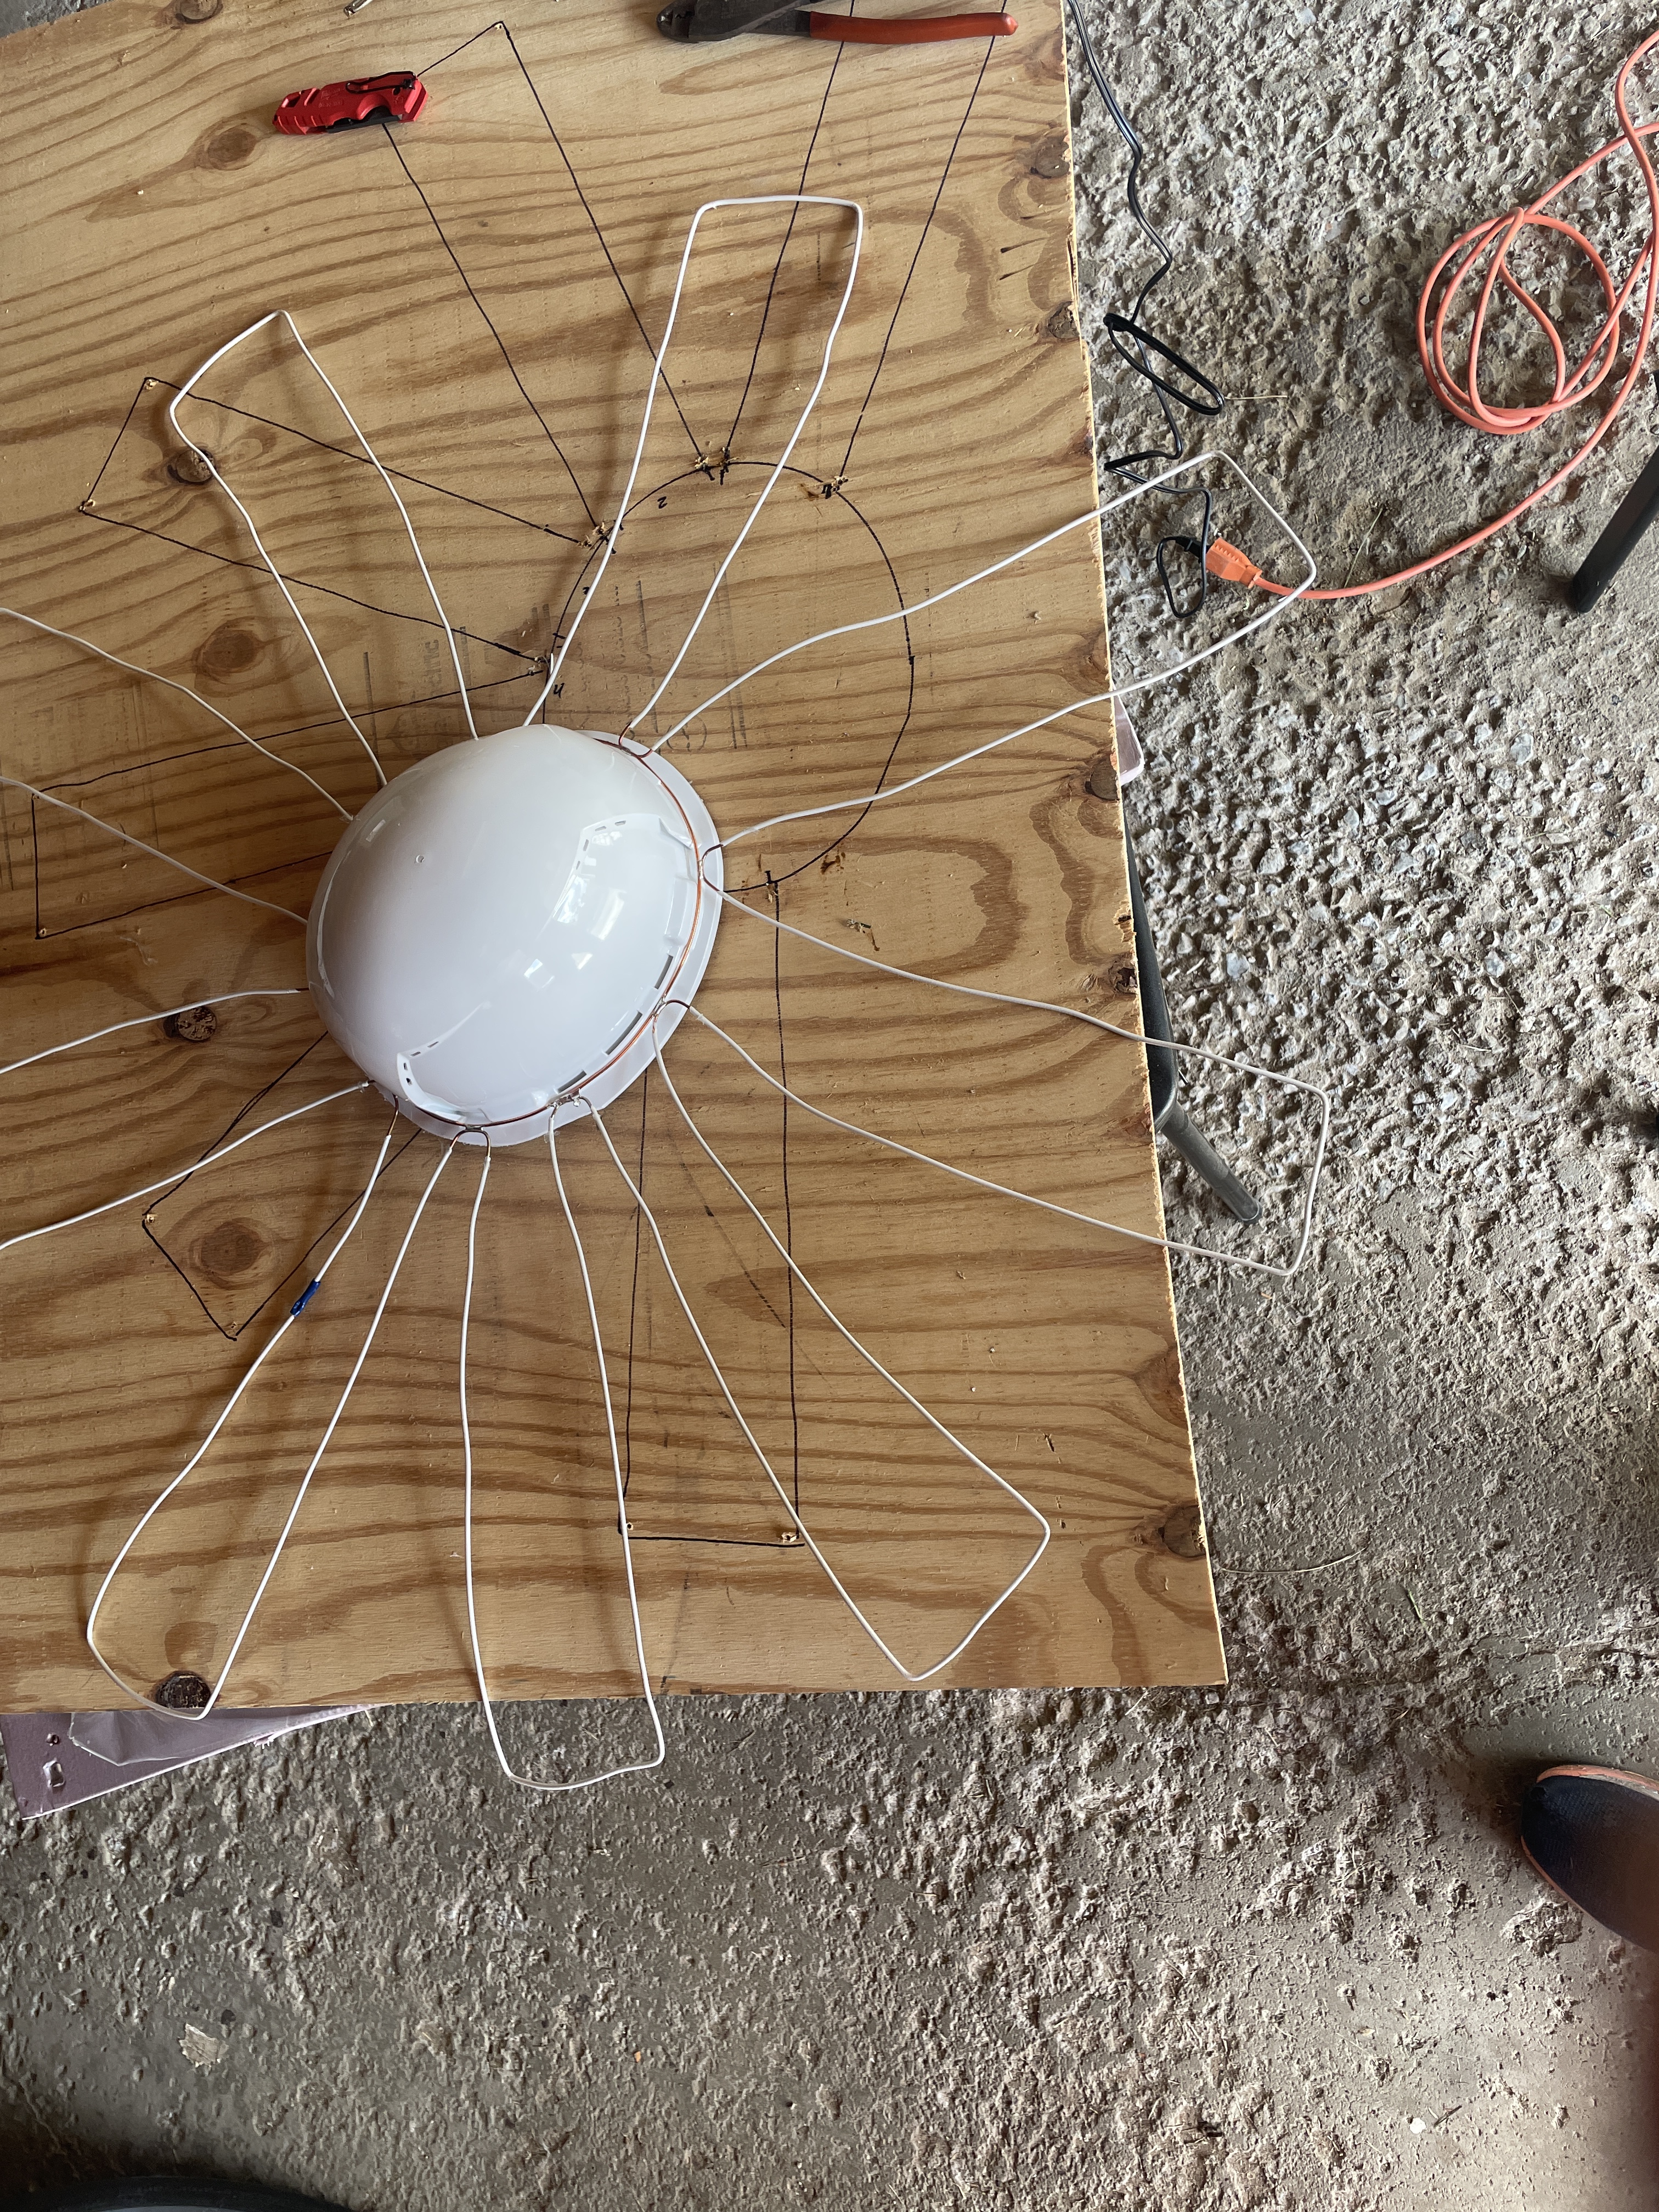
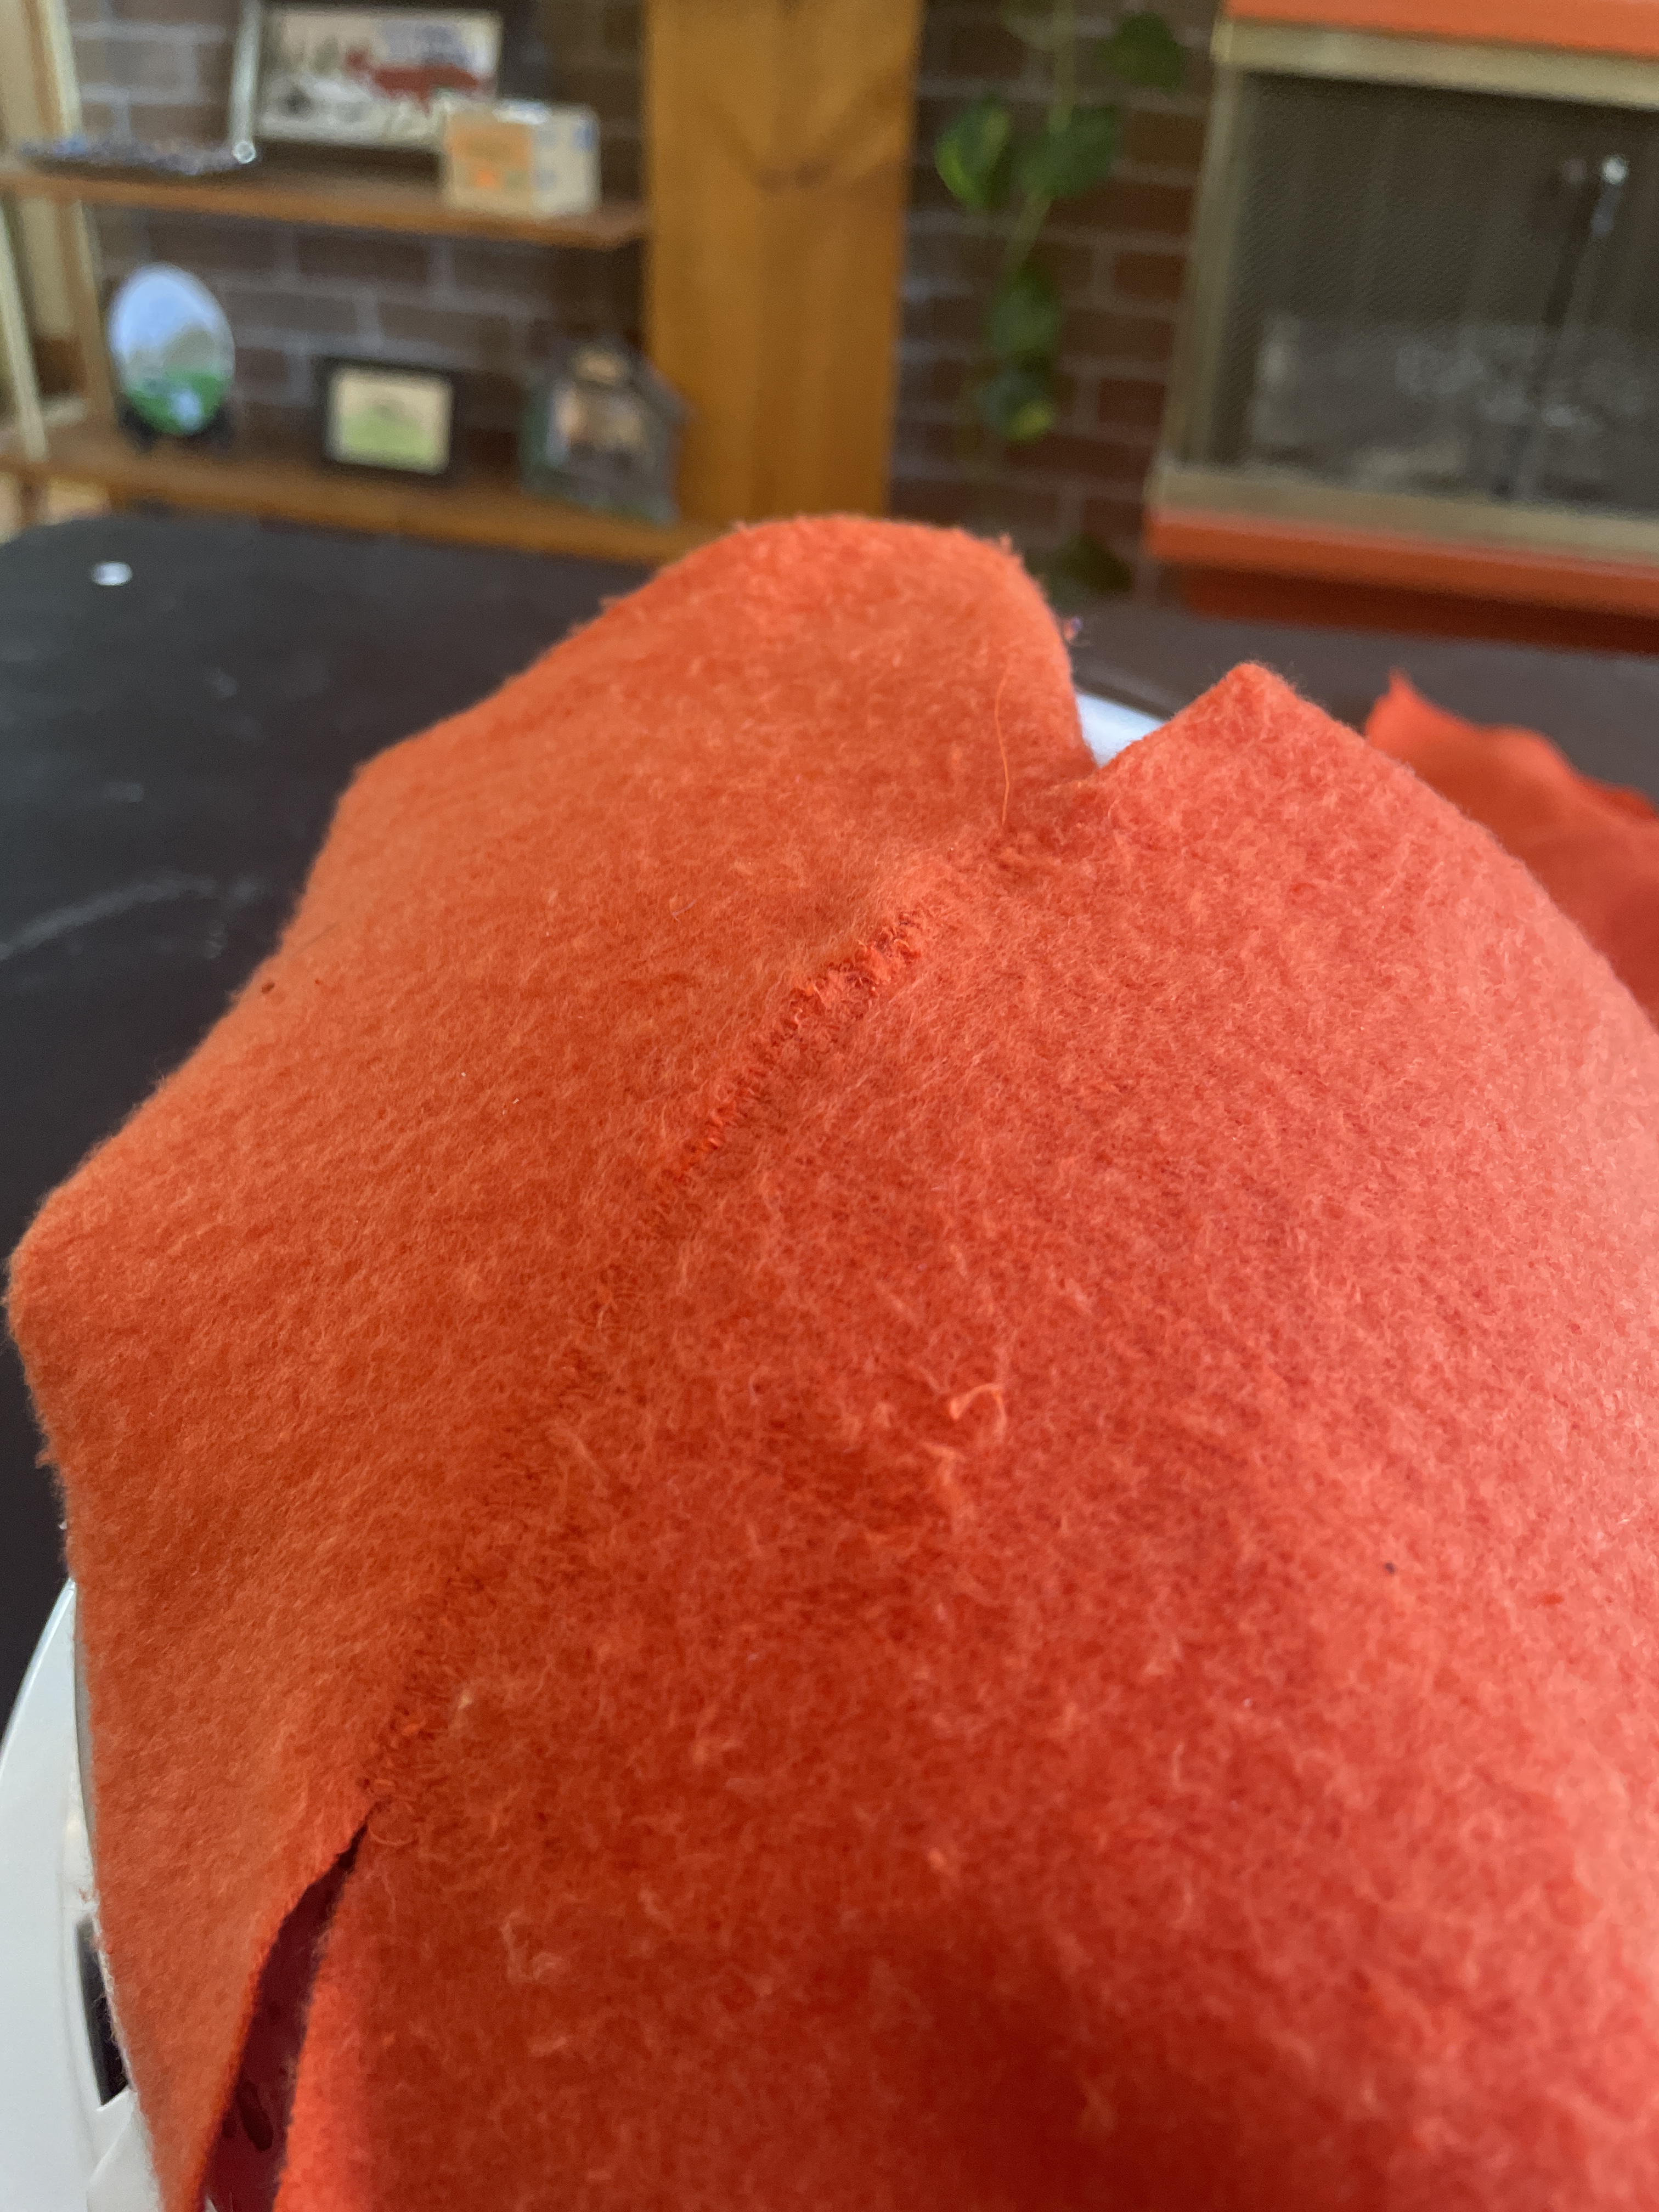
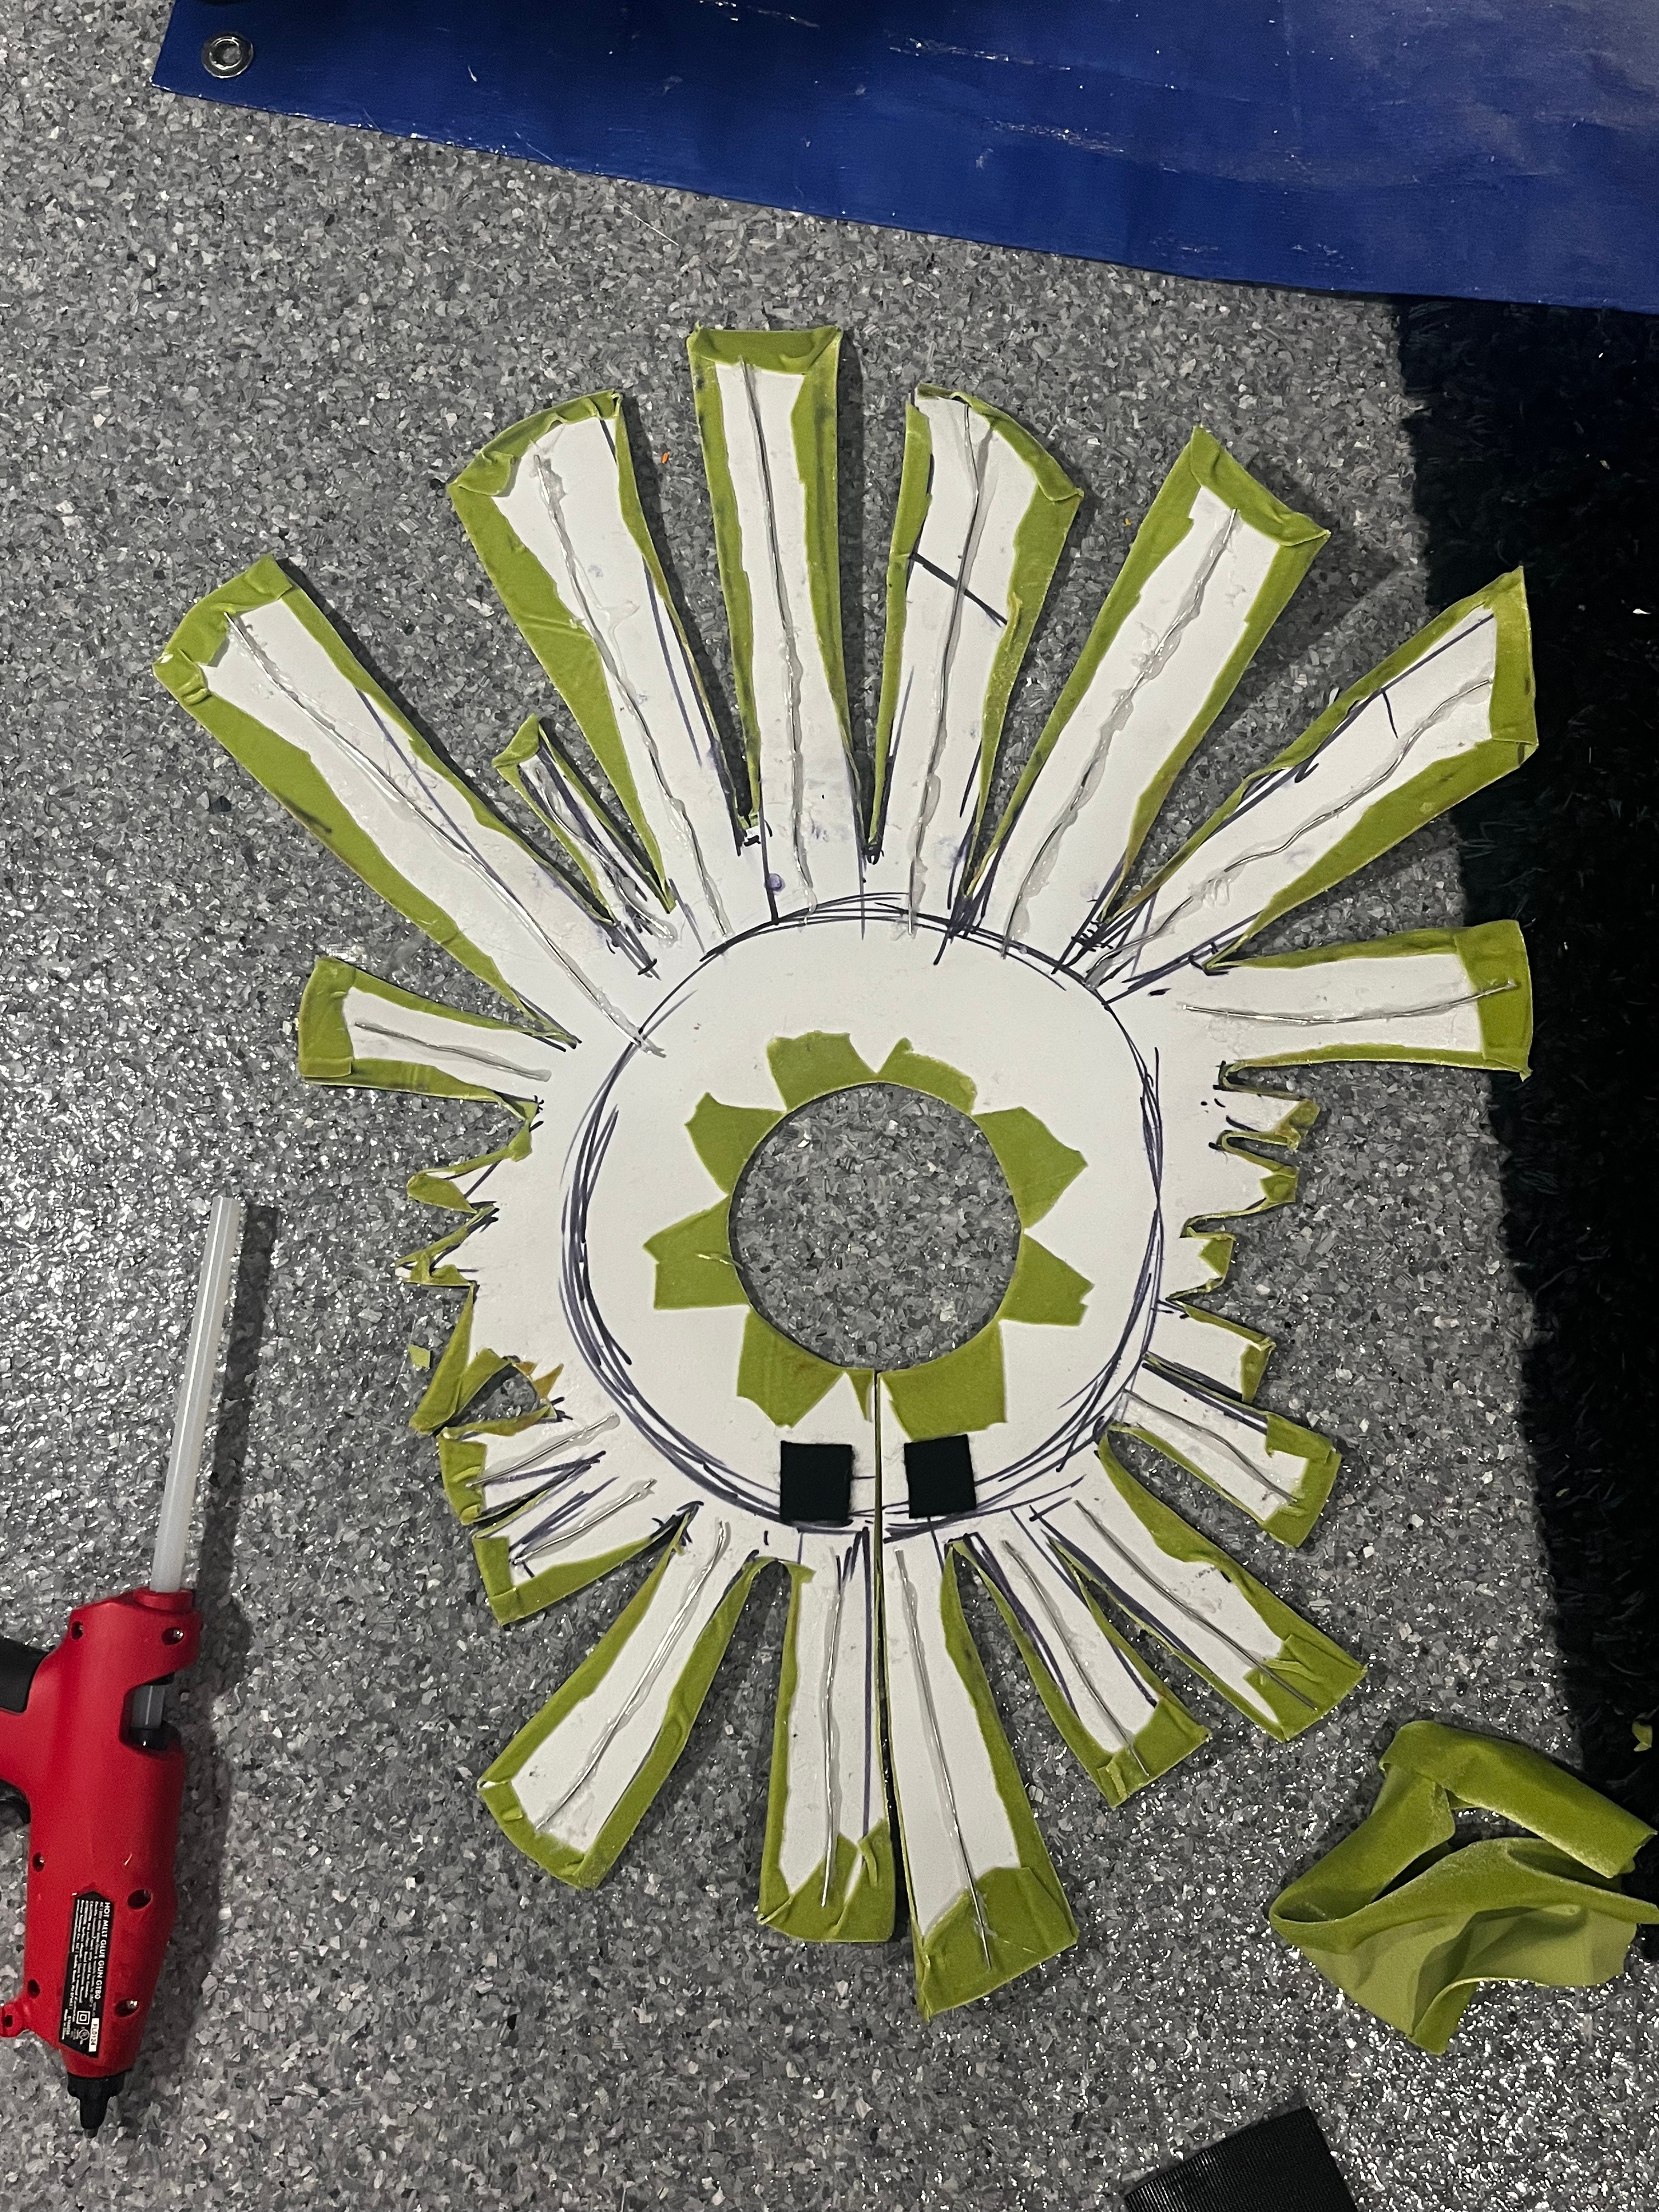
Now, onto creation. Let’s start with the showpiece: the hat. Skullkid’s hat is a Milwaukee construction helmet with the brim cut off, and a 4-point suspension on the interior. The “leaves” are all one solid piece of soldered together copper wire! I put down the helmet on a piece of plywood and traced around a leaf template, placing them where they need to be. I then drilled some screws into every corner, heated up the wire, and bent it around said screws to form the correct shape. This piece then sat on the old brim of the helmet that remained, before it was glued into place. Each leaf has a sewn sleeve that slid over it, a band hides these seams on the top and they fold under the bottom. Now–the leaves are not symmetrical. There are eight, and at the front of the hat there is a single leaf in the center, and at the back there are two off-centered and placed near to each other. This is very important, as the mask has two horns on the top. What should happen, is that the single leaf in the front should be placed in between the two horns. What ended up happening, is the wire frame was installed backwards. So there were two leaves on the hat that perfectly blocked the mask from going on! This caused several weeks of problems until I eventually realized the problem. But, the helmet suspension on the inside of the hat only installed one way. So I had to rip it out, and pad the back of the hat generously. This was better in the long run, as it allowed me to wear the hat at a much more severe angle on my head as needed. I then cut the chinstrap off an old riding helmet and hot glued it on the inside so that it wouldn’t fall off backwards. The bundle on top of the hat was made out of a sheet of EVA foam that I sketched and cut out, rolled up, and hot glued to the top of the hat. To get the fabric on it, I used a technique which I will use many times again on this cosplay. I took an appropriately sized rectangle of fabric, and some gorilla spray adhesive. I sprayed the adhesive all over the “outside” of the EVA foam, that being the side without sharpie, as I harshly learned that the adhesive directly transfers sharpie ink onto the fabric, and laid the fabric over top. I smoothed it out and waited overnight before tediously cutting the excess fabric and leaving a little extra to cover the sides. Then, because the inside needed to be covered as well, I repeated the process. Though it didn’t have to be quite as clean. The fabric covering the hat itself was also applied via spray adhesive.
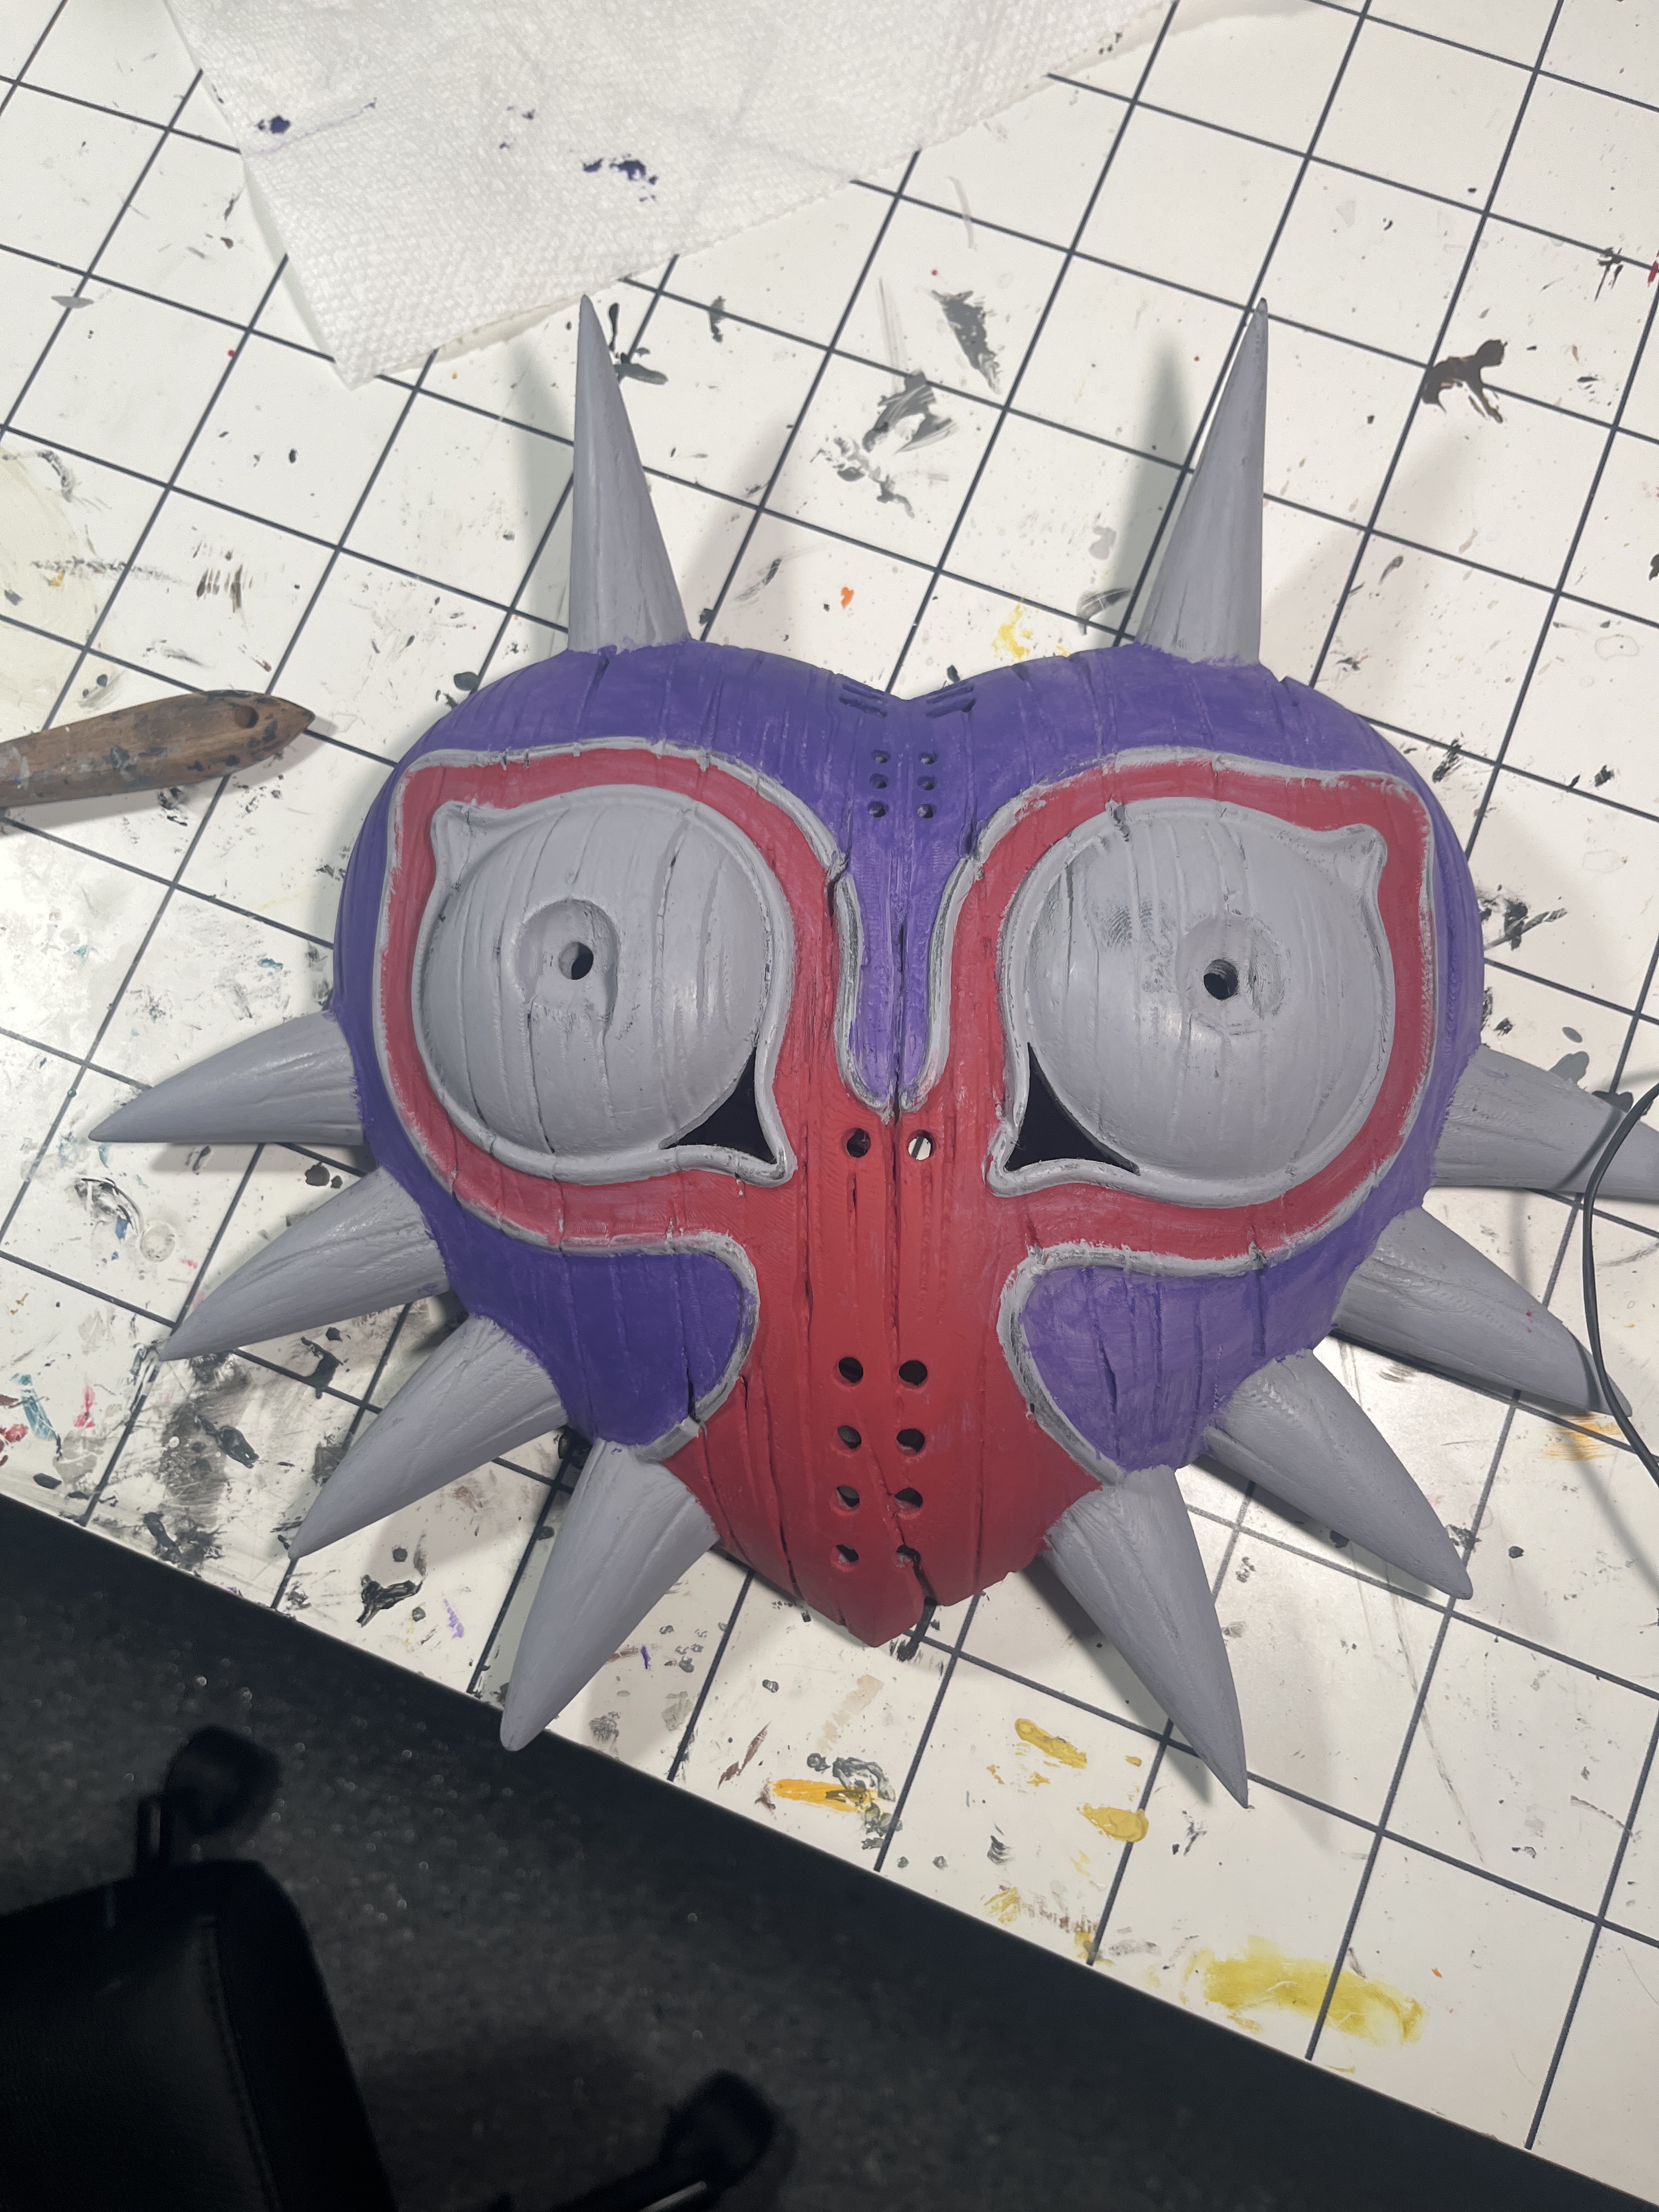
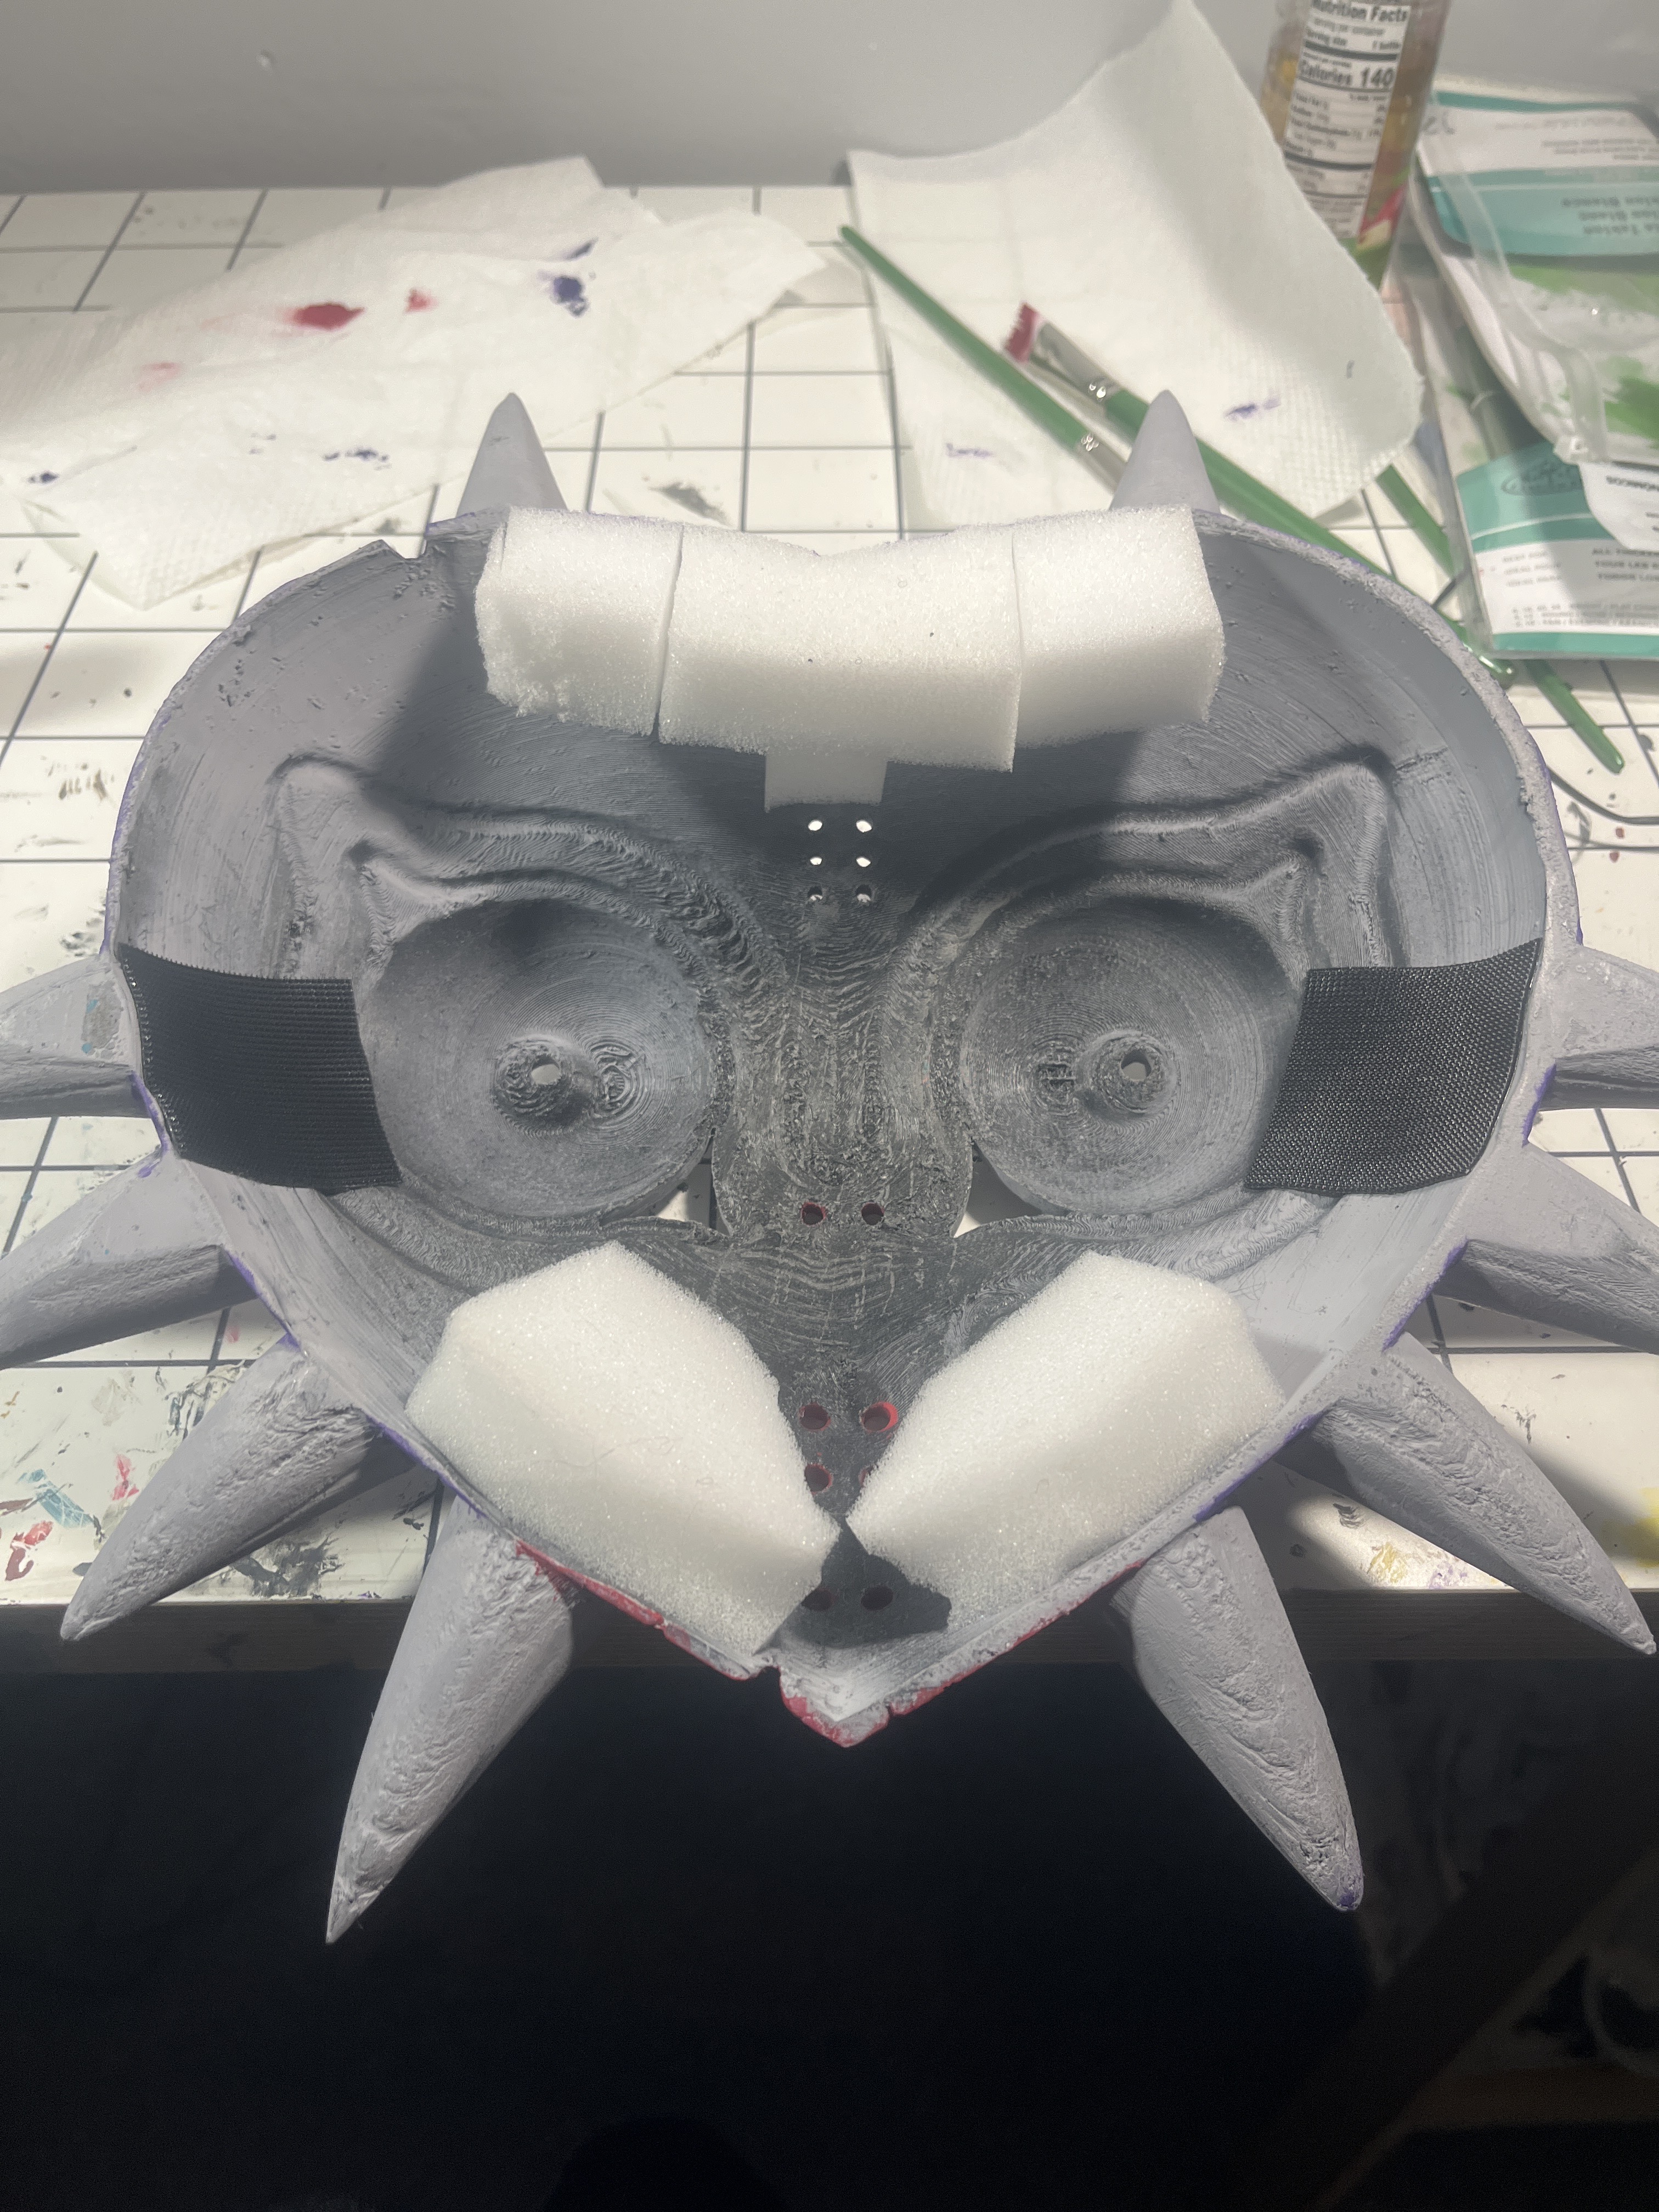
For the second showpiece, the mask, I first bought an unprepared what I assume to be a cast of a 3d-print at GalaxyCon Columbus 2024, all the way back when I suspected I’d be doing a Skullkid cosplay at some point. All the way in February 2026, it finally found itself being finished. Now, I, for some reason, thought that it was primed. It was, not. I quickly learned after applying the first coat of purple. Though I didn’t feel like going back to prime it, so I persisted. It seems fine. I can’t comment much on how I painted this mask, as with most things I painted. I just color matched things and did a lot of drybrushing. Now, I see out of the inner tearducts on the mask, so I painted some white Aida fabric the same color as the outer…tearducts, and black on the inside so I could actually see out of it. The rest of the various holes have black Aida fabric backing them. The mask has three elastic bands that hold it on. Two horizontal straps and one “vertical” strap. The two horizontal straps hold it on, the lower of the two keeping the mask from sticking out away from my face. The “vertical” strap connects from the top of the mask to the middle of the upper horizontal strap, keeping the mask from sliding down–which is incredibly problematic as the mask needs to sit high on my head for me to be able to see. The mask has two padded points, the very top in the middle where it dips and the chin. I used 1in thick polyfoam, so the mask just sits off my face.
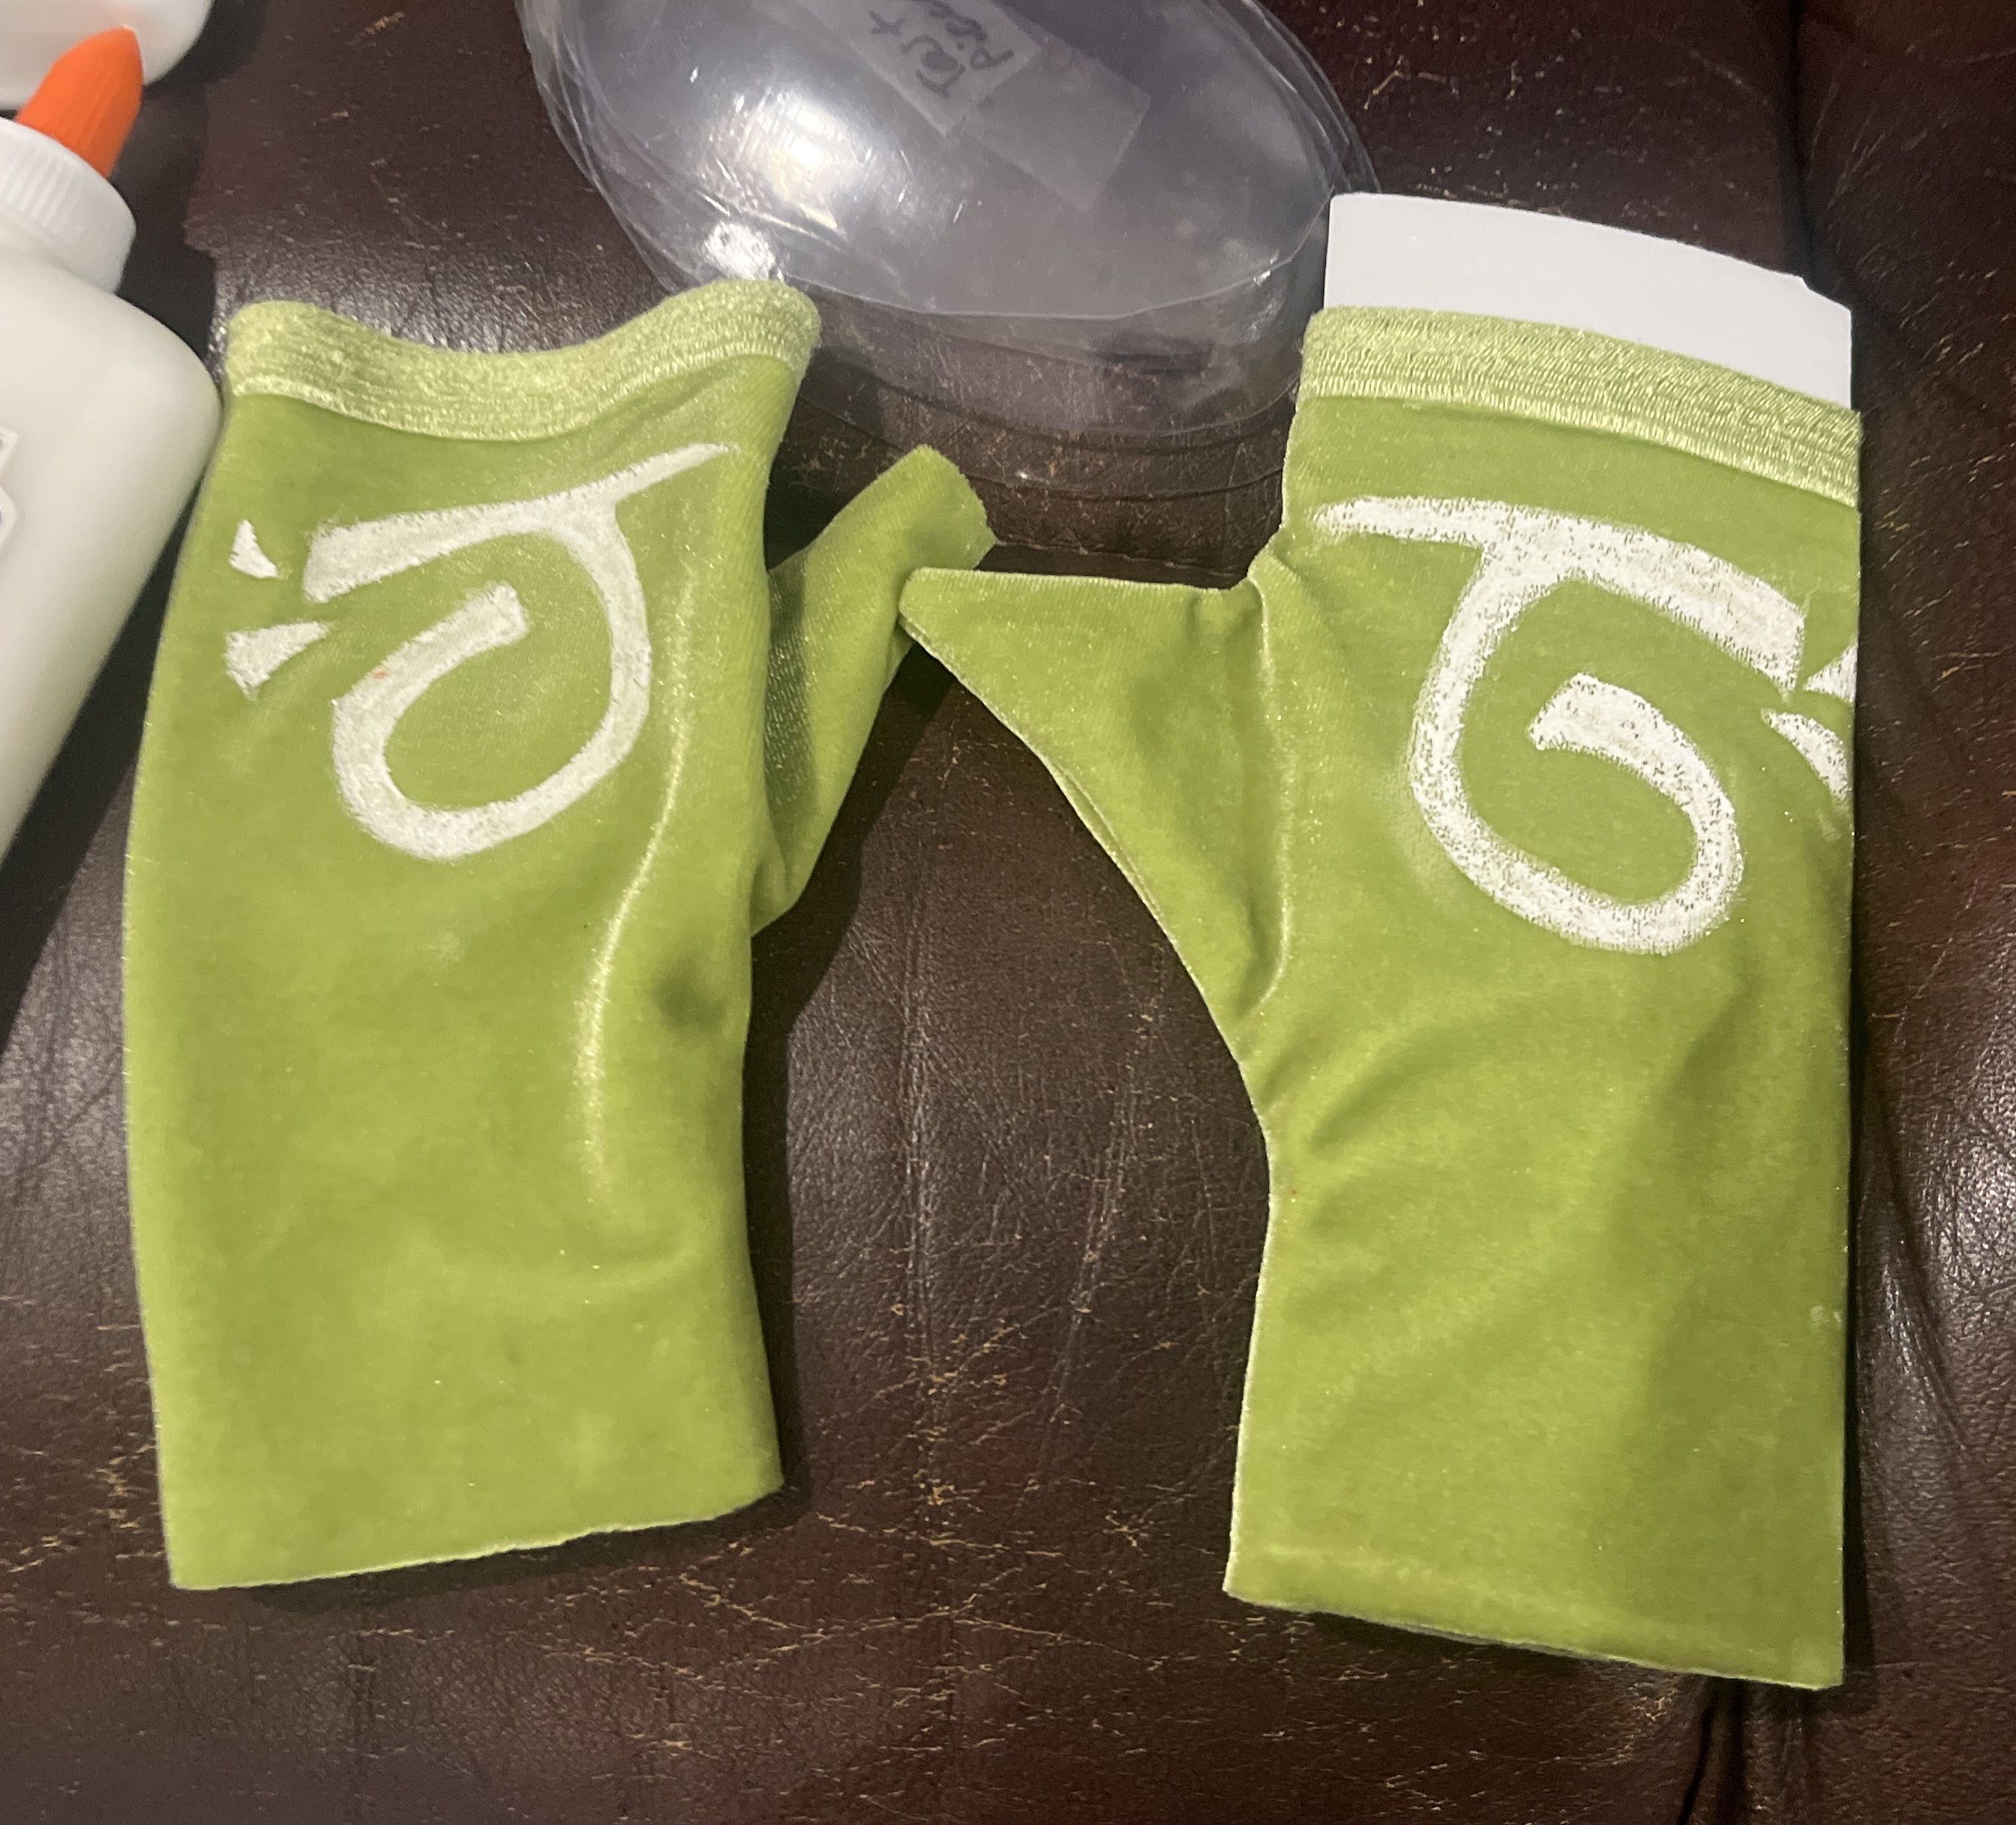
The shirt, shorts, and green gloves were all made out of modified patterns and sewn so that everything could be made with the same two fabrics. The shoes I commissioned from the same friend who made my Hollow Knight cloak. The shirt itself is ginormous, this lets it have a nice strong shape when the belt is put on. The shorts I made, before using tailors chalk to mark the “leaf” tears, and then cut out. The gloves I painted on the back with Tulip white brush-on fabric paint to get that symbol.
The leaf “gauntlets” as I so incorrectly refer to them as, were made the exact same way as the hat bundle. Except instead of being a glued together tube, it’s form is held by two elastic bands that allow me just enough stretch to slide them on and off. There is a big flap of fabric that has been glued inside this gap just above the elastic, which hides both the elastic and some shakers that I made. The shakers were 3d printed, and the metal beads inside which make the noise I gored out of a percussion egg (these shakers are also in the shoes!). They also slide on with elastic. Under all these gloves, I wear a pair of bicep length brown opera gloves so I didn’t have to wear another shirt to make my exposed arms brown. I also got a cheap brown pair of leggings to wear under the shorts.
Skullkid’s collar was also made with the same technique, though the underside is bare foam. Each leaf has a piece of wire hotglued on the bottom so I can pose them all to sit right, and I wear it by velcro-ing together a strip of fabric in the back.
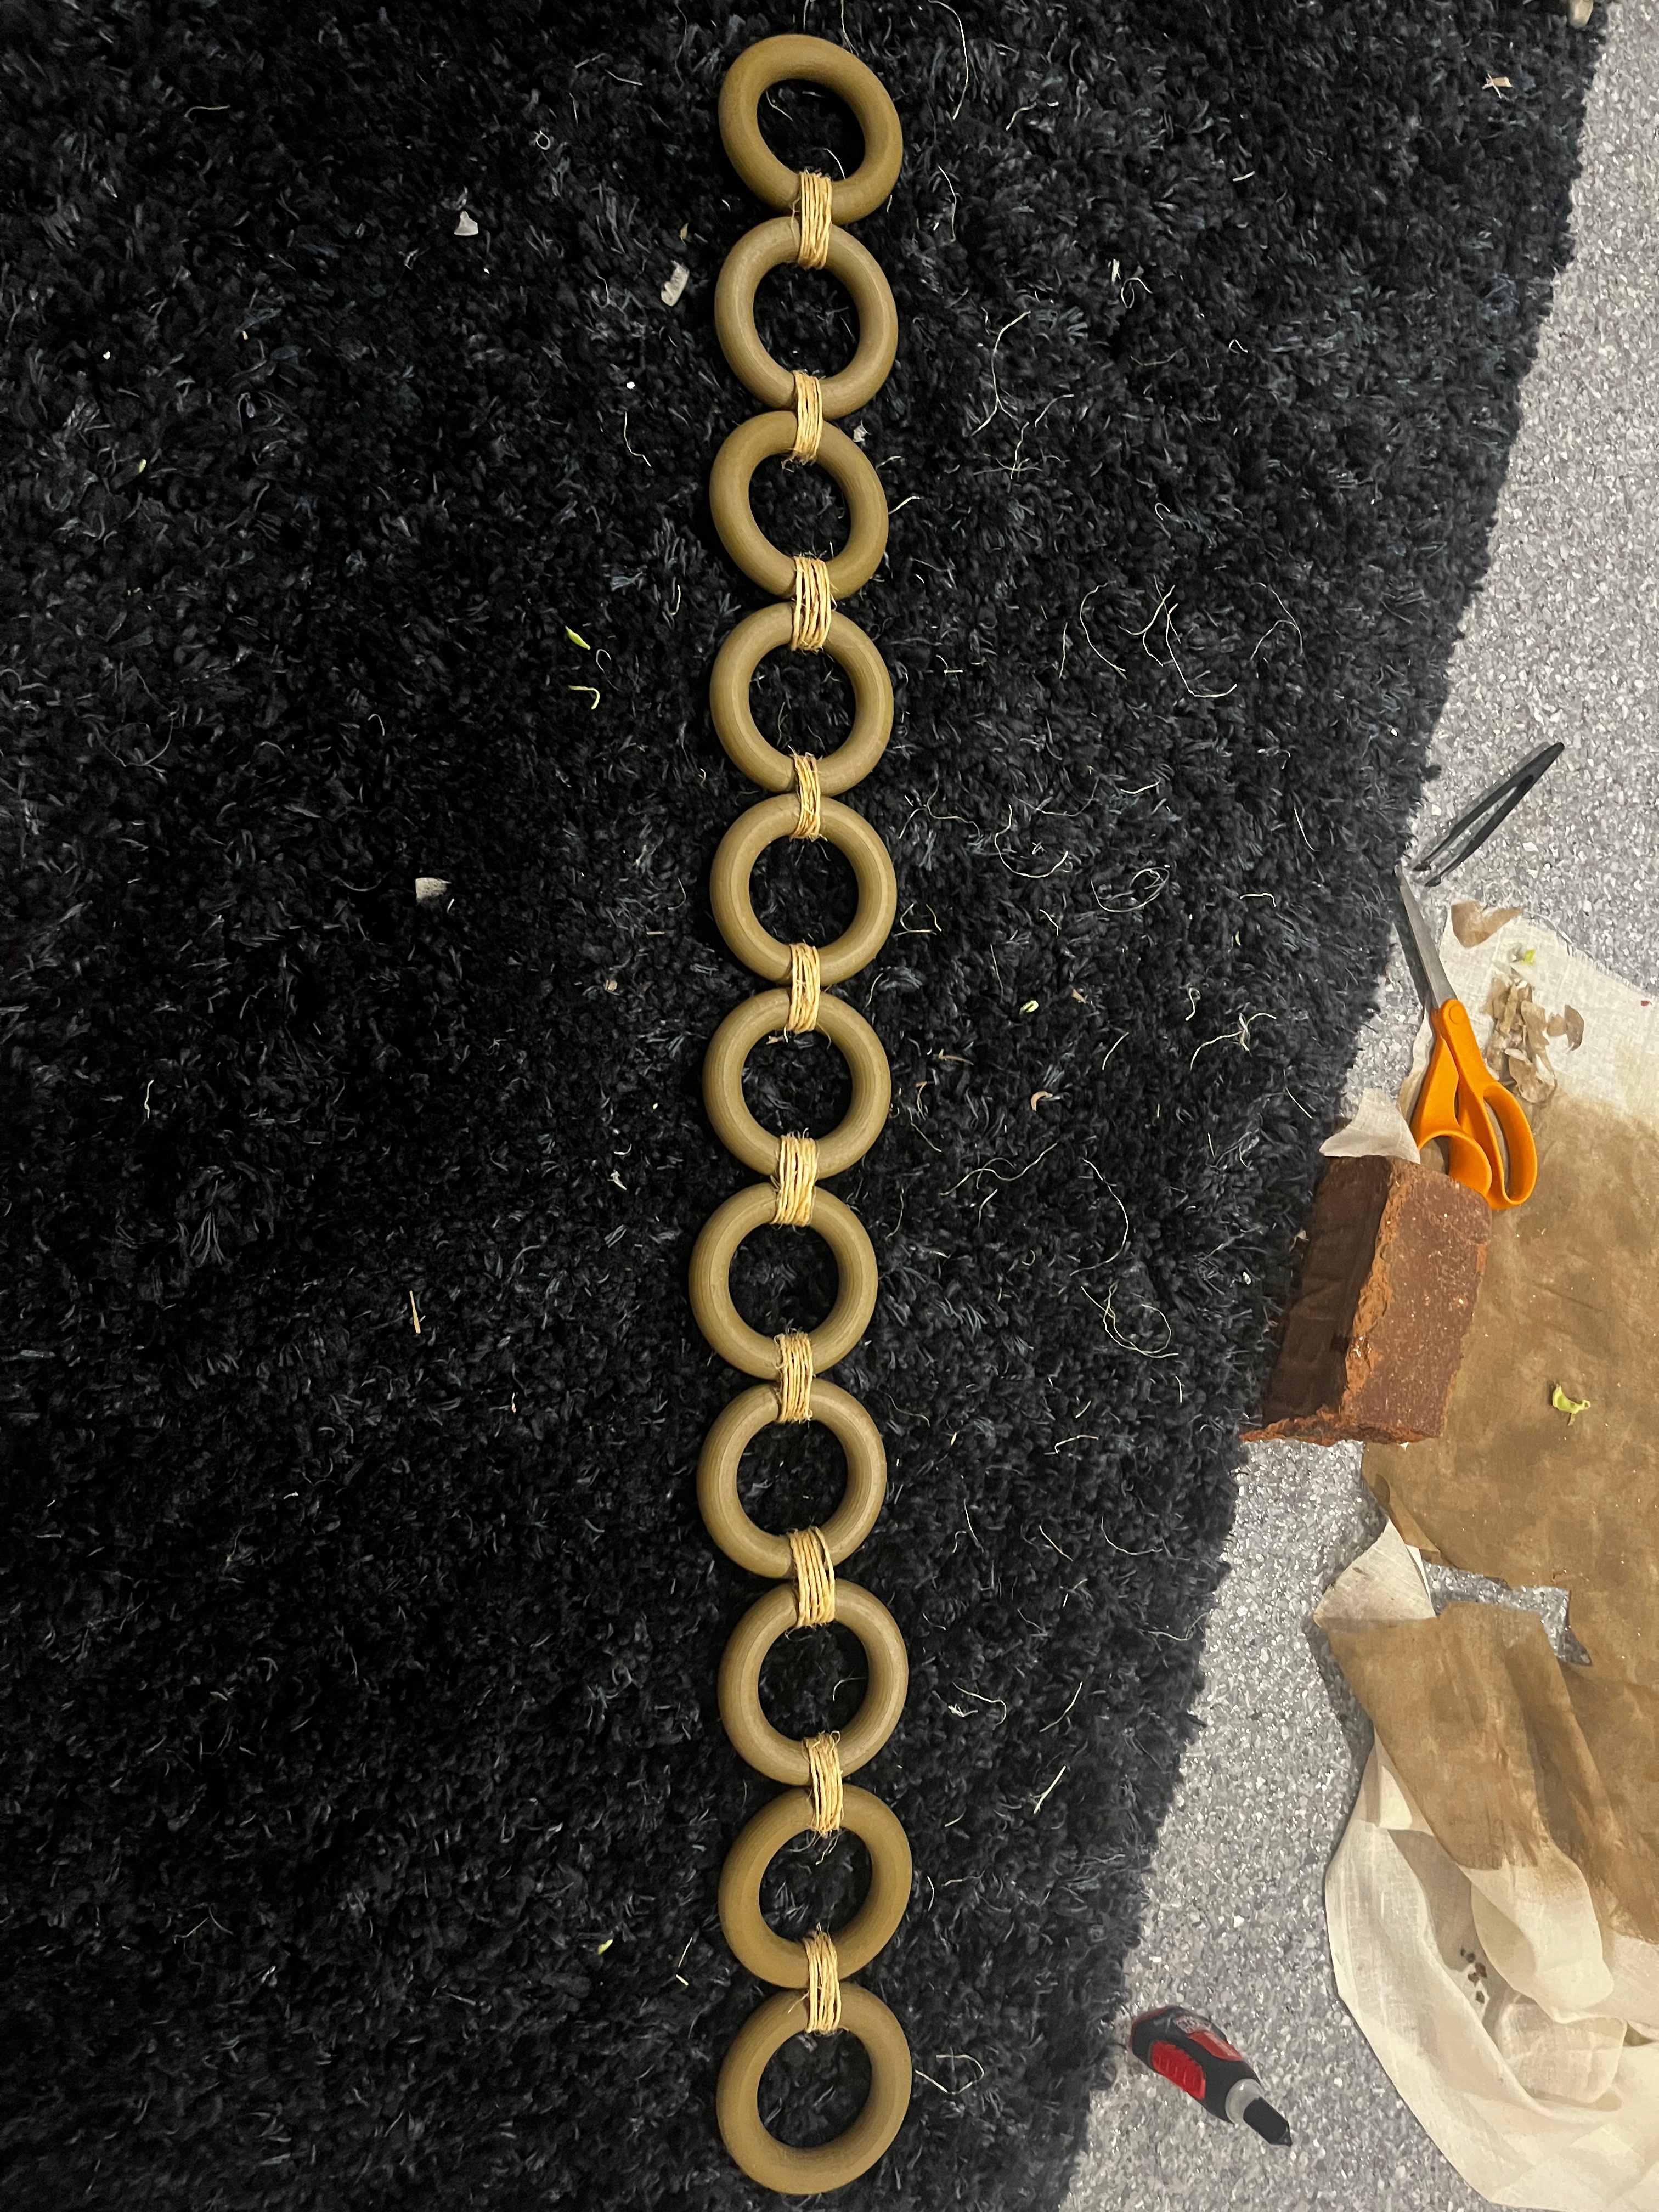
This cosplay has many rings. There are rings all around the hat, a belt of rings, and rings on the shoes. The rings I measured for and 3d printed some 26 or so of, and meticulously prepped by individually peeling all the supports off the insides and outsides of. Then they were primed with acrylic gesso, before painted and sealed. I wrapped twine around 10 of them for the hat, and 11 for the belt. I cleaned up the twine and glued the knots in the back to keep them secure.
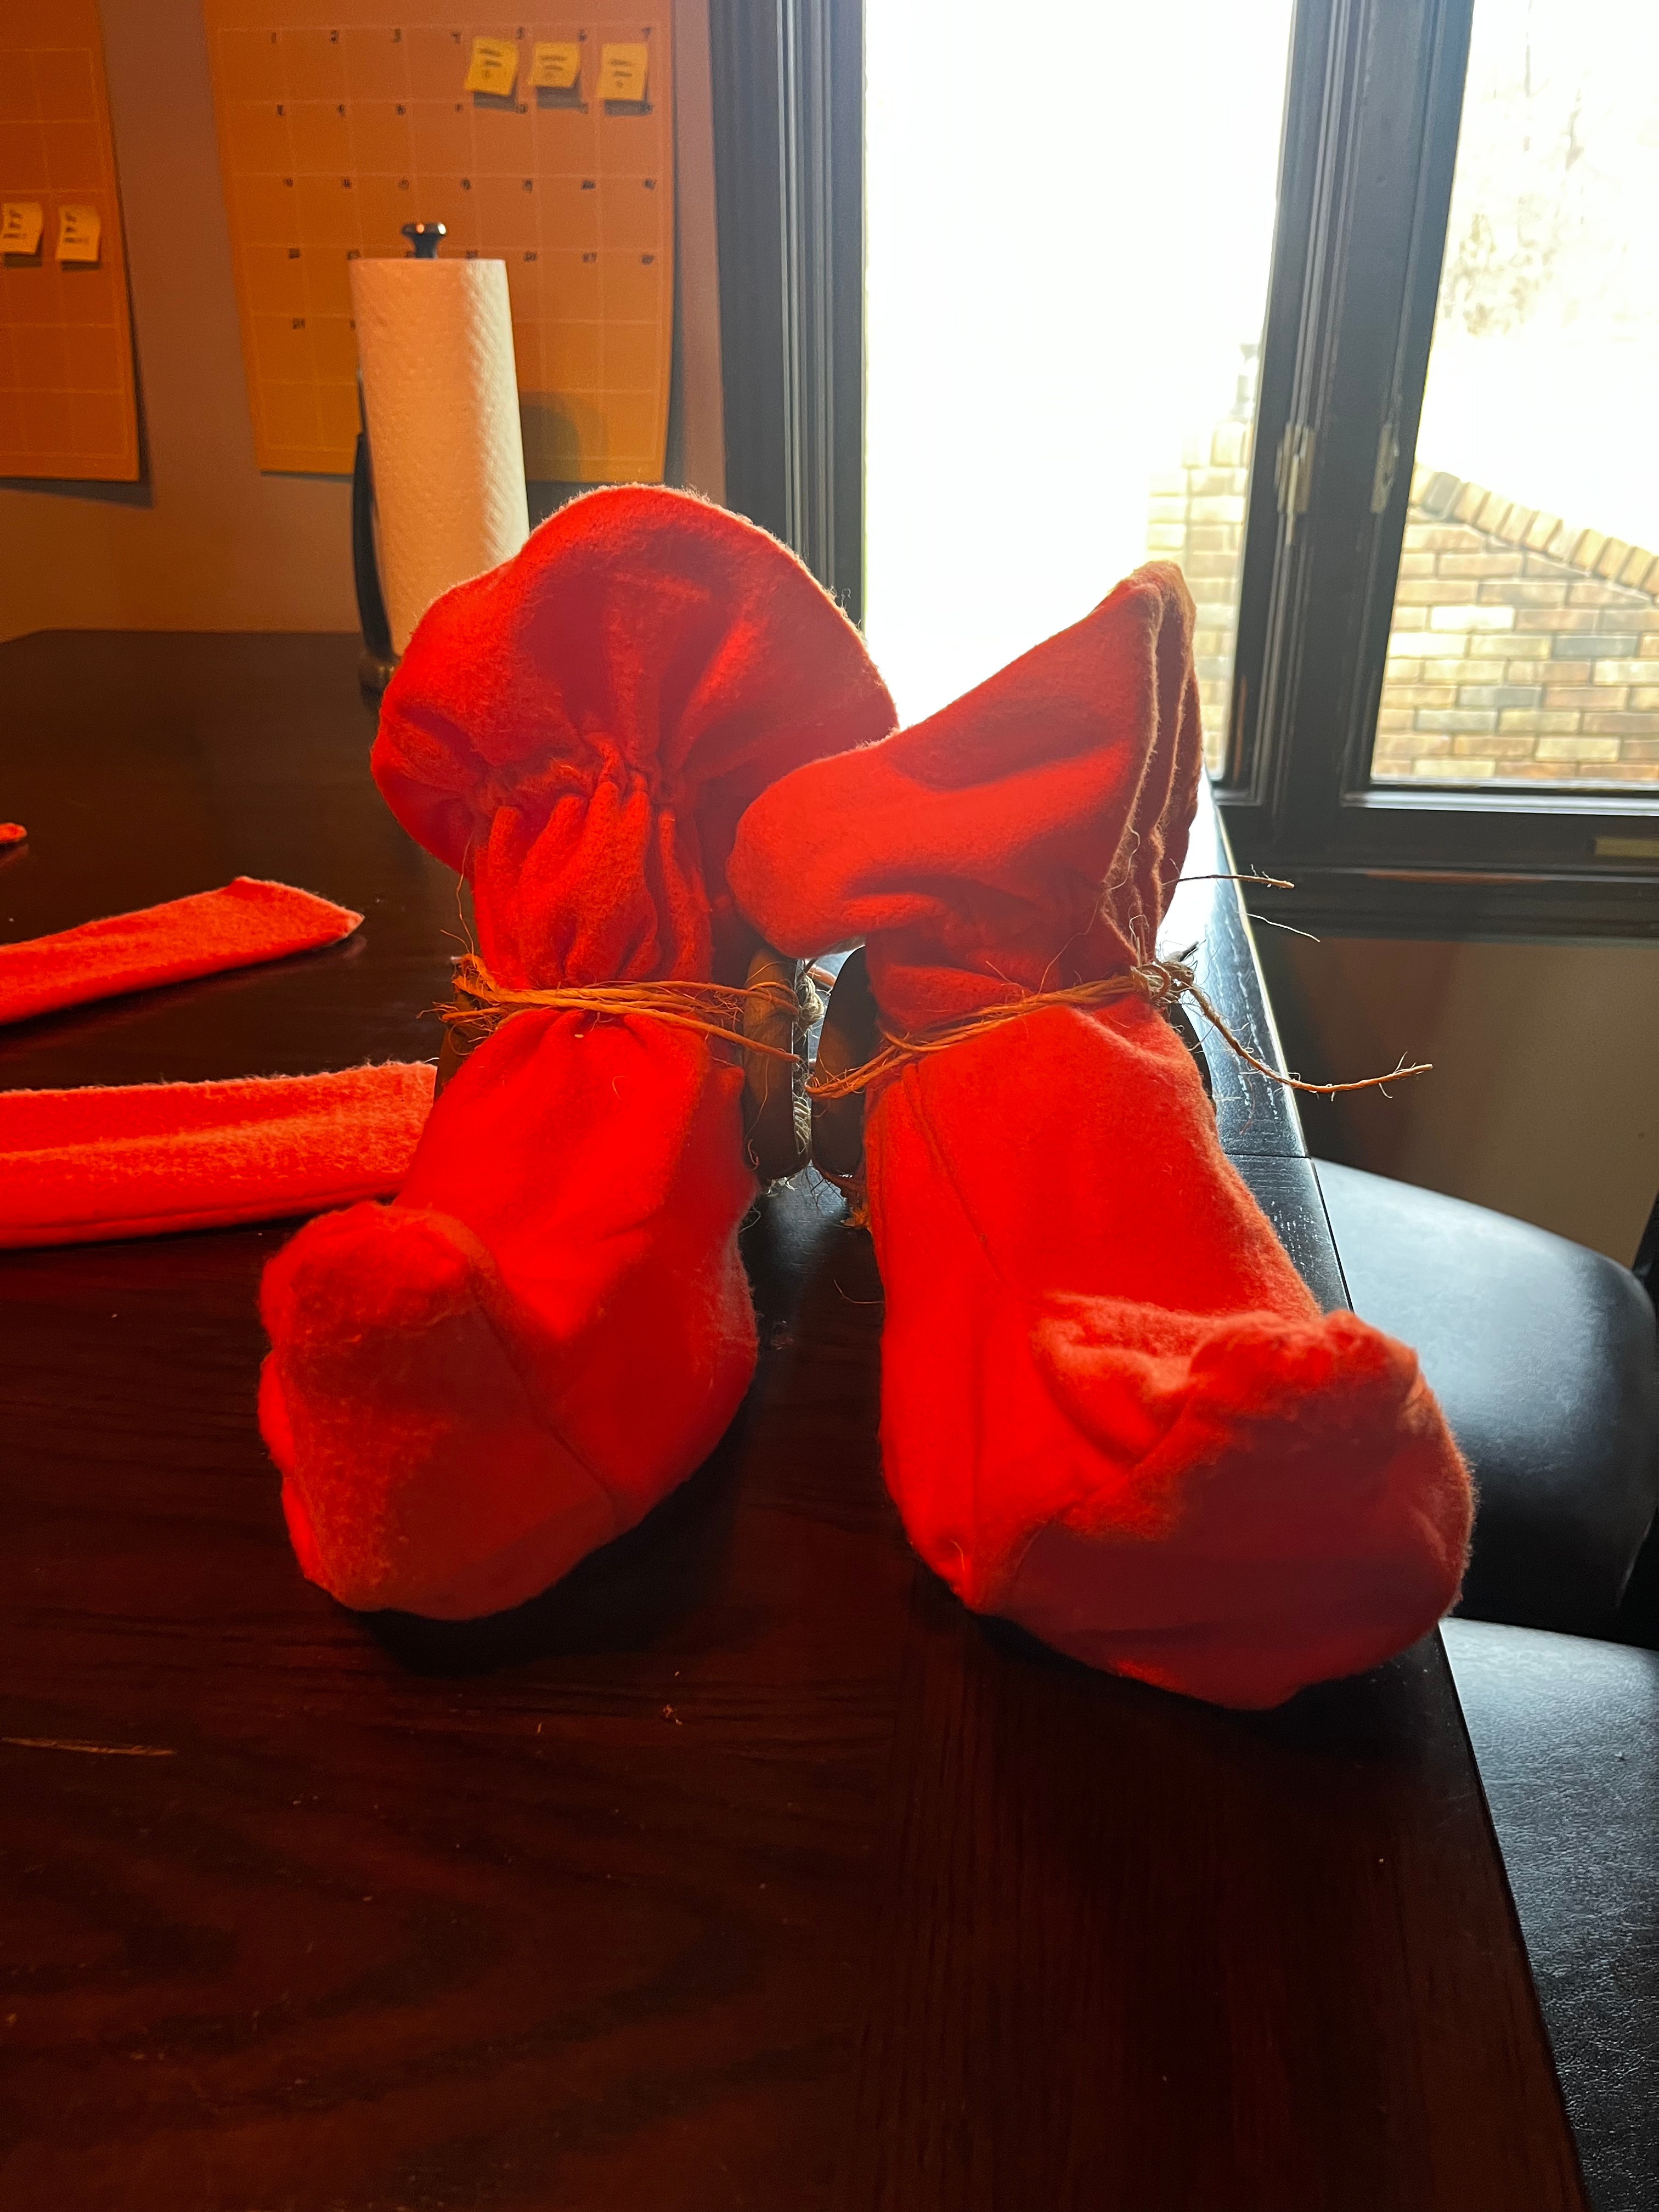
The shoes are by far the most impressive part of the cosplay, from a technical standpoint. That’s why I didn’t make them! My good friend who made the cloak for The Hollow Knight was up to try this challenge. The fabric you see on the outside are covers that go over white sliders I bought online, held in place by the rings on the sides and the twine that wraps around them. The twine in the front is looser than in the back, so I can get my heel through. The shoes have drawstrings so I can tighten them around my ankles to get that iconic shape! The shoes, as I mentioned earlier, have the same percussion egg shakers as the gloves (though this time they’re still intact), so I make an incredibly obnoxious rattling noise as I walk!
Looking back, this cosplay didn’t take as much work as some of my others. But it definitely was time consuming. There are several things about it which I would like to change, but probably won’t. As much as I want to wear this cosplay again to more conventions, due to its size and visibility it likely won’t visit as many cons as some of my more preferred cosplays–The Hollow Knight, Morpheus, etc .needless to say I think it was worth the work.

Materials used:
