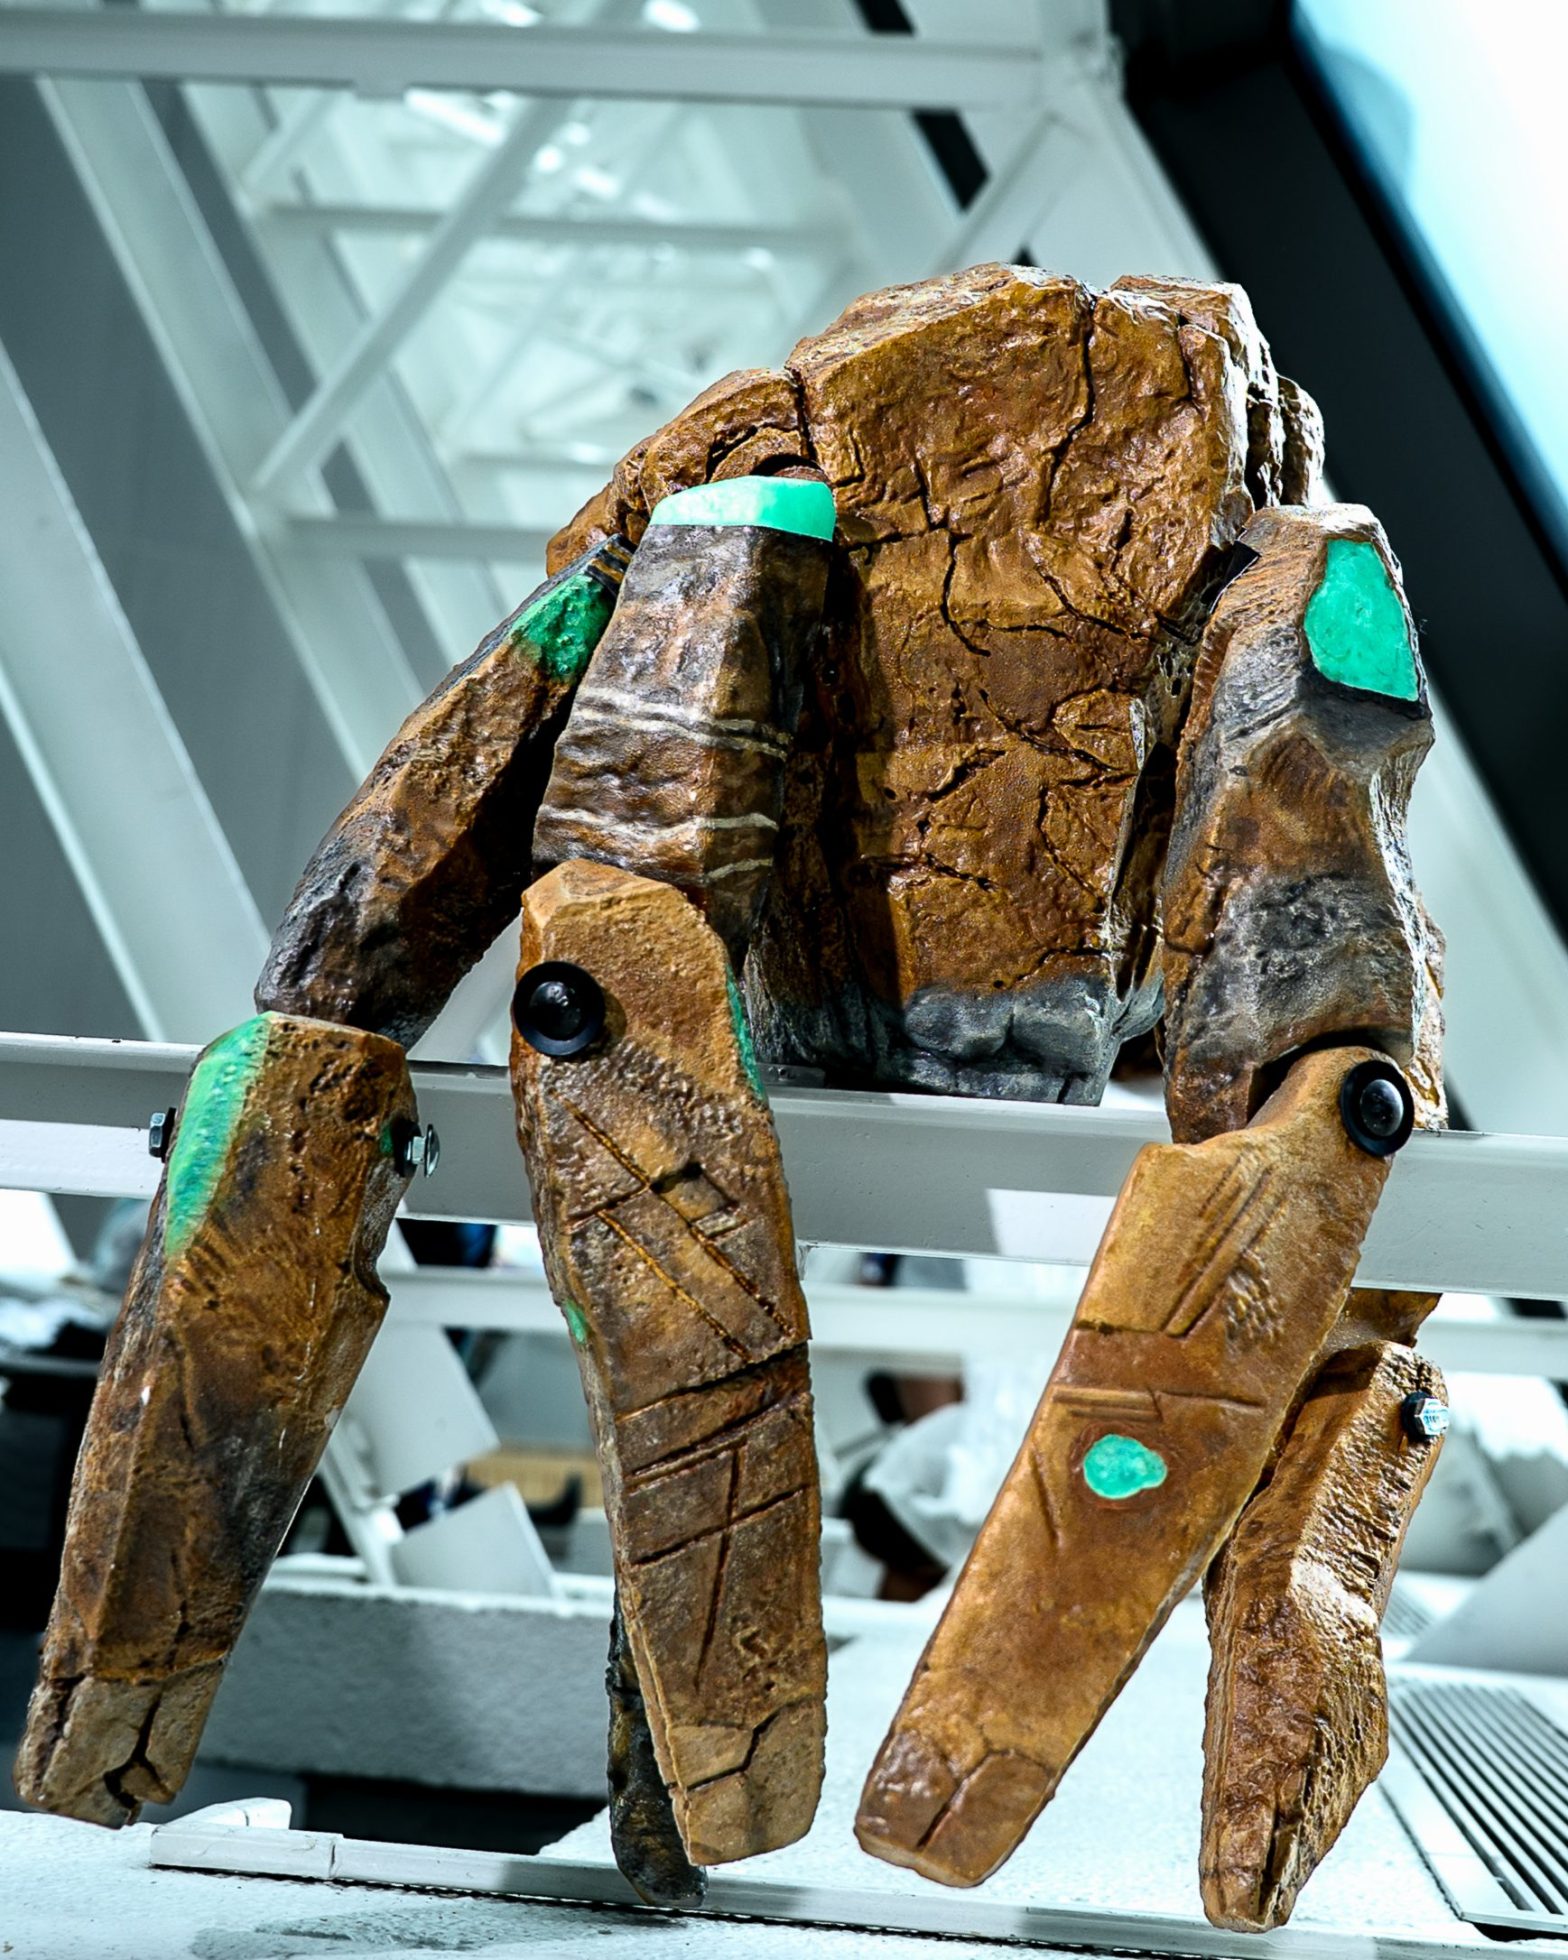
Ryland Grace is the protagonist of the incredible book and film, Project Hail Mary. He was a middle school science teacher, before being recruited on the space mission “Project Hail Mary,” to save the sun from dying out due to the creatures that plague the stars of the galaxy. On this mission, Grace makes first contact with an alien lifeform. An Eridian, a five-legged rocky looking crab creature which he appropriately named…Rocky!

The movie came out back in March of 2026, and I was AMAZED (pun intended) by it. It consumed my every waking thought for weeks. Also, fun fact, that film didn’t use any green screens, AND Rocky was resin 3d printed and puppeteered by six “rocketeers!” Anyways. So I HAD to make a life-sized mechanical rod puppet of Rocky. This puppet was a huge challenge in both engineering and painting, and I learned so much from making it.
So far I have been to three conventions as Ryland Grace, and two ith Rocky. Ryland Grace debuted at Steel CIty Con and entered the cosplay competition outside of the craftsmanship division, and Rocky had a rather rough debut at Matsuri Con where we quickly discovered a lot of changes had to be made to his joints. Their most recent appearance was at the Hall of Fame City Comic-Con, where they competed and won 2nd place in their category!
Now…how did I make our favorite dysfunctional scientist and genius rock engineer come to life!

My first iteration of Rocky was going to be carved of insulation foam, however this was scrapped. Insulation foam board sucks.
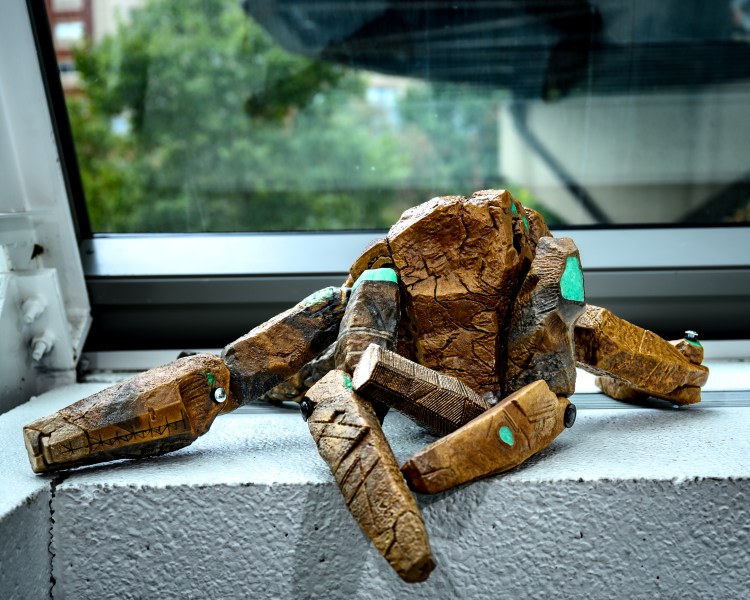
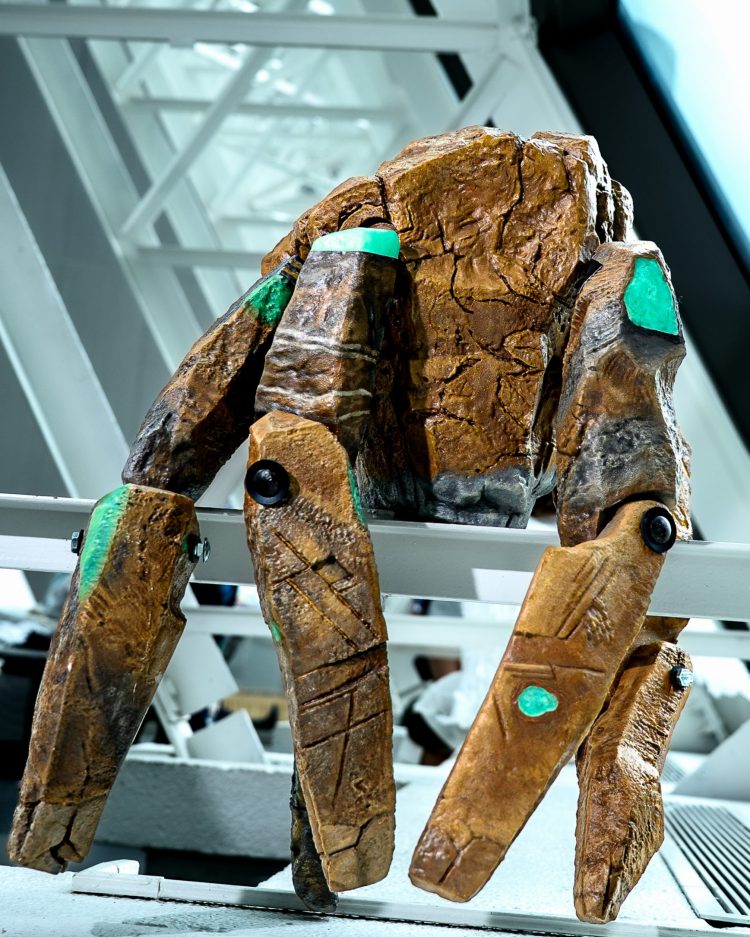
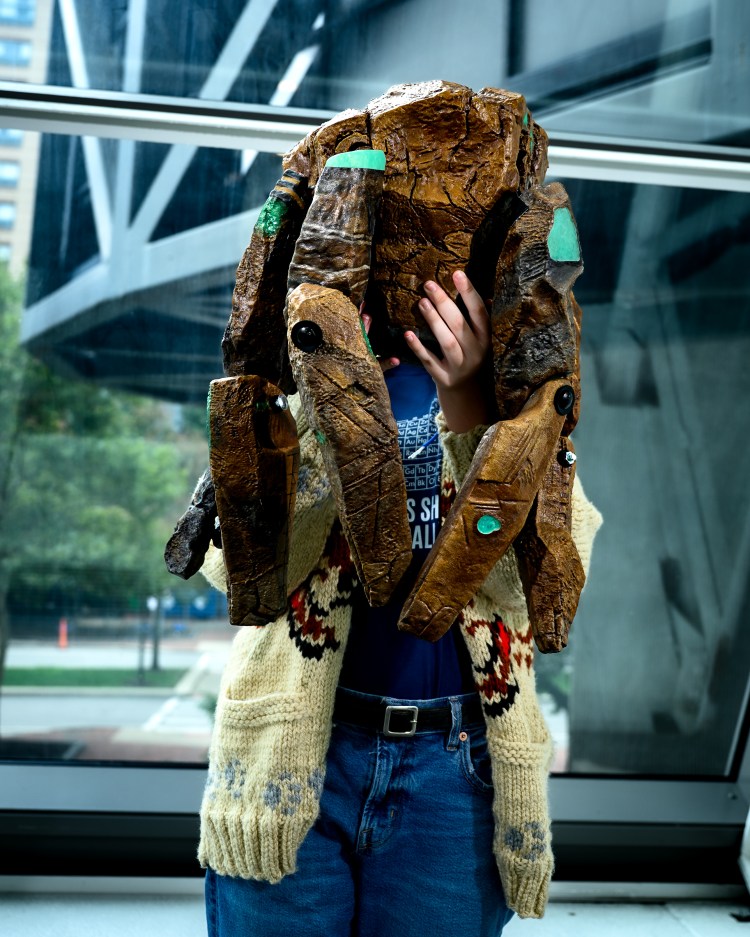
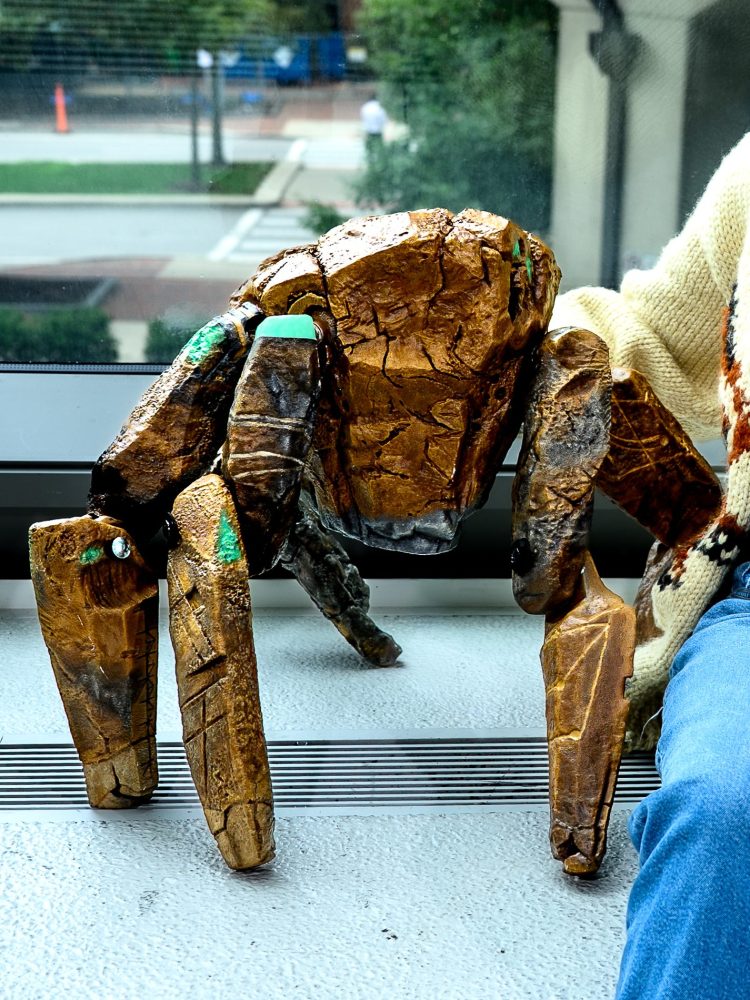
Rocky is a 3D printed mechanical and rod puppet. His arms are puppeteered with rods like a muppet, controlled with just my right hand. He has a mechanism to lift and lower the rocks on top his head like in the film, and a speaker that rests inside his body. The rock mechanism and his body are puppeteered from inside his torso, where I hold on to a PVC pipe handle. His legs are all limp unless physically held up.
Now, warning, I screwed up a lot on this puppet, reprinted each of his legs at least three times (some more than others) and progressed in a non-linear and confusing pattern. So I’ll be explaining things in the way that makes the most sense, not the way they happened.
First, I downloaded the official STL files of Rocky1 from the PHM website. These STLs are 100% screen accurate, with the exception of some parts to make them more user friendly (ball joints). I used the “unsupported figure” files designed for the ball joint action figure of Rocky. Then after that, I had to figure out how big he was in the movie—since I wanted my puppet to be screen sized. Doing some rough math and assumptions that I’m the same height as Ryan Gosling, I needed to size the files up to just over 800% for Rocky to be life sized. But before I began printing, I had to make sure that a puppet of this massive size could be held and puppeteered with rods by one person. So I made an EVA foam2 mockup using Rocky’s largest measurements. Long story short, he was far too big. So we sized him down 10% from that, which led to his final size of 745.884%.


Then, I had to do a lot of file modification to make all of him work correctly.
First things first, I hollowed out all of his pieces, and I removed the original ball joint “pegs” from his torso and put holes in their place. I removed the rocks I wanted to move from the body’s STL file and separated them into their own file, and I put a big hole in the back of the body for puppeteering. I also cut the top piece of arm 5A off for later resin casting, put large holes through the centers of every “peg in hole” elbow joint, straight through the arm on the other side (legs 1, 3, and 5). And finally, I put small holes on the sides of Rocky’s wrists for the arm rods (legs 1 and 5).
After everything was printed in Polymaker CosPLA3 and glued 4together, I began the physical modifications. Now, because I’m impatient and didn’t care to learn real CAD, I manually cut out Rocky’s head rocks with a dremel5, dremeled the nubs off legs 2B and 4A, and drilled holes through 2 and 4’s joints. Then I dremeled holes through the sides of his body, I dremeled holes in each of the pores on the sides of his body, on the very bottom of him, and some spots for resin pieces later on.
Because I didn’t want to learn CAD, I had to build up the bottom of the head rocks with foil and foam clay6 to make them tall enough for the mechanism. For the head mechanism to work, I also needed to print some square rings that had a flat side, so I could glue them to the top of the inside of Rocky’s body to make the pulley system work.
Though, that wasn’t it. I still needed to fix his joints. All of his elbows are secured with carriage bolts7, with a washer 8 on each side and a nut 9 to secure them on. The washers are nylon, and there to avoid damage to the plastic or paint. But his shoulders also needed carriage bolts to function correctly, as my original ball joint plan failed at Matsuri Con, where three of his arms fell off (repeatedly!). So I dremeled holes through each of his ball joint sockets, just wide enough for an eye-hook carriage bolt10. The eye-hook side sits inside the body, a large washer11 keeps it from falling out, the bolt goes through his arm, and is secured with another nylon washer and nut.
So! After all of that mutilation was complete, we could move on to the fun stuff. Let’s start with his resin. As I mentioned earlier, I cut out some spots of his body on arms 1A, 1B, and 3A, as well as digitally separating part of his shoulder on arm 5A. These were all done so I could use epoxy resin parts to achieve a true gemstone/crystal effect where it really mattered. For 1A, 1B, and 3A, I cast some pretty thin pieces of resin 12 in rectangular molds13 with MICA pigment14. After it cured, I traced out the shapes they needed to be with painter tape15, cut it out, and stuck it on the resin so I could carve it relatively accurately. I used my dremel to cut the pieces down until they fit well enough. Later on after all his painting was done, I used airdry clay16 to hide the gaps between the resin and plastic. For his shoulder on arm 5A, though, since it wasn’t a flat piece of resin, I had to do something different.
I bought a silicone mold kit17 and 3d printed a mold box18 that you clamp together with binder clips. Because both the 3d printed part of the shoulder I needed to make the negative mold with, and the mold itself were PLA, I was able to glue the shoulder part to the mold box. This kept it secure while I mixed and poured the silicone over it. After about two days, the silicone mold was fully cured and I could remove it from the box. Now, I had a silicone mold with Rocky’s shoulder imprinted perfectly inside of it. After that I sprayed some mold release19 in the silicone, mixed up more epoxy resin with MICA pigment in it, and poured it in the mold. I was extra cautious with how long it needed to cure, so I waited four days before removing the resin from the mold.


But when I did, I just dremeled it a little to make sure it’d fit and I had a perfect resin cap for Rocky’s arm!


Last but not least for our physical modifications, I screwed two PVC pipe caps20 to the inside of his body, sized and cut a thicker piece of pvc, wrapped it in grip tape21, and slid it over the two caps. This makes up Rocky’s interior handle.

Unfortunately, that would be the last of the fun that I would have for a while. As now, it was time to prep. This was a full month of bondo22 and sanding. Bondo glaze, sand, repeat. As painstaking as it was, it was worth it in the end as now you can’t even tell that his body was printed in five parts.
After all that sanding was done, I primed23 him, and then it was time for texture paint24. I sponged some pretty generous layers of this stuff on, being mindful of where I put it. The parts of Rocky that are more grey got more texture than the areas that were brown, and the spots that were green got none at all.
After I was satisfied with the texture, I used my brand new Gaahleri airbrush25 to apply his base coats. I mixed up his base colors of acrylic paint26, thinned it with airbrush thinner27, and strained it with airbrush cup filters28 before I sprayed it–this kept the cheap, poorly ground pigment of the acrylic paint from clogging my airbrush.
It sprayed perfectly after being strained, but before I had those filters it was a nightmare. All of his base colors of brown, grey, and green were applied with an airbrush.

And then came the intimidating part. Paint.
How do you paint a character that never appears to be a consistent color? A character that is both literally alien and yet so similar to what we are familiar with here on earth? All while having little to no reference media or behind the scenes commentary on it’s paintjob?
Well, the answer wasn’t washes or drybrushing like I thought it would be. Nor was it fancy airbrush techniques, sponge usage, or even spray bottle nonsense.
The answer? Glazes. Acrylic paint mixed with glaze medium29.
I painted my Rocky in a very “traditional” sense, I painted Rocky the way I would paint a canvas–not a puppet. I started with highlights and lighter areas, worked my way darker, and blended the paint as I went using the transparency of the glaze medium. I mixed colors on the fly to get what I needed in the moment, and never once did I dry brush or use a wash. All I did was build up colors layer by layer, light to dark. For his grey areas, I used a sponge30 to get a more rough rock texture, but that was it. It took a long time, and it was painful at times, but it gave me the most screen accurate results that I think a single person without a movie scale budget could reproduce. I had two paint palettes31 that I kept perpetually wet (by wrapping them in soaked paper towels when I wasn’t using them), and I used basic taklon brushes32 in decreasing sizes as time went on.

His green spots that I couldn’t cast in resin, and had to paint, were definitely more challenging, though. I mostly just tried to darken what I thought would be the “deeper” parts of the crystal, and highlighted where I thought it would catch the light. I spent a long time blending the edges of the green into the brown, too, once again using the blending capabilities of the glaze medium.
After he was fully painted and heavily sealed33, all I had left was to assemble him, make his arm rods, and make his audio files for his speaker.
His arm rods I simply cut to the desired length, spraypainted black34, and wrapped grip tape on. His audio files were much more time consuming. I spent hours one day just recording, isolating, and adjusting the volume of dialogue from the film. After I had the files, I uploaded them to a soundboard app on IOS, bought a sony speaker35, and boom. I had a speaker I could plop inside my puppet.
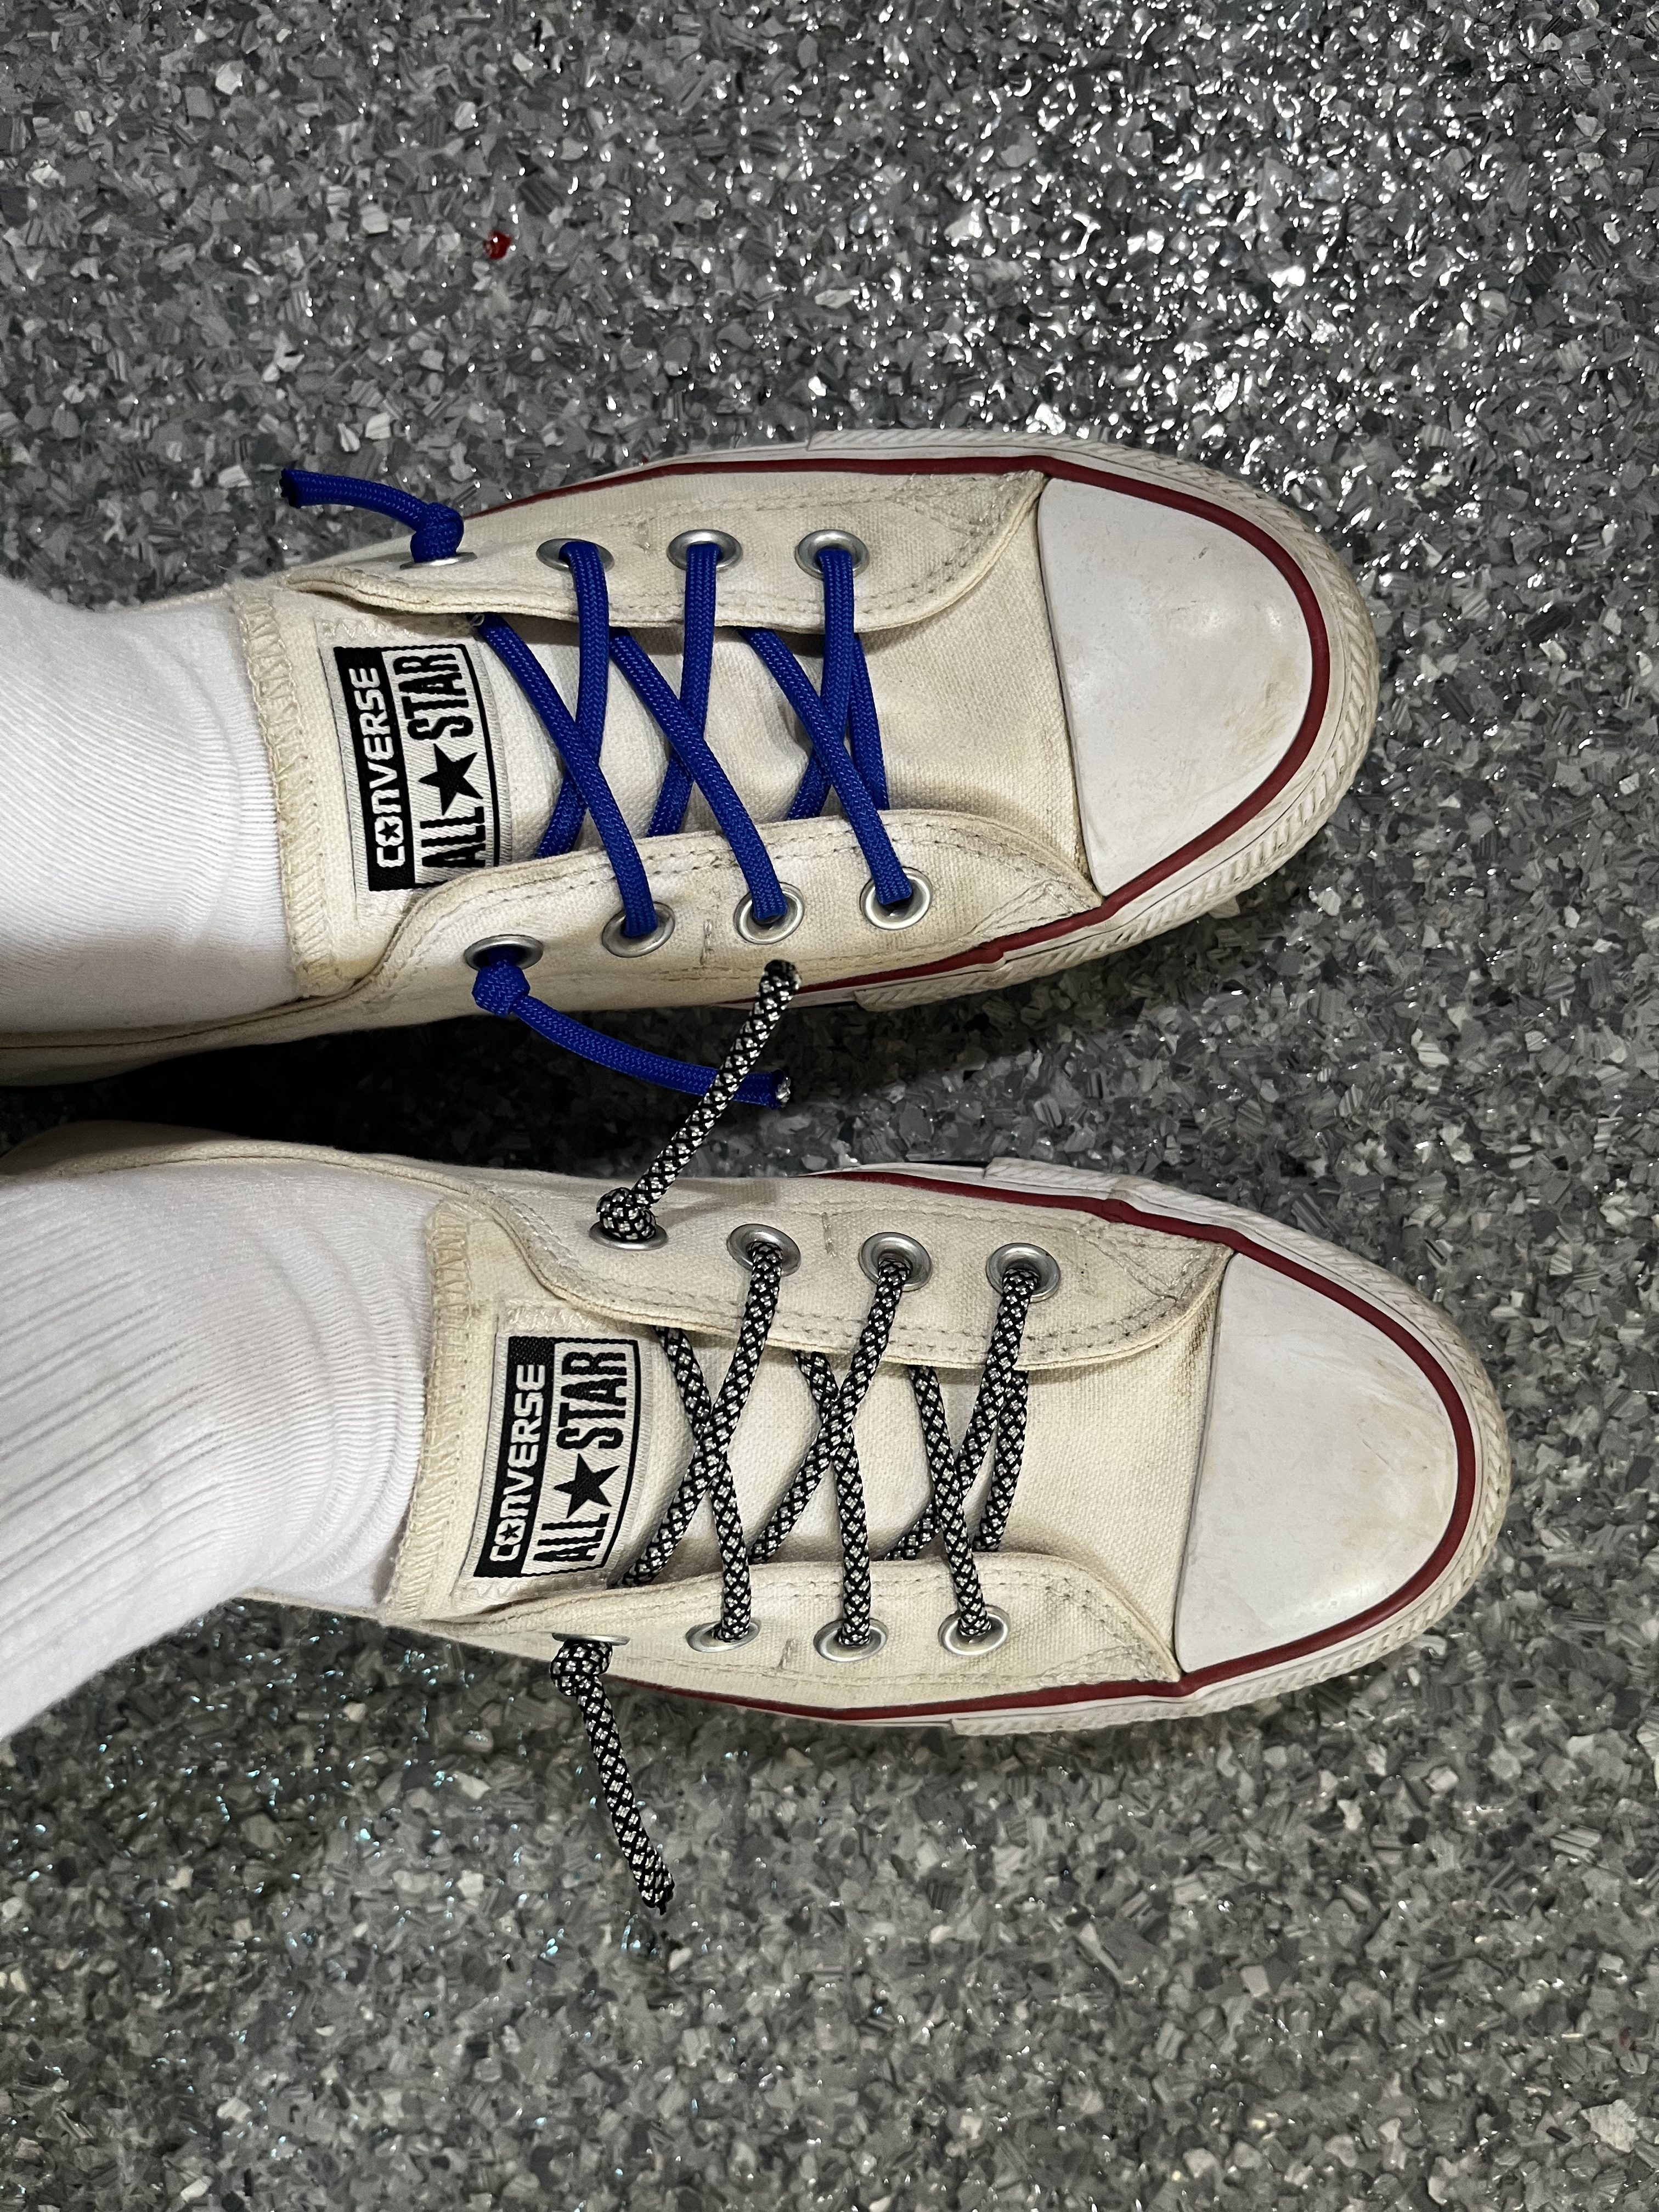
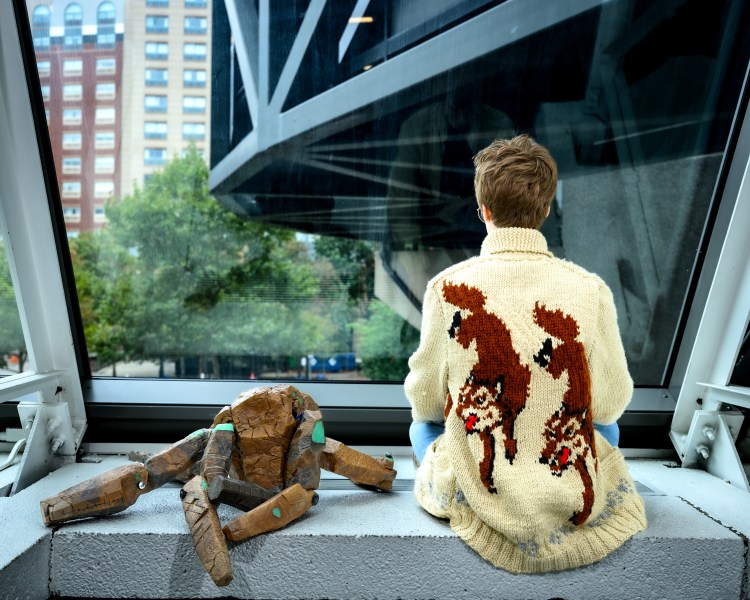
Finally, we’ll end the creation portion of this post on how I made Ryland Grace. First things first, and most importantly, my infamous cosplay handler hand-knit the fox sweater sold by Mary Maxim36! Secondly, and honestly the part of this entire cosplay I enjoy entirely too much…the screen-used converse that I found in my size on EBay. Okay, but I don’t really care about the shoes. It’s the shoelaces I care about. I swapped the shoelaces for paracord, the same way Grace did at the end of the film when he’s on Erid! My Grace cosplay also has the “I wear this shirt periodically” periodic table shirt, which a friend got for me! The glasses and jeans are just generic ~


This post was a bit more rushed than some of my others, and probably foggy on certain details, so I apologize for that. But I really needed to get this up. If you would like to know more about how he was made, I’d be happy to have a 1-on-1 conversation over email.
Materials used:

